Preparing for travelling is always a pain in the neck, but wait, are you done just by packing and booking flights and hotels? Certainly not for countries like China, Iran etc, cause you definelty don’t want to lose you social connection during the trip. But in some countries, you won’t get access to YouTube, Facebook, Twitter unless you have VPN or the like. There’re many proxies out there, for some you need to pay, and some are free, but you may find the pop-up ads to be annoying, so why don’t build your own VPN? Of course, it’s free, now all you need to have is a Gmail account, even you don’t, I believe it is a piece of cake for you to apply one.
So what next? Create a GAE(Google App Engine) account,all you need to do is log in tohttp://appengine.google.com/ with your gmail account:
1.You’ll see the following welcome page, click on “Create Application”
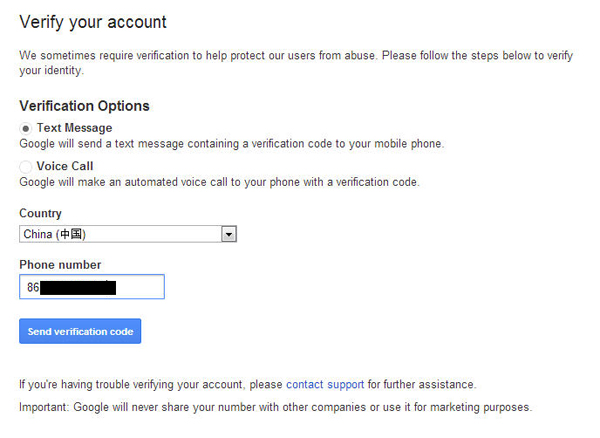
2.The second step is to verify your account, there’re two options, I’d recommend you verify with text message, simply input your cellphone number and click on “Send Verification Code”
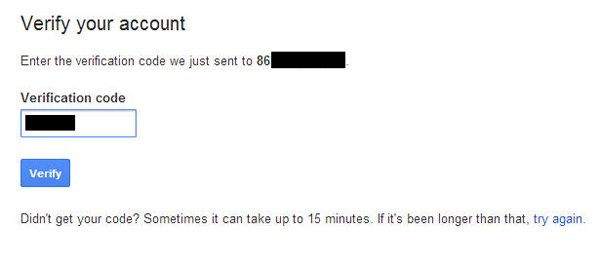
3.Fill in the 6-digit verification code you receive from Google, try go back to step 2 if you didn’t get the code
4.Now you need to pick an ID for your application, can before applying, check the availability of the App ID, 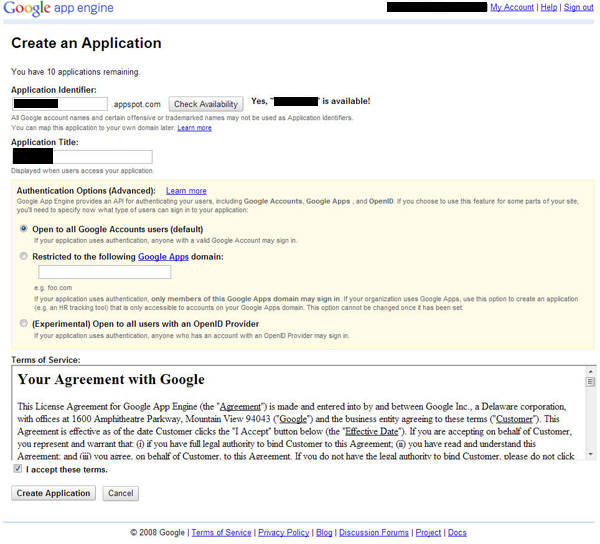
Now you’ve created an application, we need to upload the code, before that, let’s make a few tweak to the code:
1.Download GoAgent, this should be the official site:Click to Download
Or you can download from the following place:Click to Download
2.Open proxy.ini under the folder “local” with a text editor such as Notepad,put the App ID you just used right after “appid = “, and click “Save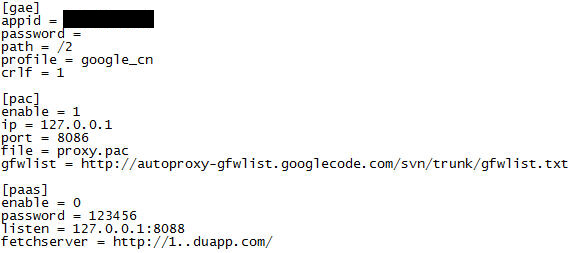
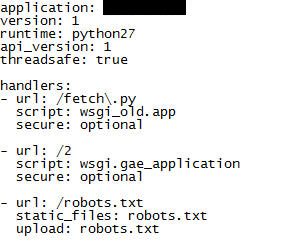
3.Open app.yaml under “server\python” with a text editor such as Notepad ,fill in the same App ID after “application: “, then save the file
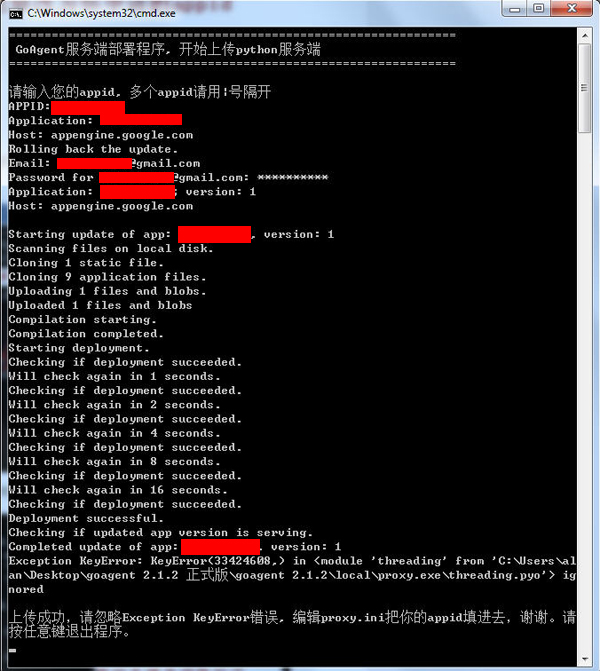
4.Double click uploader.bat within “server”, input App ID, Email etc as required, and click “Enter” or “Return”, now just wait till you see “Deployment successful”, ignore the following proxy.ini issue, since we’ve already done that
5. Check if you’ve successfully uploaded the code by log in Google App Engine with the same account,you should find Current Version becomes 1
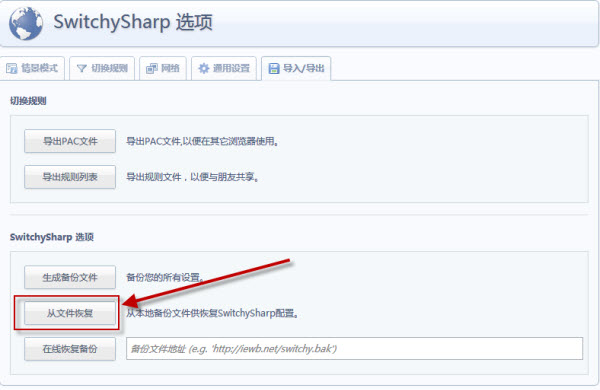
Congratulations! You’re almost there. If you’re a desktop user, go to Chrome we store and add Proxy SwitchySharp, then download SwitchyOptions.bak, under the Import/Export tab, click on “Restore from file”, upload the SwitchyOptions.bak you just downloaded.
An icon looks like globe will be added to your browser, now you can click on GoAgent to use your own VPN(you’re supposed to open the proxy.exe file under “local” at the same time),choose “Direct Connection” when you don’t need to use the VPN.
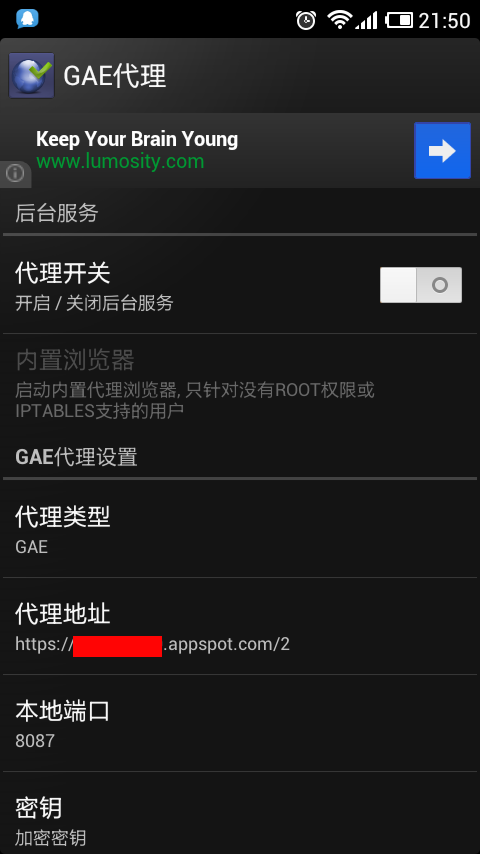
It can also be adopted on your smart phone, search for GAE代理(GAE Proxy) or download GAE代理_GAEProxy and extract the file then copy to your Android phone. Install the app, all you need to set is agent address and the port, the agent address is still your App ID, and the port is 8087, open the service when you want to use it.


