完整目录请见Odoo 14全新前端框架 OWL(Odoo Web Library)官方文档中文版
🦉 如何开启一个Owl项目 🦉
Content
综述
每个软件项目都有其具体的需求。这其中很多需求可通过一些工具得以解决:webpack、gulp、css预处理器、打包工具、编译器…
正因为如此,通常开启一个项目都不是那么简单。一些框架提供自有工具来协助完成。但那样会需要进行集成并学习如何使用这些应用。
Owl的设计可以让其完全不依赖于任何工具。因此,Owl可以“轻松地”与现代构建工具链进行集成。本节中,我们将讨论启动项目的不同配置方式。每个方式在不同场景下都存在着优劣势。
简单html文件
最简单的配置如下:一个包含你自己代码的简单 JS 文件。我们可以创建如下文件结构:
|
1 2 3 4 |
hello_owl/ index.html owl.js app.js |
owl.js文件可通过https://github.com/odoo/owl/releases来下载最近发布的版本。这是一个单独的 JS 文件,它将所有的Owl导出到一个全局owl对象中。
index.html中应包含如下内容:
|
1 2 3 4 5 6 7 8 9 |
<!DOCTYPE html> <html lang="en"> <head> <title>Hello Owl</title> <script src="owl.js"></script> <script src="app.js"></script> </head> <body></body> </html> |
app.js的内容如下:
|
1 2 3 4 5 6 7 8 9 10 11 12 13 14 15 16 |
const { Component } = owl; const { xml } = owl.tags; const { whenReady } = owl.utils; // Owl Components class App extends Component { static template = xml`<div>Hello Owl</div>`; } // Setup code function setup() { const app = new App(); app.mount(document.body); } whenReady(setup); |
现在只需要在浏览器加载这一 html 文件就会显示欢迎消息。这一配置并不高级,但极为简单。没有用到任何第三方工具。通过使用Owl最小化构建(owl.min.js)可以实现一定的优化。
使用静态服务器
以上的配置有一个非常大的缺点:应用代码位于单个文件中。很明显我们可以将其分为多个文件并在html页面中的多个<script>标签中进行引入 ,但那样我们需要确保脚本插入的顺序正确,还需要在全局变量中导出每个文件的内容,在文件间无法进行自动补全。
针对这一问题有一个技术含量不高的解决方法:使用原生 JS 模块。但这有一个要求,出于安全原因,浏览器不接受file协议所分发的模块内容。这意味着我们需要使用一台静态服务器。
我们使用如下文件结构启动一个新项目:
|
1 2 3 4 5 6 |
hello_owl/ src/ app.js index.html main.js owl.js |
和前面一样,可通过https://github.com/odoo/owl/releases下载最新版本的owl.js。
index.html中应包含如下内容:
|
1 2 3 4 5 6 7 8 9 |
<!DOCTYPE html> <html lang="en"> <head> <title>Hello Owl</title> <script src="owl.js"></script> <script src="main.js" type="module"></script> </head> <body></body> </html> |
注意在main.js的script标签中有一个type="module"属性。这表示浏览器会将该脚本解析为一个模块,并加载其所有依赖。
下面是app.js 和 main.js的内容:
|
1 2 3 4 5 6 7 8 9 10 11 12 13 14 15 16 17 |
// app.js ---------------------------------------------------------------------- const { Component } = owl; const { xml } = owl.tags; export class App extends Component { static template = xml`<div>Hello Owl</div>`; } // main.js --------------------------------------------------------------------- import { App } from "./app.js"; function setup() { const app = new App(); app.mount(document.body); } owl.utils.whenReady(setup); |
main.js文件中导入了app.js文件。注意导入语句中有一个.js后缀,这很重要。在部分文本编辑器都能理解这一语法并会提供自动实例功能。
接下来要执行这段代码,我们需要静态地对src文件夹提供服务。一种低技术含量的方式是使用python SimpleHTTPServer 这类功能:
|
1 2 |
$ cd src $ python -m SimpleHTTPServer 8022 # 现在内容可通过localhost:8022进行访问 |
译者注:Python 3启动 HTTP 服务的模块不同于 Python 2,为: python3 -m http.server 8022
另一种更为javascript的方式是创建一个npm应用。可通过在项目根目录下添加如下package.json文件来实现:
|
1 2 3 4 5 6 7 8 9 10 11 12 13 14 |
{ "name": "hello_owl", "version": "0.1.0", "description": "Starting Owl app", "main": "src/index.html", "scripts": { "serve": "serve src" }, "author": "John", "license": "ISC", "devDependencies": { "serve": "^11.3.0" } } |
此时即可通过执行npm install命令来安装serve工具,通过npm run serve命令来启动一个静态服务器。
标准Javascript项目
前面的配置没有问题,对很一部分用例也是不错的选择,包括快速原型验证。但它缺乏一些有用的功能,比如实时重载、测试套装或在单个文件中打包代码。
这里面的每种功能或其它很多功能,可通过很多不同方式实现。配置这类项目并不简单,我们这里提供了一个入门的示例。
我们的标准Owl项目文件结构如下:
|
1 2 3 4 5 6 7 8 9 10 11 12 13 14 |
hello_owl/ public/ index.html src/ components/ App.js main.js tests/ components/ App.test.js helpers.js .gitignore package.json webpack.config.js |
项目中的public文件夹用于包含所有静态资源,如图片和样式文件。src文件夹中有一个 JS 源码文件,在tests中包含一个测试套件。
以下是index.html的内容:
|
1 2 3 4 5 6 7 |
<!DOCTYPE html> <html lang="en"> <head> <title>Hello Owl</title> </head> <body></body> </html> |
注意其中不包含<script>标签。这些会通过webpack进行注入。下面我们来看 JS 文件:
|
1 2 3 4 5 6 7 8 9 10 11 12 13 14 15 16 17 18 19 20 21 22 23 24 25 26 27 28 29 30 31 32 33 34 35 36 37 38 39 40 41 42 43 44 45 46 47 48 49 50 51 52 53 54 55 56 57 58 59 60 61 62 63 64 65 66 67 68 69 |
// src/components/App.js ------------------------------------------------------- import { Component, tags, useState } from "@odoo/owl"; const { xml } = tags; export class App extends Component { static template = xml`<div t-on-click="update">Hello <t t-esc="state.text"/></div>`; state = useState({ text: "Owl" }); update() { this.state.text = this.state.text === "Owl" ? "World" : "Owl"; } } // src/main.js ----------------------------------------------------------------- import { utils } from "@odoo/owl"; import { App } from "./components/App"; function setup() { const app = new App(); app.mount(document.body); } utils.whenReady(setup); // tests/components/App.test.js ------------------------------------------------ import { App } from "../../src/components/App"; import { makeTestFixture, nextTick, click } from "../helpers"; let fixture; beforeEach(() => { fixture = makeTestFixture(); }); afterEach(() => { fixture.remove(); }); describe("App", () => { test("Works as expected...", async () => { const app = new App(); await app.mount(fixture); expect(fixture.innerHTML).toBe("<div>Hello Owl</div>"); click(fixture, "div"); await nextTick(); expect(fixture.innerHTML).toBe("<div>Hello World</div>"); }); }); // tests/helpers.js ------------------------------------------------------------ import { Component } from "@odoo/owl"; import "regenerator-runtime/runtime"; export async function nextTick() { return new Promise(function (resolve) { setTimeout(() => Component.scheduler.requestAnimationFrame(() => resolve())); }); } export function makeTestFixture() { let fixture = document.createElement("div"); document.body.appendChild(fixture); return fixture; } export function click(elem, selector) { elem.querySelector(selector).dispatchEvent(new Event("click")); } |
最后是配置文件.gitignore、 package.json 和 webpack.config.js:
|
1 2 3 |
node_modules/ package-lock.json dist/ |
|
1 2 3 4 5 6 7 8 9 10 11 12 13 14 15 16 17 18 19 20 21 22 23 24 25 26 27 28 29 30 31 32 33 34 35 36 37 38 39 40 41 42 43 44 45 46 |
{ "name": "hello_owl", "version": "0.1.0", "description": "Demo app", "main": "src/index.html", "scripts": { "test": "jest", "build": "webpack --mode production", "dev": "webpack-dev-server --mode development" }, "author": "Someone", "license": "ISC", "devDependencies": { "@babel/core": "^7.8.4", "@babel/plugin-proposal-class-properties": "^7.8.3", "babel-jest": "^25.1.0", "babel-loader": "^8.0.6", "babel-plugin-transform-es2015-modules-commonjs": "^6.26.2", "html-webpack-plugin": "^3.2.0", "jest": "^25.1.0", "regenerator-runtime": "^0.13.3", "serve": "^11.3.0", "webpack": "^4.41.5", "webpack-cli": "^3.3.10", "webpack-dev-server": "^3.10.2" }, "dependencies": { "@odoo/owl": "^1.0.4" }, "babel": { "plugins": ["@babel/plugin-proposal-class-properties"], "env": { "test": { "plugins": ["transform-es2015-modules-commonjs"] } } }, "jest": { "verbose": false, "testRegex": "(/tests/.*(test|spec))\\.js?$", "moduleFileExtensions": ["js"], "transform": { "^.+\\.[t|j]sx?$": "babel-jest" } } } |
|
1 2 3 4 5 6 7 8 9 10 11 12 13 14 15 16 17 18 19 20 21 22 23 24 25 26 27 28 29 30 31 32 33 34 35 36 37 38 39 40 41 42 |
const path = require("path"); const HtmlWebpackPlugin = require("html-webpack-plugin"); const host = process.env.HOST || "localhost"; module.exports = function (env, argv) { const mode = argv.mode || "development"; return { mode: mode, entry: "./src/main.js", output: { filename: "main.js", path: path.resolve(__dirname, "dist"), }, module: { rules: [ { test: /\.jsx?$/, loader: "babel-loader", exclude: /node_modules/, }, ], }, resolve: { extensions: [".js", ".jsx"], }, devServer: { contentBase: path.resolve(__dirname, "public/index.html"), compress: true, hot: true, host, port: 3000, publicPath: "/", }, plugins: [ new HtmlWebpackPlugin({ inject: true, template: path.resolve(__dirname, "public/index.html"), }), ], }; }; |
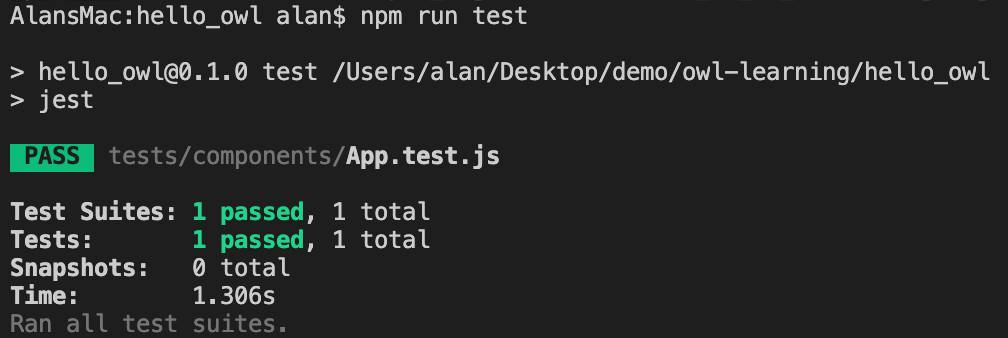
通过这一配置,就可使用如下脚本命令了:
|
1 2 3 4 5 |
npm run build # 以生产模式在dist/中构建完整应用 npm run dev # 启动一个可实时加载的开发服务 npm run test # 运行jest测试套件 |


