简装 WebRTC直播页面
通过以下代码即可访问本地摄像头及扬声器,主要是使用getUserMedia()这一 API 并进行 constaints 的相关配置:
|
1 2 3 4 5 6 7 8 9 10 11 12 13 14 15 16 17 18 19 20 21 22 23 24 25 26 27 28 29 30 31 32 33 34 35 36 37 38 39 40 41 42 43 44 45 46 47 48 49 50 51 52 53 54 55 56 57 58 59 |
<!DOCTYPE html> <html> <head> <meta http-equiv="Content-Type" content="text/html; charset=utf-8" /> <title>WebRTC测试页面</title> </head> <body> <h1>WebRTC测试页面</h1> <video autoplay playsinline></video> <script> // constraints 配置指定是否使用音频、视频 // const mediaStreamContrains = { // video: true, // audio: true // }; const localVideo = document.querySelector('video'); const mediaStreamContrains = { video: { frameRate: {min: 20}, // 帧率 facingMode: "user", // user;前置摄像头,enviroment:后置摄像头,还有 left,right // width: {min: 640, ideal: 1280}, // 视频宽度 // height: {min: 360, ideal: 720}, // 视频高度 // aspectRatio: 16/9, // 视频宽/高 // resizeMode: true, // 是否允许调整图像大小 }, audio: { echoCancellation: true, // 是否开启回音消除 noiseSuppression: true, // 是否开启降噪 autoGainControl: true, // 是否开启自动增益 /* 其它参数 volume: 音量大小 sampleRate:音频采样率 sampleSize:音频采样大小 latency:延迟大小 channelCount:声道数 */ } // deviceId, groupId }; function gotLocalMediaStream(mediaStream){ localVideo.srcObject = mediaStream; } function handleLocalMediaStreamError(error){ console.log('navigator.getUserMedia error: ', error); } navigator.mediaDevices.getUserMedia(mediaStreamContrains).then( gotLocalMediaStream ).catch( handleLocalMediaStreamError ); </script> </body> </html> |
以上页面需使用 https 进行访问,下面就介绍如何搭建本地的 https 服务
本地https服务
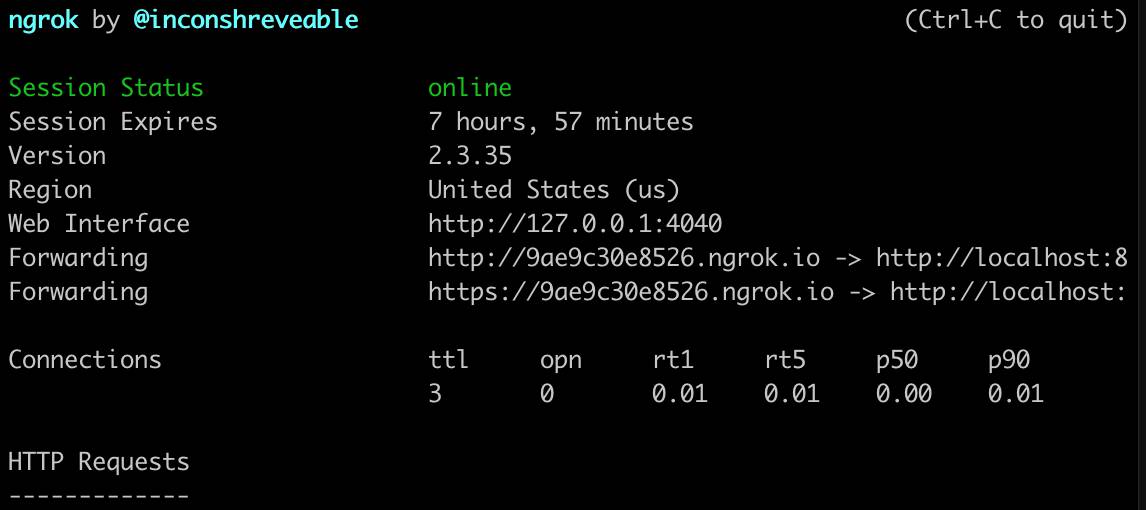
Ngrok官方网站下载软件包并进行解压,执行如下命令即可开启其代理服务,包含 http 和 https 两种访问方式:
|
1 |
./ngrok http 8888 |
其中的8888根据本地启动的服务所使用端口进行修改,这里我使用 Python 启动了一个简单的 Web 服务器,端口使用的是8888:
|
1 |
python3 -m http.server 8888 |
从图中可以看到免费版可以使用最长8小时。


