本文将通过CentOS 7来学习Linux的以下常用知识:
- Linux网络设置
- SSH常用配置和使用方法
- Linux常用服务
- Crontab定时任务
- NTP时间同步
- Logrotate日志切割
- Supervisor进程管理
- Linux常用命令
- Linux中的防火墙配置方法
- 使用Apache配置Web服务器
- 使用Nginx配置Web服务器
- MySQL的安装及常用操作
- Linux中的常见问题
- Memcached和Redis缓存
- Git的配置和使用
- PHP安装及配置
- Lavarel的安装及配置
- Yii的安装及配置
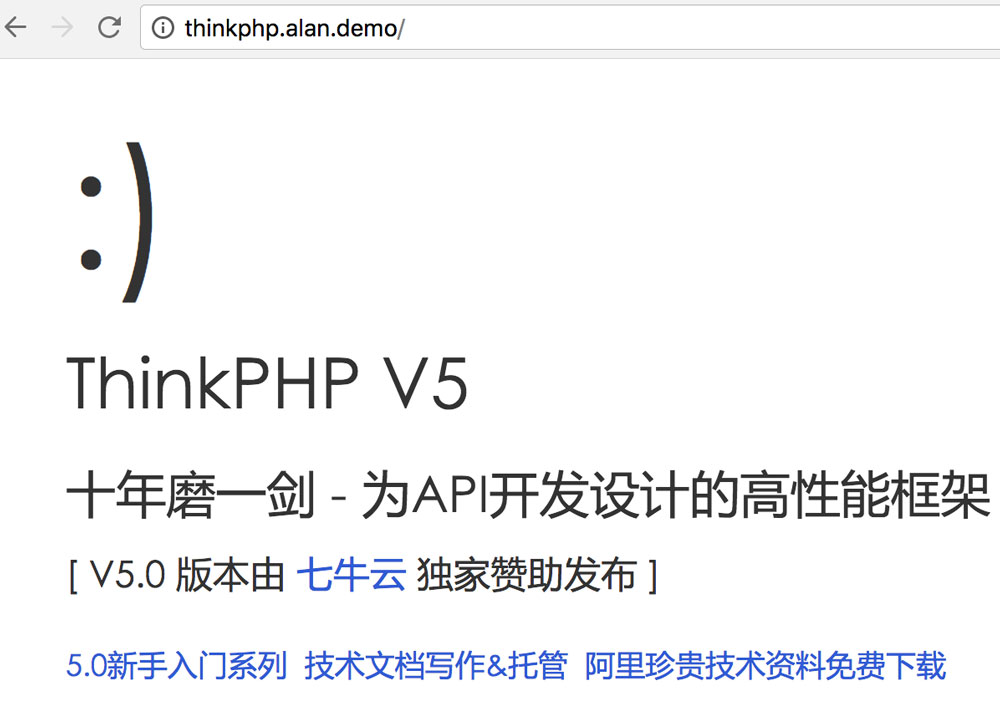
- ThinkPHP的安装及配置
- phpMyAdmin的安装及配置
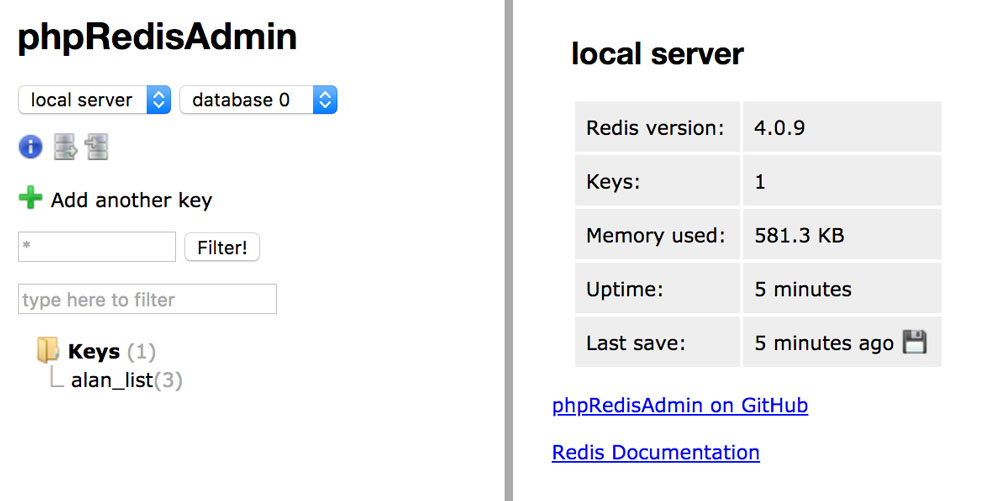
- phpRedisAdmin的安装及配置
- Java环境搭建
- Tomcat搭建和启用
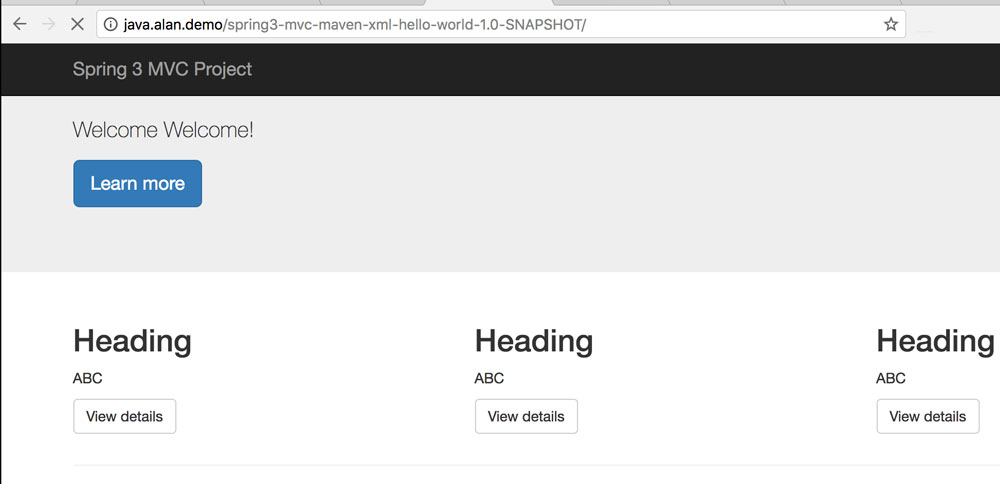
- Maven使用示例
- Python运行环境配置
- Zabbix监控系统安装配置
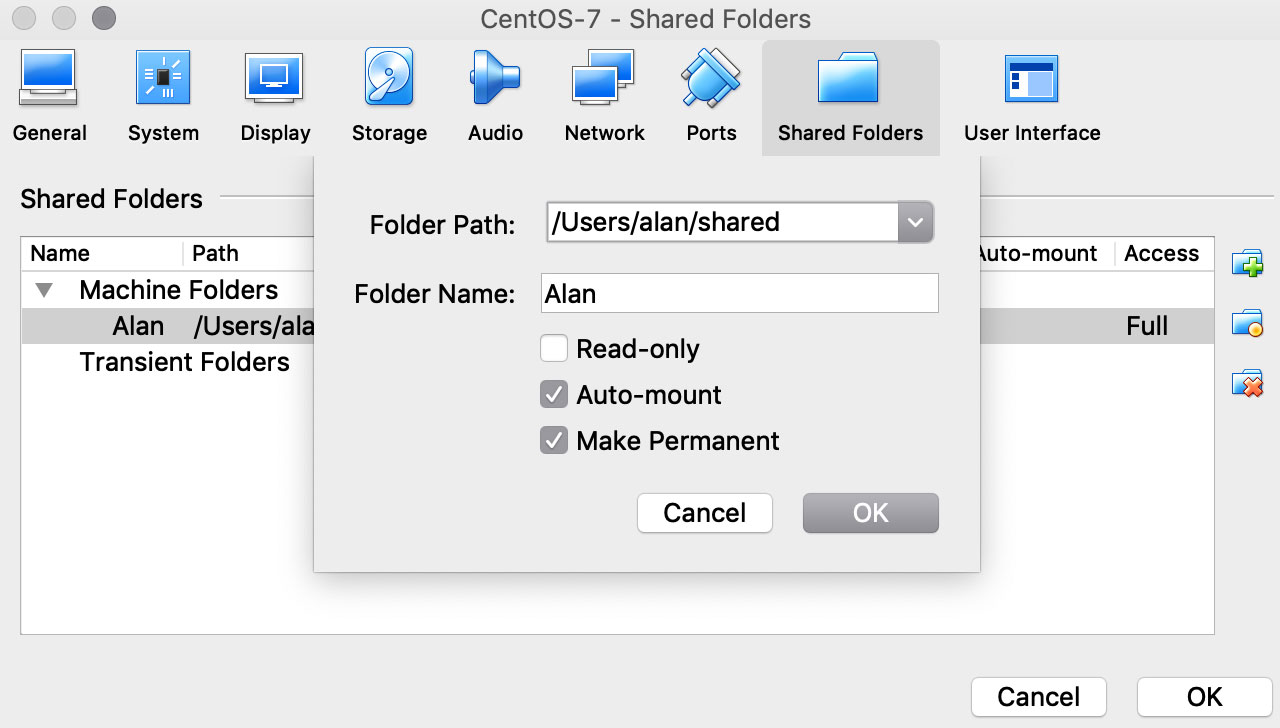
- VirtualBox 设置共享文件夹
- 开启BBR加速
网络设置
|
1 2 3 4 5 6 7 8 9 10 11 12 13 14 15 16 17 18 19 20 21 |
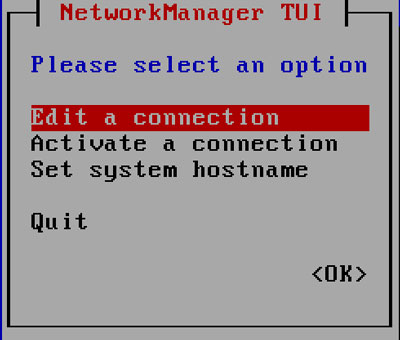
#查看 nmcli d #打开NetworkManager在图形化界面配置网卡 nmtui #命令行手动配置,如采用DHCP只需将以下文件中的ONBOOT改为yes vi /etc/sysconfig/network-scripts/ifcfg-*** # ifcfg-enp0s3 # 配置固定IP则需进行更多的设置: BOOTPROTO=static IPADDR=192.168.0.11 NETMASK=255.255.255.0 GATEWAY=192.168.0.1 #重启网络 /etc/init.d/network restart # 注:如果使用VirtualBox构建本地虚拟机,请在设置中开始桥接模式,否则无法连接外网 #查看IP地址信息 ifconfig # yum install net-tools ip addr #修改HOSTNAME hostnamectl set-hostname *** |
替换默认源:http://mirrors.163.com/.help/centos.html
|
1 2 3 4 5 6 7 |
yum install wget -y mv /etc/yum.repos.d/CentOS-Base.repo /etc/yum.repos.d/CentOS-Base.repo.backup cd /etc/yum.repos.d/ wget -O /etc/yum.repos.d/CentOS-Base.repo http://mirrors.aliyun.com/repo/Centos-7.repo # wget http://mirrors.163.com/.help/CentOS7-Base-163.repo yum clean all yum makecache |
SSH
|
1 2 3 4 5 6 7 8 9 10 11 12 13 14 15 16 17 18 19 20 21 22 23 24 25 26 27 28 29 30 31 32 33 34 35 36 37 38 |
# 服务端和客户端通常默认都已安装 # 安装服务端 yum install openssh-server # 启动服务 service sshd start # 开机自启动 chkconfig sshd on # 安装客户端 yum install openssh-clients # 配置文件 vi ~/.ssh/config # 配置内容参考 host "alan" Hostname 192.168.0,5 User root Port 22 IdentityFile ~/.ssh/id_rsa.pub IdentitiesOnly yes host "alan2" .... # 此时可通过ssh alan来进行连接 # 免密登陆配置(SSH Key),Mac方法相同,Windows可使用Xshell来生成公钥和私钥 ssh-keygen -t rsa # 默认直接输入ssh-keygen即彩用此算法 # 另一种算法ssh-keygen -t dsa # 执行完成后会同时生成一个私钥和一个公钥(.pub) # 公钥内容拷贝到目标服务器的以下文件中 ~/.ssh/authorized_keys # Linux默认不能进行免密登录,需执行 ssh-add alan_rsa # 与生成私钥时使用的名称相同 # 若出现Could not open a connection to your authentication agent.报错,请先执行 ssh-agent bash # 此时执行 ssh root@xxx.xxx.xxx.xxx即可免密登录目标服务器 # 其它安全配置,如修改默认的端口22,修改文件: /etc/ssh/sshd_config |
常用命令
w或top查看负载,load average后的三个数字分别为最近1分钟、最近5分钟和最近15分种的负载值,生产环境一般认为0.6-0.7为报警阀值(预留部分就对突发)
|
1 2 3 4 5 6 7 8 9 10 11 12 13 14 15 16 17 18 19 20 21 22 23 24 25 26 27 28 29 30 31 32 33 34 |
# 查看CPU信息 cat /proc/cpuinfo fdisk free -m # 查看内存 df -h # 查看磁盘空间 # 基础命令 yum install/remove/search/info # 安装、删除、搜索、软件包信息 yum list # 查看已安装 yum clean packages # 清理缓存 ls/touch/mkdir/cd # 查看文件、新建文件、创建目录(-p)、切换目录 rm/cp/mv/pwd # 删除、复制、移动文件或目录、查看当前目录 tail/head/cat/more/less # 读取文件 grep/find/wc # 搜索关键字、查找文件、统计个数 useradd/adduser/userdel/passwd # 添加用户、删除用户、设置密码 tar -tvf # 查看tar包内的内容 # 提权和文件上传下载 sudo sudo su - visudo # 提权配置,一般不建议直接用root操作,以用户alan为例,添加如下行 %alan ALL=(ALL) ALL wget/curl -o #下载 scp #上传、下载 yum install lrzsz # rz/sz命令用于上传下载 # vim常用命令 gg/G/yy/p/dd/u # 移到文首、文尾、复制、粘贴、删除行、撤销 # 常用命令组合 ps -ef | grep # 查看进程 netstat -anpl | grep # 查看网络端口占用情况 |
常用服务
Crontab
|
1 2 3 4 5 6 |
# 编辑定时任务 crontab -e # 如每分钟执行一个命令 */1 * * * * xxx >> /tmp/xxx.log # 查看定时任务 crontab -l |
NTP
|
1 2 3 4 5 6 7 8 9 |
sudo yum -y install ntp # 更新时间 sudo ntpdate cn.pool.ntp.org # 修改为本地时区 sudo rm /etc/localtime sudo ln -s /usr/share/zoneinfo/Asia/Shanghai /etc/localtime # 添加定时任务更新时间 sudo su - */30 * * * * ntpdate cn.pool.ntp.org |
Logrotate
|
1 2 3 4 5 6 7 8 9 10 11 12 13 14 15 16 17 18 19 20 21 22 23 24 |
# 日志切割工具,以Nginx为例 cat /etc/logrotate.d/nginx /var/log/nginx/*.log { # 转储周期 daily missingok # 日志保留时间 rotate 52 compress delaycompress notifempty create 640 nginx adm sharedscripts postrotate if [ -f /var/run/nginx.pid ]; then kill -USR1 `cat /var/run/nginx.pid` fi endscript } # 切割预演(不加参数-d直接执行) cd /var/log/nginx sudo logrotate -d /etc/logrotate.d/nginx |
Supervisor
|
1 2 3 4 5 6 7 8 9 10 11 12 13 14 15 16 17 18 19 20 21 22 23 24 25 |
sudo pip install supervisor sudo mkdir /etc/supervisor # 创建配置文件 sudo echo_supervisord_conf > /etc/supervisor/supervisord.conf # 将该文件末尾修改为 [include] files = /etc/supervisor/conf.d/*.ini sudo mkdir /etc/supervisor/conf.d cd /etc/supervisor/conf.d sudo vim redis.ini [program:redis] command=/usr/local/bin/redis-server autostart=true autorestart=true startsecs=3 # 启动服务 supervisord -c /etc/supervisor/supervisord.conf sudo supervisorctl # 在该命令窗口中即可执行如下的操作 stop redis start redis |
防火墙
|
1 2 3 4 5 6 7 8 9 10 11 12 |
# 通常默认已安装 yum install firewalld systemctl start|status|stop|disable firewalld.service firewall-cmd --version|--state|--get-zones|--list-all-zone|--zone-public firewall-cmd --list-ports|--add-service|--remove-service|--query-service|--add-port # SELinux /etc/selinux/config # 配置文件 setenforce 0 # permissive setenforce 1 # enforcing getenforce # 查看状态 |
Apache
|
1 2 3 4 5 6 7 8 9 10 11 12 13 14 15 16 17 18 19 20 21 22 23 24 25 |
yum install httpd # 安装 systemctl start|stop|restart httpd.service # 如无法访问可通过关闭防火墙或执行以下任一操作 sudo firewall-cmd --add-port 80/tcp --permanent sudo firewall-cmd --add-service http --permanent # 常见配置(可在/etc/httpd/conf/httpd.conf中直接配置或在该文件中加入Include vhost.d/*.conf,然后在vhost.d文件夹中添加配置文件) <VirtualHost *:80> ServerName www.alanhou.org ServerAlias alanhou.org DocumentRoot /var/www/html <Directory /var/www/html> Options Indexes FollowSymLinks AllowOverride None Require all granted # 重定向配置,通常放在网站根目录的.htaccess文件中 <IfModule mod_rewrite.c> RewriteEngine on RewriteRule ^(.*).html$ index.php </IfModule> </Directory> </VirtualHost> # 语法检查 apachectl configtest |
Nginx
更多关于Nginx的学习,请参见Nginx完整学习笔记(CentOS 7)
|
1 2 3 4 5 6 7 8 9 10 11 12 13 14 15 16 17 18 19 20 21 22 23 24 25 26 27 28 29 30 31 32 33 34 35 36 37 38 39 40 41 42 43 44 45 46 47 48 49 50 51 52 53 54 55 56 57 58 59 60 61 62 |
# 添加yum源 sudo rpm -Uvh http://nginx.org/packages/centos/7/noarch/RPMS/nginx-release-centos-7-0.el7.ngx.noarch.rpm yum install nginx # 安装 systemctl start|stop|enable|restart|reload nginx # 线上通常用reload # 常见配置,在etc/nginx/conf.d下添加配置文件 server { listen 80; server_name www.alanhou.org alanhou.org; root /var/www/html; index index.html index.htm; # 在/etc/nginx/nginx.conf中定义日志格式,如alan # 示例: log_format alan '$remote_addr - "$http_user_agent" "$http_x_forwarded_for"'; # 日志指定 access_log /var/log/nginx/alan_access.log alan; location / { # 伪静态指定 rewrite ^(.*)\.html$ /index.php } } # 反向代理 upstream alan_hosts{ server your.ip.address:80; } server { ... location / { # proxy_set_header Host mydomain.com; proxy_pass http://alan_hosts; } # 或者针对不同链接进行不同的配置 location /newlink { proxy_pass http://your.ip.address:port; } } # 负载均衡 upstream alan_hosts{ # 多台服务器根据权重轮询访问 server your.ip.address:80 weight=10; server your.ip.address1:80 weight=5; } server { ... location / { # proxy_set_header Host mydomain.com; proxy_pass http://alan_hosts; } } # 单行调试 server { listen 80; # 日志调试功能 add_header Content-Type "text/plain; charset=utf-8"; return 200 "$http_host"; ... } |
MySQL
MySQL数据库中的常见问题参见MySQL常见问题
|
1 2 3 4 5 6 7 8 9 10 11 12 13 14 15 16 17 18 19 20 21 22 23 24 25 26 27 28 29 30 31 32 33 34 35 36 37 38 39 40 41 42 43 44 45 46 47 48 49 50 51 |
# CentOS 7默认安装mariadb数据库,先进行删除 sudo yum remove mariadb-libs.x86_64 -y #下载MySQL源:http://dev.mysql.com/downloads/repo/yum/ sudo wget https://dev.mysql.com/get/mysql57-community-release-el7-11.noarch.rpm sudo yum localinstall mysql57-community-release-el7-11.noarch.rpm -y sudo yum install mysql-community-server -y # 启动服务 sudo systemctl start mysqld # 查找默认密码 cat /var/log/mysqld.log|grep "password" # 修改密码,通过mysql -uroot -p进入MySQL命令行 SET PASSWORD FOR 'root'@'localhost'=PASSWORD('xxxxxx'); # 在设置密码过程中如反复提示密码过度简单且不需要设置复杂密码执行 set global validate_password_policy=0; set global validate_password_length=1; # 远程连接 use mysql; # %可以修改为指定IP(此时单独增加一条记录),root可更改为对应用户 UPDATE user SET Host = '%' WHERE Host = 'localhost' AND User = 'root'; FLUSH PRIVILEGES; # 无法连接可能关闭防火墙或执行如下任一操作 sudo firewall-cmd --add-service mysql --permanent sudo firewall-cmd --add-port 3306/tcp --permanent # 创建用户 create user 'alan'@'%' identified by '123456'; # 赋予权限select, update, insert, delete grant all privileges on *.* to 'alan'@'%' identified by '123456'; # 收回权限 revoke insert, delete on *.* from alan; # 执行上述命令后进行刷新 FLUSH PRIVILEGES; # 开启general log(MySQL命令行)用于查看数据库操作 set global general_log_file="/tmp/general.log"; set global general_log=on; # 关闭赋值off # 忘记root密码 sudo vim /etc/my.cnf # 在文件中加入 skip-grant-tables # 重启MySQL sudo systemctl restart mysqld # 直接使用mysql -uroot -p无需输入密码进入命令终端 use mysql; UPDATE user SET authentication_string=password('******') WHERE user='root'; FLUSH PRIVILEGES; # 删除前面加入的skip-grant-tables并重启MySQL服务 |
远程链接工具
Memcached
|
1 2 3 4 5 6 7 8 9 10 11 12 13 14 15 16 |
# 安装 sudo yum -y install memcached # 启动 memcached -d|-l|-m|-p # 查看端口号(可查询默认端口号为11211 netstat -anpl | grep memcached # 安装telnet sudo yum install telnet.* # 通过telnet连接Memcached telnet 127.0.0.1 11211 # 定义键值对 set alan 0 60 10 # 其中alan为键名,0为flag,60为定义的时间长度(秒),10为存储字节数 helloworld # 值 get alan # 获取对应键名的值 delete alan # 删除缓存中对应的键值对 quit # 退出连接 |
Redis
Redis除了支持Key/Value类型的数据,还提供list, set, hash等数据结构的存储,并支持Master-Slave模式的数据备份以数据持久化(把内存中的数据保存在磁盘中)
|
1 2 3 4 5 6 7 8 9 10 11 12 13 14 15 16 17 18 19 20 21 22 23 24 25 26 27 28 29 30 31 32 |
# 安装,进入Redis官网获取最新稳定版链接 wget http://download.redis.io/releases/redis-4.0.9.tar.gz tar -zxvf redis-4.0.9.tar.gz cd redis-4.0.9 # 解决/bin/sh: cc: command not found sudo yum -y install gcc # 解决fatal error: jemalloc/jemalloc.h sudo make MALLOC=libc # 补充,执行如下步骤自动安装到系统 sudo ./utils/install_server.sh # 所有都选默认,仅修改:Please select the redis executable path [] /usr/local/bin/redis-server # 启动 cd src ./redis-server # 客户端(新开窗口,同样在src目录下操作) ./redis-cli # 在客户端的操作 set alan helloworld # 设置键值对 get alan # 获取对应键名的值 del alan # 删除键值对 # 列表 LPUSH alan_list python # 向列表中添加值 LPUSH alan_list php LPUSH alan_list java LRANGE alan_list 0 2 # 此处0代表列表的起始下标,2代表列表的终结下标 quit # 退出 # Redis默认端口是6379,telnet连接方式 telnet 127.0.0.1 6379 # 其它 redis-benchmark # 性能测试工具 redis-check-aof # 数据修复工具 redis-check-dump # 检查导出工具 |
Git
相关文章:如何使用配置GitHub
|
1 2 3 4 5 6 7 8 |
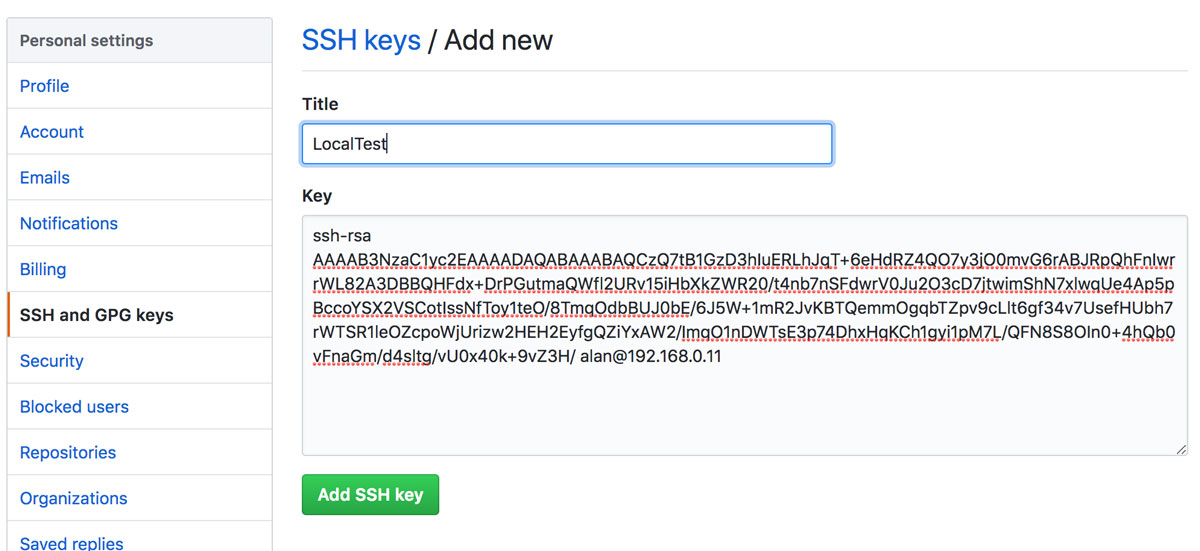
# 安装 sudo yum -y install git # 远程仓库 # 1.在Git平台(如GitHub)的设置中放入公钥 # 生成公钥 cd ~/.ssh ssh-keygen # 将.pub的内容拷贝到该平台上 |
|
1 2 3 4 5 6 7 8 9 10 11 12 13 14 15 16 17 18 19 20 21 22 23 24 25 26 27 28 29 30 31 32 33 34 35 36 37 38 39 |
# 2.平台上新建或已有仓库,在本地克隆 git clone git@github.com:xxx/xxx.git # 查看源地址 git remote -v # 配置Git账号 git config --global user.email "you@example.com" git config --global user.name "Your Name" # 4.在本地进行文件编辑并进行commit git commit -am '1st local edit' # 5.上传到Git git push origin master:master # 6.在平台上对文件进行编辑,再在本地进行更新 git fetch # 合并 git rebase origin/master # 本地仓库 # 1.创建相关文件,进入文件夹 git init git add . git commit -am "1st commit" # 添加远程仓库 git remote add origin git@github.com:xxx/xxx.git # 拉取README文件 git fetch git rebase origin/master git push origin master:master # git命令自动补全配置 git clone https://github.com/git/git # 文件查看地址:https://github.com/git/git/blob/master/contrib/completion/git-completion.bash cp git-completion.bash ~/.git-completion.bash sudo vi ~/.bashrc # 添加内容 if [ -f ~/.git-completion.bash ]; then source ~/.git-completion.bash fi # 此时即可使用自动补全,如未重新进入请执行source ~/.bashrc |
PHP
CentOS 7默认PHP版本为5.4
|
1 2 3 4 5 6 7 8 9 10 11 |
# 若已安装旧版本需进行删除 yum list installed | grep php yum remove php.x86_64 ... # 安装 sudo rpm -Uvh https://mirror.webtatic.com/yum/el7/epel-release.rpm sudo rpm -Uvh https://mirror.webtatic.com/yum/el7/webtatic-release.rpm # 选择版本进行安装 yum search php sudo yum -y install php72w-fpm # 安装PHP扩展 yum -y install php72w php72w-cli php72w-common php72w-devel php72w-embedded php72w-gd php72w-mbstring php72w-mysqlnd php72w-opcache php72w-pdo php72w-xml# 查询版本 php -v |
以下各框架的安装均假设在/etc/hosts(Mac)或/windows/system32/drivers/etc/hosts.txt中对域名进行了本地化配置
Laravel
|
1 2 3 4 5 6 7 8 9 10 11 12 13 14 15 16 17 18 19 20 21 22 23 24 25 26 27 28 29 30 31 32 33 34 35 36 37 38 39 40 41 |
# 安装composer cd /tmp curl -sS https://getcomposer.org/installer | php sudo mv composer.phar /usr/local/bin/composer # 安装Laravel cd /var/www sudo /usr/local/bin/composer create-project --prefer-dist laravel/laravel laravel # PHP Fatal error: require(): Failed opening required '/var/www/laravel/public/../vendor/autoload.php' composer dump-autoload # PHP Fatal error: Uncaught Error: Class 'Illuminate\Foundation\Application' not found in /var/www/laravel/bootstrap/app.php:14 composer update --no-scripts sudo systemctl start php-fpm sudo vim sudo vim /etc/nginx/conf.d/laravel.conf # 配置内容 server { listen 80; server_name laravel.alan.demo; root /var/www/laravel/public; index index.php index.html; access_log /var/log/nginx/laravel_access.log alan; location / { try_files $uri $uri/ /index.php?$args; } location ~ \.php$ { include fastcgi_params; fastcgi_pass 127.0.0.1:9000; fastcgi_param SCRIPT_FILENAME $document_root$fastcgi_script_name; try_files $uri =404; } } # RuntimeException No application encryption key has been specified. php artisan key:generate chmod -R 777 /var/www/laravel/storage/logs/ chmod -R 777 /var/www/laravel/bootstrap/cache chmod -R 777 /var/www/laravel/storage/framework/views/ |
访问http://laravel.alan.demo:
Yii 2
相关文章:
|
1 2 3 4 5 6 7 8 9 10 11 12 13 14 15 16 17 18 19 20 21 22 23 24 25 26 27 28 29 30 31 32 |
# <a href="http://www.yiichina.com/download" target="_blank">Yii官网</a>找到下载链接 cd /var/www sudo wget https://github.com/yiisoft/yii2/releases/download/2.0.15/yii-basic-app-2.0.15.tgz sudo tar -xzvf yii-basic-app-2.0.15.tgz sudo mv base yii2 cd /etc/nginx/conf.d/ sudo cp laravel.conf yii2.conf # 根据Laravel的配置文件进行部分修改即可 server { listen 80; server_name yii2.alan.demo; root /var/www/yii2/web; index index.php index.html index.htm; access_log /var/log/nginx/yii2_access.log alan; location / { try_files $uri $uri/ /index.php?$query_string; } location ~ \.php$ { include fastcgi_params; fastcgi_pass 127.0.0.1:9000; fastcgi_index index.php; fastcgi_param SCRIPT_FILENAME $document_root$fastcgi_script_name; try_files $uri =404; } } sudo systemctl reload nginx # yii\web\Request::cookieValidationKey must be configured with a secret key. sudo vim /var/www/yii2/config/web.php # 为'cookieValidationKey'后配置上值 |
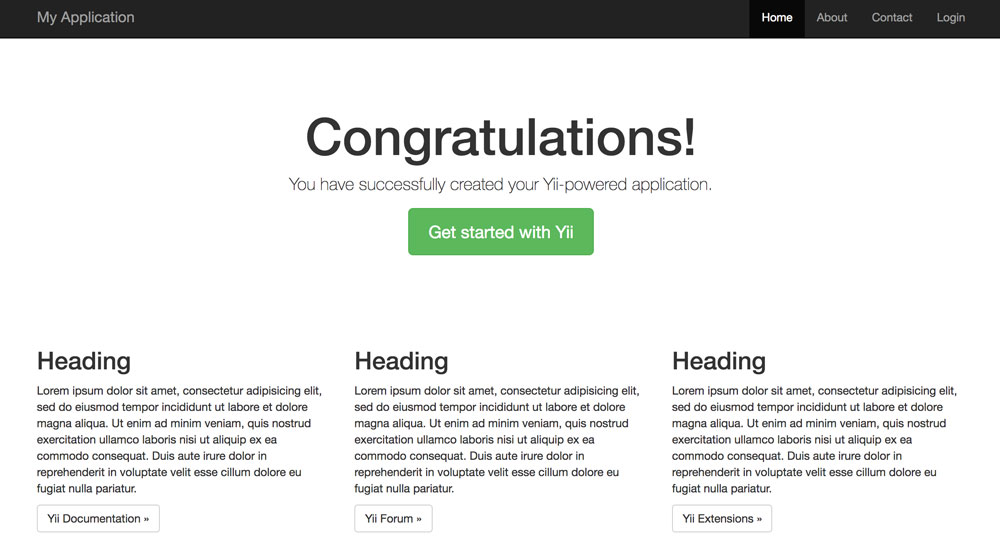
访问http://yii2.alan.demo:
ThinkPHP 5
相关文章:ThinkPHP 5小知识和常见问题
|
1 2 3 4 5 6 7 8 9 10 11 12 13 14 15 16 17 18 19 20 21 22 23 24 25 26 |
# <a href="http://www.thinkphp.cn/" target="_blank" rel="noopener noreferrer">ThinkPHP官网</a>下载安装包,并上传至/var/www/thinkphp sudo yum -y install unzip unzip thinkphp_5.0.16.zip cd /etc/nginx/conf.d/ sudo cp laravel.conf thinkphp.conf # 根据Laravel的配置文件进行部分修改即可 server { listen 80; server_name thinkphp.alan.demo; root /var/www/thinkphp/public; index index.php index.html index.htm; access_log /var/log/nginx/thinkphp_access.log alan; location / { try_files $uri $uri/ /index.php?$query_string; } location ~ \.php$ { include fastcgi_params; fastcgi_pass 127.0.0.1:9000; fastcgi_index index.php; fastcgi_param SCRIPT_FILENAME $document_root$fastcgi_script_name; try_files $uri =404; } } # 确保php-fpm, nginx启动即可在浏览器中进行访问 |
访问http://thinkphp.alan.demo:
phpMyAdmin
|
1 2 3 4 5 6 7 8 9 10 11 12 13 14 15 16 17 18 19 20 21 22 23 24 25 26 |
cd /var/www # 进入phpMyAdmin官网查找最新版链接 sudo wget https://files.phpmyadmin.net/phpMyAdmin/4.7.9/phpMyAdmin-4.7.9-all-languages.zip sudo unzip phpMyAdmin-4.7.9-all-languages.zip sudo mv phpMyAdmin-4.7.9-all-languages/ phpmyadmin cd /etc/nginx/conf.d/ sudo cp laravel.conf phpmyadmin.conf # 根据Laravel的配置文件进行部分修改即可 server { listen 80; server_name phpmyadmin.alan.demo; root /var/www/phpmyadmin; index index.php index.html index.htm; access_log /var/log/nginx/phpmyadmin_access.log alan; location / { try_files $uri $uri/ /index.php?$query_string; } location ~ \.php$ { include fastcgi_params; fastcgi_pass 127.0.0.1:9000; fastcgi_index index.php; fastcgi_param SCRIPT_FILENAME $document_root$fastcgi_script_name; try_files $uri =404; } } |
|
1 2 3 4 5 6 7 8 9 10 11 12 13 14 15 16 17 18 19 20 21 22 23 24 25 26 27 28 29 30 |
# 允许连接远程数据库 sudo vim /var/www/phpmyadmin/libraries/config.default.php $cfg['AllowArbitraryServer'] = true; # 配置多服务器 # 将根目录下的config.sample.inc.php复制出一份config.inc.php,可以发现文件中有: $i = 0; /** * First server */ $i++; /* Authentication type */ $cfg['Servers'][$i]['auth_type'] = 'cookie'; /* Server parameters */ $cfg['Servers'][$i]['host'] = 'localhost'; $cfg['Servers'][$i]['compress'] = false; $cfg['Servers'][$i]['AllowNoPassword'] = false; # 仿照上面这一段可以添加多台主机 /* * Second server */ $i++; $cfg['Servers'][$i]['auth_type'] = 'cookie'; /* Server parameters */ $cfg['Servers'][$i]['host'] = 'your.ip.address'; $cfg['Servers'][$i]['compress'] = false; $cfg['Servers'][$i]['AllowNoPassword'] = false; |
效果如下:
phpRedisAdmin
|
1 2 3 4 5 6 7 8 9 10 11 12 13 14 15 16 17 18 19 20 21 22 23 24 25 26 27 |
cd /var/www sudo git clone https://github.com/ErikDubbelboer/phpRedisAdmin.git cd phpRedisAdmin sudo git clone https://github.com/nrk/predis.git vendor mv phpRedisAdmin phpredisadmin cd /etc/nginx/conf.d/ sudo cp laravel.conf phpredisadmin.conf # 根据Laravel的配置文件进行部分修改即可 server { listen 80; server_name phpredisadmin.alan.demo; root /var/www/phpredisadmin; index index.php index.html index.htm; access_log /var/log/nginx/phpmyadmin_access.log alan; location / { try_files $uri $uri/ /index.php?$query_string; } location ~ \.php$ { include fastcgi_params; fastcgi_pass 127.0.0.1:9000; fastcgi_index index.php; fastcgi_param SCRIPT_FILENAME $document_root$fastcgi_script_name; try_files $uri =404; } } |
访问http://phpredisadmin.alan.demo/
Java
相关文章:Java关键字图表
Tomcat
|
1 2 3 4 5 6 7 8 9 10 11 12 13 14 15 16 17 18 19 20 21 22 23 24 25 26 27 28 29 30 31 32 33 34 35 36 37 38 |
# 安装Java(可通过yum search java|grep openjdk查看可安装版本) sudo yum -y install java-1.8.0-openjdk* # 验证安装是否成功 java -version # JAVA_HOME配置,默认 yum 安装与编译安装的JAVA地址不同,需进行查找 ls -lr /usr/bin/java # 根据输出结果再执行 ls -lrt /etc/alternatives/java # 此时输出结果即为 JAVA 真实安装路径,/etc/profile或~/.bash_profile 中添加 export JAVA_HOME=/usr/lib/jvm/java-1.8.0-openjdk-1.8.0.181-3.b13.el7_5.x86_64 export JRE_HOME=$JAVA_HOME/jre export CLASSPATH=$JAVA_HOME/lib:$JRE_HOME/lib:$CLASSPATH export PATH=$JAVA_HOME/bin:$JRE_HOME/bin:$PATH # 安装Tomcat(https://tomcat.apache.org/) wget http://mirrors.hust.edu.cn/apache/tomcat/tomcat-9/v9.0.6/bin/apache-tomcat-9.0.6.tar.gz tar -zxvf apache-tomcat-9.0.6.tar.gz mv apache-tomcat-9.0.6 tomcat cd tomcat/bin # 配置 UTF-8,在redirectPort="8443"后添加 # vi conf/server.xml URIEncoding="UTF-8" # 启动Tomcat sh startup.sh # 此时若无法访问http://192.168.*.*:8080尝试设置防火墙 sudo firewall-cmd --add-port 8080/tcp --permanent # 设置转发 sudo vim /etc/nginx/conf.d/java.conf server { listen 80; server_name java.alan.demo; location / { proxy_pass http://127.0.0.1:8080; } } sudo systemctl reload nginx # 此时可以通过http://java.alan.demo进行访问 |
Maven
|
1 2 3 4 5 6 |
# 安装Maven(http://maven.apache.org/) wget http://mirrors.hust.edu.cn/apache/maven/maven-3/3.5.3/binaries/apache-maven-3.5.3-bin.tar.gz tar -zxvf apache-maven-3.5.3-bin.tar.gz mv apache-maven-3.5.3 maven # 设置软链来进行全局执行 sudo ln -s ~/maven/bin/mvn /usr/bin/mvn |
使用示例
|
1 2 3 4 5 6 7 8 |
cd /tmp git clone https://github.com/mkyong/spring3-mvc-maven-xml-hello-world.git cd spring3-mvc-maven-xml-hello-world/ # 使用Maven打包(.war) mvn clean package cp target/spring3-mvc-maven-xml-hello-world-1.0-SNAPSHOT.war ~/tomcat/webapps/ # Tomcat启动情况下包会被自动解压,访问以下网址 http://java.alan.demo/spring3-mvc-maven-xml-hello-world-1.0-SNAPSHOT/ |
Python
相关文章:
CentOS 7下通过uWSGI + Nginx部署Django
|
1 2 3 4 5 6 7 8 9 10 11 12 13 14 15 16 17 18 19 20 21 22 23 24 25 26 27 28 29 30 31 32 33 34 35 36 37 38 39 40 41 42 43 44 45 46 47 |
# 安装pip sudo yum -y install python2-pip # 设置豆瓣源 mkdir ~/.pip sudo vim ~/.pip/pip.conf [global] timeout = 60 index-url = https://pypi.doubanio.com/simple # 安装Virtualenv sudo pip install virtualenv # 创建虚拟环境 virtualenv alan # 启动环境 source alan/bin/activate # 退出环境 deactivate # 安装Flask pip install flask mkdir flask & cd flask vim index.py from flask import Flask app = Flask(__name__) @app.route('/') def hello_world(): return 'Hello World!' if __name__ == '__main__': app.run(host='0.0.0.0') # nginx配置 sudo vim /etc/nginx/conf.d/flask.conf server { listen 80; server_name flask.alan.demo; location / { proxy_pass http://127.0.0.1:5000; } } systemctl reload nginx sudo firewall-cmd --add-port 5000/tcp # 开启服务 python index.py |
此时可以访问http://flask.alan.demo/
Python 3
|
1 2 3 4 5 |
sudo yum install epel-release -y sudo yum install python36 -y sudo yum install python36-setuptools -y sudo yum install python3-devel -y sudo easy_install-3.6 pip |
Zabbix
相关文章:
|
1 2 3 4 5 6 7 8 9 10 11 12 13 14 15 16 17 18 19 20 21 22 23 24 25 26 27 28 29 30 31 32 33 34 35 36 37 38 |
# https://www.zabbix.com/download # 添加源 sudo rpm -i http://repo.zabbix.com/zabbix/3.4/rhel/7/x86_64/zabbix-release-3.4-2.el7.noarch.rpm # 服务端 sudo yum install zabbix-server-mysql zabbix-web-mysql # 客户端(测试放在同一台机器上) sudo yum install zabbix-agent # 进入MySQL终端 create database zabbix; exit; # 导入数据库 cd /usr/share/doc/zabbix-server-mysql-3.4.8/ zcat create.sql.gz | mysql -uroot -p zabbix # 配置文件(配置DBHost, DBName,DBUser, DBPassword) sudo vim /etc/zabbix/zabbix_server.conf # 启动服务 sudo systemctl start zabbix-server # Nginx配置 sudo vim /etc/nginx/conf.d/zabbix.conf server { listen 80; server_name zabbix.alan.demo; root /usr/share/zabbix; index index.php index.html index.htm; access_log /var/log/nginx/zabbix_access.log alan; location / { try_files $uri $uri/ /index.php?$query_string; } location ~ \.php$ { include fastcgi_params; fastcgi_pass 127.0.0.1:9000; fastcgi_index index.php; fastcgi_param SCRIPT_FILENAME $document_root$fastcgi_script_name; try_files $uri =404; } } |
访问http://zabbix.alan.demo/进入Web端安装界面(默认用户名/密码:admin/zabbix),安装中关于PHP的错误在/etc/php.ini中进行修改即可
|
1 2 3 4 5 6 7 8 |
sudo vim /etc/php.ini date.timezone = Asia/Shanghai post_max_size = 32M max_execution_time = 300 max_input_time = 300 sudo systemctl restart php-fpm # 备注:语言相关文件/usr/share/zabbix/include/locales.inc.php |
VirtualBox 设置共享文件夹
首先点击菜单栏设备(Devices)>安装增强功能(Insert Guest Additions CD Image…)
以下演示假定本地文件夹为/Users/alan/shared,虚拟机 对应文件夹为/home/shared
|
1 2 3 4 5 6 7 8 9 |
mkdir /mnt/cdrom mount /dev/cdrom /mnt/cdrom cp -R /mnt/cdrom /usr/local/src/VBoxAdditions yum install -y gcc gcc-devel gcc-c++ gcc-c++-dvel make kernel kernel-devel bzip2 /usr/local/src/VBoxAdditions/VBoxLinuxAdditions.run install # 启用共享文件夹 mkdir /home/shared mount -t vboxsf Alan /home/shared |
Golang
|
1 2 3 4 5 6 7 8 9 10 11 12 13 |
wget https://studygolang.com/dl/golang/go1.12.5.linux-amd64.tar.gz tar -C /usr/local -xzf go1.12.5.linux-amd64.tar.gz # vi /etc/profile export GOROOT=/usr/local/go export GOBIN=$GOROOT/bin export GOPKG=$GOROOT/pkg/tool/linux_amd64 export GOARCH=amd64 export GOOS=linux export GOPATH=/go export PATH=$PATH:$GOBIN:$GOPKG:$GOPATH/bin source /etc/profile |
NodeJS
|
1 2 3 4 5 |
yum install -y gcc-c++ make curl -sL https://rpm.nodesource.com/setup_10.x | sudo -E bash - sudo yum install nodejs -y curl -sL https://dl.yarnpkg.com/rpm/yarn.repo | sudo tee /etc/yum.repos.d/yarn.repo sudo yum install yarn -y |
开启 BBR 加速
|
1 2 3 4 5 6 7 8 9 10 11 12 13 14 15 16 17 18 19 20 21 22 23 |
yum update # 升级内核 sudo rpm --import https://www.elrepo.org/RPM-GPG-KEY-elrepo.org sudo rpm -Uvh http://www.elrepo.org/elrepo-release-7.0-2.el7.elrepo.noarch.rpm # 安装内核 sudo yum --enablerepo=elrepo-kernel install kernel-ml -y # 查看已安装内核 awk -F\' '$1=="menuentry " {print i++ " : " $2}' /etc/grub2.cfg # 设置为新升级内核 grub2-set-default 0 # 重启服务器 reboot # 修改sysctl配置 echo 'net.core.default_qdisc=fq' | sudo tee -a /etc/sysctl.conf echo 'net.ipv4.tcp_congestion_control=bbr' | sudo tee -a /etc/sysctl.conf sudo sysctl -p # 查看是否已启用 BBR sysctl net.ipv4.tcp_available_congestion_control # 验证 sysctl -n net.ipv4.tcp_congestion_control # 检查内核模块是否已加载 lsmod | grep bbr lsmod | grep bbr |
常见问题
1. -bash: ifconfig: command not found
在CentOS 6中习惯了使用ifconfig的人会发现在CentOS中默认并不能使用ifconfig,可以使用ip addr进行替代,或者查询对应包并安装
|
1 2 3 |
yum search ifconfig #查询到对应的包名net-tools.x86_64 : Basic networking tools yum -y install net-tools.x86_64 |
2.Failed to start reboot.target: Activation of org.freedesktop.systemd1 timed out
|
1 |
reboot -f |
3.Job for nginx.service failed because the control process exited with error code. See “systemctl status nginx.service” and “journalctl -xe” for details.
|
1 2 3 4 |
setenforce 0 或 vim /etc/selinux/config SELINUX=disabled |
4.Kill 相关进程
如 MySQL卡死,有多条重启进程,可通过如下命令打印出所有 kill 命令然后进行打印
|
1 |
ps -ef|grep mysqld|grep -v grep|awk '{print "kill -9 "$2}' |
5、测试当地连接速度
|
1 |
curl -o /dev/null -s -w "time_connect: %{time_connect}\ntime_starttransfer: %{time_starttransfer}\ntime_total: %{time_total}\n" "http[s]://<IP或域名>[:<端口>]" |
常用文件
/etc/sysconfig/network(常用来修改主机名)
HOSTNAME
/etc/motd 设置开机欢迎信息(阿里云修改开机信息)
/etc/issue 开机时显示的版本信息

