WordPress的默认集成有twentyfifteen之类的模板,位置在wp-content/themes下。如果想要安装或者开发主题,都需要在这个目录下来完成。
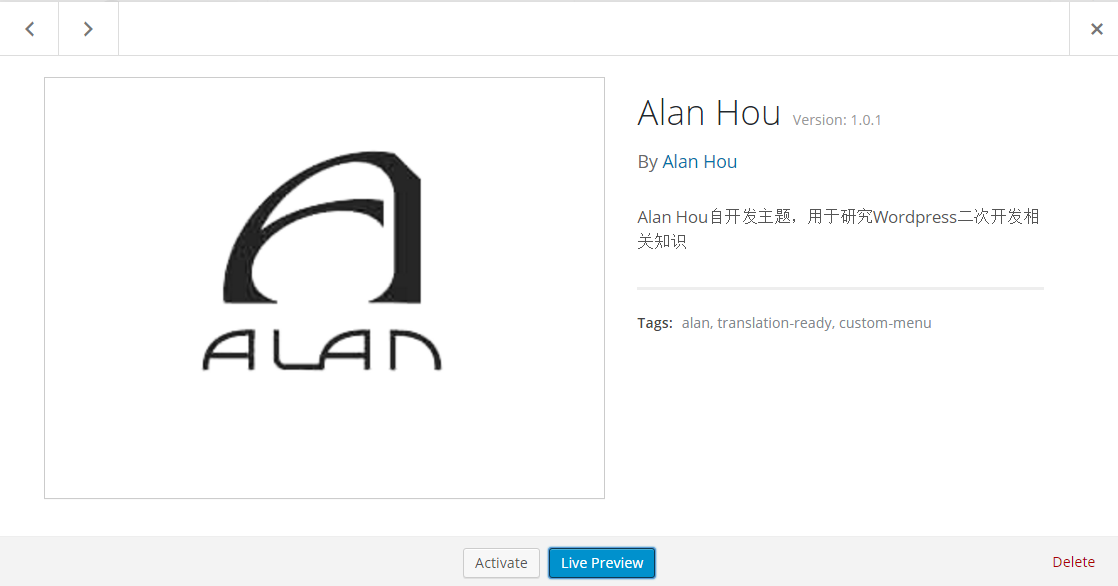
本例将在wp-content/themes目录下创建一个名为alanhou的文件夹,自开发的模板要求至少有index.php和style.css这两个文件。通常在style.css最上方会有一大段注释,用于在设置主题名称、版本等相关信息。细心的你一定还会发现在后台查看主题时还会有一张图片,这张图片来自主题文件夹下的screeshot.png, 建议大小为880*660px(或相似比例的图片)。
/*
Theme Name: Alan Hou
Theme URI: http://alanhou.org/
Author: Alan Hou
Author URI: http://alanhou.org/
Description: Alan Hou自开发主题,用于研究Wordpress二次开发相关知识
Version: 1.0.1
License: GNU General Public License v2 or later
License URI: http://www.gnu.org/licenses/gpl-2.0.html
Tags: alan, translation-ready, custom-menu
Text Domain: alanhou
*/
完成上述操作后在后台的效果如下
首先我们先在index.php中加入代码,调用主题CSS,并输出博客的标题和描述,主要用到了bloginfo(), get_option(), wp_header()和wp_footer()方法示例代码如下:
<!doctype html>
<html>
<head>
  <meta http-equiv="Content-Type" content="text/htm; charset=<?php bloginfo('charset'); ?>" />
  <?php if(is_home()): $title = get_bloginfo('name'); else: $title = wp_title('', false); endif; if($paged>0):
      $title .= '-第'.$paged.'页';
    endif;
  ?>
  <title><?php echo $title; ?></title>
  <meta name="description" content="<?php bloginfo('description'); ?>" />
  <link rel="stylesheet" href="<?php bloginfo('stylesheet_url') ?>" type="text/css" ?>
  <?php wp_head(); ?>
</head>
<body>

<div id="header" class="fl">

<div id="header-left" class="fl">

<h1><a href="<?php echo get_option('home'); ?>"><?php bloginfo('name'); ?></a></h1>


<div class="description"><?php bloginfo('description'); ?></div>

    </div>


<div id="header-right" class="fr">

    </div>

  </div>


<div id="nav">

<ul><?php wp_nav_menu(); ?></ul>

  </div>


<div id="main" class="fl">
  </div>

  <?php wp_footer(); ?>
</body>
通过简单的css控制后就得到如下这样的头部
循环输出文章内容
<div id="posts" class="fl">
  <?php //判断是否有文章存在 if(have_posts()): while(have_posts()): //获取文章信息并存入全局变量$post中 the_post(); ?>


<div class="post-item">


<div class="post-title">
      <?php /*输出文章标题和链接*/ ?>
      <a href="<?php the_permalink?>">


<h2><?php the_title(); ?></h2>


</a>
    </div>


<div class="post-content">
      <?php /*输出文章内容*/ ?>
      <?php the_content(); ?>
    </div>


<div class="post-meta">
      <?php /*输出文章所属分类*/ ?>
      <?php the_category(); ?>
      <?php /*输出文章作者*/ ?>
      <?php the_author(); ?>
      <?php /*输出文章发布时间*/ ?>
      <?php the_time('Y-m-d'); ?>
      <?php /*输出编辑文章链接*/ ?>
      <?php edit_post_link('Edit','|',''); ?>
    </div>


  </div>


  <?php endwhile; else: echo "当前博客没有文章可供显示"; endif; ?>
</div>
侧边栏和翻页
调出翻页功能只需使用posts_nav_link()即可,而侧边栏使用get_sidebar(),如
<div class="nav_link fl">
  <?php posts_nav_link(); ?>
</div>


<?php get_sidebar(); ?>
通常需首先在functions.php中注册小工具(可同时注册多个小工具),这样才会在后台外观菜单下出现小工具从而进行拖放编辑,例如:
//注册一个侧边栏的小工具
 register_sidebar(
  array(
    'name' => '侧边栏',
    'before_widget' => '


<div class="sbox">',
    'after_widget' => '</div>


',
    'before_title' => '


<h2>',
    'after_title' => '</h2>


'
  )
在主题根目录下创建sidebar.php,使用dynamic_sidebar()调出后台小工具中设置的内容(该函数中可传入register_sidebar中的name值)
<div class="fr rightbox">
  <?php dynamic_sidebar(); ?>
</div>
但有时为防止小工具中未加入内容或者只是为了提高一些灵活性,也可以在side.php中自行加入相应模块,只需通过is_dynamic_sidebar()进行判断,然后输出相应模块即可。比如:
<div class="fr rightbox">
	<?php if(is_dynamic_sidebar()): dynamic_sidebar(); else: ?>


<div class="sbox">


<h2>分类</h2>


<ul>
			<?php wp_list_cats(); ?>
		</ul>


	</div>


<div class="sbox">


<h2>页面</h2>


<ul>
			<?php wp_list_pages(); ?>
		</ul>


	</div>


<div class="sbox">


<h2>注册登录</h2>


<ul>
			<?php wp_register(); ?>
			<?php wp_loginout(); ?>
		</ul>


	</div>


	<?php endif; ?>
</div>
常用的封装文件
如同侧边栏一样,头部和底部通常也是相同的,所以较为推荐的做法是在主题目录下创建header.php和footer.php,然后使用get_header()和get_footer()函数来进行调用。
分类页模板:
category.php
如果想要不同分类调取不同分类的话,可以使用category加中间杠后接需使用该模板的分类Id号或别名(slug)来进行命名,如category-2.php或category-wordpress.php
也可以通过在category.php中通过判断id号来调用不同模板,比如
if ( is_category(array(1,2,3)) ) {
  include(TEMPLATEPATH . '/abc.php');
}else{
  include(TEMPLATEPATH . '/def.php');
}
还有一种类似的方法
$cat_ID = get_query_var('cat');
$cat = get_category($cat_ID);
$slug=$name = $cat->slug;

if ( '' !== locate_template(  array("template-parts/category-$slug.php")  ) ) {
     get_template_part( 'template-parts/category', $slug );
}else{
	get_template_part( 'template-parts/category', 'default');
}
文章页模板
single.php
除了前面介绍的方法外还可以通过previous_post_link()和next_post_link()来输出上一篇和下一篇文章标题链接,同是还可以自定义文本,如previous_post_link(‘上一篇:%link’)
文章页面后台编辑页面中可以添加自定义栏目,名称和值将存放在wp_postmeta表中,可通过get_post_meta()来获取,如
get_post_meta($post->ID, ‘test’, true),其中true返回字符串,false返回数组
独立页面模板
独立页面默认调用index.php作为模板,可通过新建page.php来作为独立页面模板。如果要单独为某一独立页面设置模板的话,可以在模板根目录中创建page-id.php,其中的id为该独立页面的id号。同样地,也可以采用页面别名page-slug.php的方式。
评论文件
评论文件为根目录下的comments.php,然后在相应位置中通过comments_template()进行调用,与评论相关的数据表为wp_comments, wp_commentmeta。
可以通过comments_open()方法判断是否开启了评论功能,对于文章页面可以通过讨论栏止开启或关闭评论(如未找到请点击右上角显示选项进行勾选显示),
对于有密码保护的页面可使用post_password_required()函数进行判断
if(!comments_open()):
  echo "评论功能已关闭";
elseif(post_password_required()):
  echo "请输入密码查看评论";
elseif(!have_comments()):
  echo "还没有评论,赶紧来评论吧!";
else:
  wp_list_comments();
endif;
comment_registration通过后台设置>讨论下的用户必须注册并登录才可以发表评论开启
if(get_option('comment_registration') && !is_user_logged_in()):
  echo '你必须<a href="'.wp_login_url().'">登录</a>才能发表评论';
elseif(comments_open()):
  comment_form();
endif;
搜索页面
和其它页面一样,如果没有search.php文件,搜索页将会调用index.php作为模板,所以请创建search.php文件作为搜索页面
404页面
和其它页面一样,如果没有404.php文件,404页面将会调用index.php作为模板,所以请创建404.php文件作为404页面


