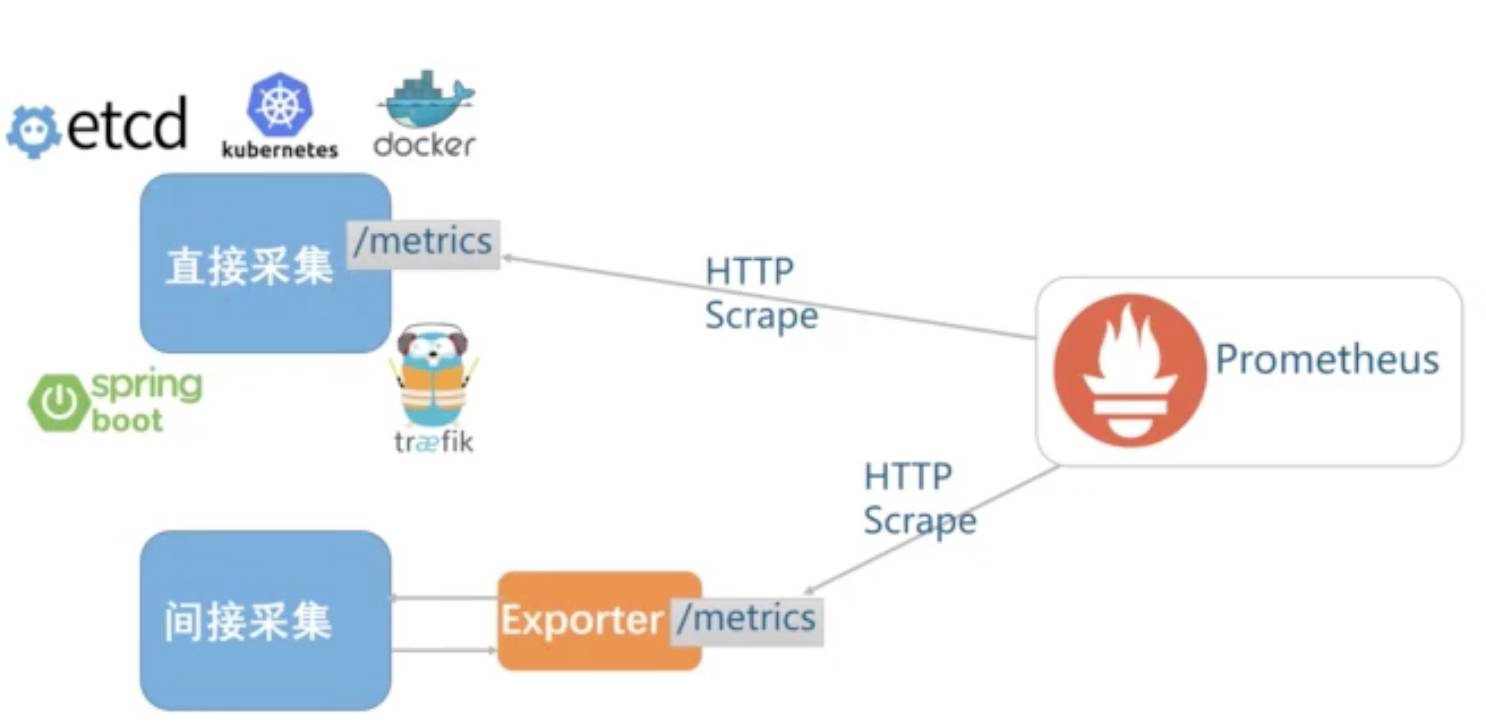
- 开源监控工具
- 时间序列数据库 TSDB,Golang 实现
- Soundcloud 研发,源于谷歌 borgmon
- 多维度(标签),拉模式(Pull-based)
- 白盒&黑盒监控均支持,DevOps 友好
- Metrics & Alert,不是 logging/tracing
- 社区生态丰富(多语言,各种exporters)
- 单机性能
- 每秒消费百万级时间序列
- 上千个 targets
BizDevOPs
Metrics-Driven Development
Metrics 种类
- Counter(计数器)
- 始终增加(统计 http 请求数、下单数等)
- Gauge(测量仪)
- 当前值的一次快照测量,可增可减(统计磁盘使用率、同时在线用户数等)
- Histogram(直方图)
- 通过分桶(bucket)方式统计样本分布
- Summary(汇总)
- 根据样式统计出百分位(客户端计算)
|
1 2 3 4 5 6 |
# PromQL 示例(HTTP错误百分比) sum(rate(http_requests_total{status="500"}[5m])) by (path) / sum(rate(http_requests_total{5m})) by (path) # 4小时内磁盘是否会满 ALERT DiskWillFullIn4Hours IF predict_linear(node_filesystem_free[1h],4*3600)<0 |
Google的四个黄金指标
- 延迟
- 流量
- 错误
- 饱和度
安装 Docker
|
1 2 |
curl -sSL https://get.docker.com/ | sh curl -sSL https://get.daocloud.io/docker | sh # 国内 |
配置国内Docker 镜像
|
1 2 3 4 5 6 7 |
# vi /etc/docker/daemon.json { "registry-mirrors": [ "http://hub-mirror.c.163.com" ] } |
安装 cadvisor
|
1 2 3 4 5 6 7 8 9 |
sudo docker run \ --volume=/:/rootfs:ro \ --volume=/var/run:/var/run:rw \ --volume=/sys:/sys:ro \ --volume=/var/lib/docker/:/var/lib/docker:ro \ --publish=8090:8080 \ --detach=true \ --name=cadvisor \ google/cadvisor:latest |
安装 Node-Exporter
|
1 2 3 4 5 |
docker run -d --name node-exporter -p 9100:9100 \ -v "/proc:/host/proc:ro" \ -v "/sys:/host/sys:ro" \ -v "/:/rootfs:ro" \ prom/node-exporter |
安装MySQL-Exporter
|
1 |
docker run -d --restart=always --name mysqld-exporter -p 9104:9104 -e DATA_SOURCE_NAME="user:password@(172.17.0.1:3306)/" prom/mysqld-exporter |
启动Mongo-Exporter
|
1 |
docker run -d --restart=always --name mongo-exporter -p 9216:9216 bitnami/mongodb-exporter:latest --mongodb.uri mongodb://user:password@ip:port |
安装配置 Prometheus
prometheus.yml
|
1 2 3 4 5 6 7 8 9 10 11 12 13 14 15 16 17 18 19 20 21 22 23 24 25 26 27 28 29 30 31 32 33 34 35 36 37 38 |
sudo mkdir -p /data/prometheus/conf/ cd /data/prometheus/conf/ vi prometheus.yml global: scrape_interval: 15s evaluation_interval: 15s alerting: alertmanagers: - static_configs: - targets: #- alertmanager:9093 rule_files: - "first.rules" # - "second.rules" scrape_configs: - job_name: 'prometheus' static_configs: - targets: ['localhost:9090'] - job_name: 'docker' static_configs: - targets: ['172.17.0.1:8090'] - job_name: 'server' static_configs: - targets: ['172.17.0.1:9100'] - job_name: 'mysql' static_configs: - targets: ['172.17.0.1:9104'] - job_name: 'mongo' static_configs: - targets: ['172.17.0.1:9216'] |
first.rules
|
1 2 3 4 5 6 7 8 9 10 11 12 13 14 15 16 17 18 19 20 21 22 23 24 25 26 27 28 29 30 31 32 33 34 35 36 37 38 39 40 41 42 43 44 45 46 47 48 49 50 51 52 53 54 55 56 57 58 59 60 61 62 63 64 65 66 67 68 69 70 71 72 73 |
groups: - name: 主机状态-监控告警 rules: - alert: 主机状态 expr: up == 0 for: 1m labels: status: 非常严重 annotations: summary: "{{$labels.instance}}:服务器宕机" description: "{{$labels.instance}}:服务器延时超过5分钟" - alert: CPU使用情况 expr: 100-(avg(irate(node_cpu_seconds_total{mode="idle"}[5m])) by(instance)* 100) > 60 for: 1m labels: status: 一般告警 annotations: summary: "{{$labels.mountpoint}} CPU使用率过高!" description: "{{$labels.mountpoint }} CPU使用大于60%(目前使用:{{$value}}%)" - alert: 内存使用 expr: 100 -(node_memory_MemTotal_bytes -node_memory_MemFree_bytes+node_memory_Buffers_bytes+node_memory_Cached_bytes ) / node_memory_MemTotal_bytes * 100> 80 for: 1m labels: status: 严重告警 annotations: summary: "{{$labels.mountpoint}} 内存使用率过高!" description: "{{$labels.mountpoint }} 内存使用大于80%(目前使用:{{$value}}%)" - alert: IO性能 expr: 100-(avg(irate(node_disk_io_time_seconds_total[1m])) by(instance)* 100) < 60 for: 1m labels: status: 严重告警 annotations: summary: "{{$labels.mountpoint}} 流入磁盘IO使用率过高!" description: "{{$labels.mountpoint }} 流入磁盘IO大于60%(目前使用:{{$value}})" - alert: 网络 expr: ((sum(rate (node_network_receive_bytes_total{device!~'tap.*|veth.*|br.*|docker.*|virbr*|lo*'}[5m])) by (instance)) / 100) > 102400 for: 1m labels: status: 严重告警 annotations: summary: "{{$labels.mountpoint}} 流入网络带宽过高!" description: "{{$labels.mountpoint }}流入网络带宽持续2分钟高于100M. RX带宽使用率{{$value}}" - alert: 网络 expr: ((sum(rate (node_network_transmit_bytes_total{device!~'tap.*|veth.*|br.*|docker.*|virbr*|lo*'}[5m])) by (instance)) / 100) > 102400 for: 1m labels: status: 严重告警 annotations: summary: "{{$labels.mountpoint}} 流出网络带宽过高!" description: "{{$labels.mountpoint }}流出网络带宽持续2分钟高于100M. RX带宽使用率{{$value}}" - alert: TCP会话 expr: node_netstat_Tcp_CurrEstab > 1000 for: 1m labels: status: 严重告警 annotations: summary: "{{$labels.mountpoint}} TCP_ESTABLISHED过高!" description: "{{$labels.mountpoint }} TCP_ESTABLISHED大于1000%(目前使用:{{$value}}%)" - alert: 磁盘容量 expr: 100-(node_filesystem_free_bytes{fstype=~"ext4|xfs"}/node_filesystem_size_bytes {fstype=~"ext4|xfs"}*100) > 80 for: 1m labels: status: 严重告警 annotations: summary: "{{$labels.mountpoint}} 磁盘分区使用率过高!" description: "{{$labels.mountpoint }} 磁盘分区使用大于80%(目前使用:{{$value}}%)" |
启动服务
|
1 |
docker run -d --name prometheus -p 9090:9090 -v /data/prometheus/conf/:/etc/prometheus/ prom/prometheus |
Alert Manager安装
注:因 Grafana 会实现同样的报警功能,这里未使用 Alert Manager
|
1 2 3 4 5 6 7 8 9 10 11 12 13 14 15 16 17 18 19 20 21 22 23 24 25 26 27 28 29 30 31 32 33 34 35 36 37 38 39 40 41 42 43 44 45 46 47 48 49 50 51 |
mkdir -p /data/alertmanager/template # /data/alertmanager/alertmanager.yml global: resolve_timeout: 2m smtp_smarthost: smtp.exmail.qq.com:465 # 邮箱smtp服务器代理,以腾讯企业邮箱为例 smtp_from: xxxx@xx.com # 邮件头中的发送邮箱名 smtp_auth_username: xxxx@xx.com # 发送邮箱名 smtp_auth_password: xxxx # 邮箱密码或授权码 wechat_api_url: 'https://qyapi.weixin.qq.com/cgi-bin/' # 默认值,可不进行配置 templates: - '/etc/prometheus/template/wechat.tmpl' route: group_by: ['alertname'] group_wait: 30s group_interval: 60s receiver: 'wechat' # 优先使用wechat发送 repeat_interval: 1h routes: #子路由,使用email发送 - receiver: email match_re: severity: Critical # severity 需在 Prometheus 的 rule 中配置 receivers: - name: 'email' email_configs: - to: 'xxx@xxx.com' send_resolved: true # 发送已解决通知 - name: 'wechat' wechat_configs: - corp_id: 'ww1cxxxxx' #企业ID to_party: '2' # 通知部门ID,部门右侧下拉弹窗最下端显示 agent_id: '1000002' api_secret: '0rzo_xxxxx-O1oasDU' # 生成的secret send_resolved: true # /data/alertmanager/template/wechat.tmpl {{ define "wechat.default.message" }} {{ range $i, $alert :=.Alerts }} ========监控报警========== 告警状态:{{ .Status }} 告警级别:{{ $alert.Labels.severity }} 告警类型:{{ $alert.Labels.alertname }} 告警应用:{{ $alert.Annotations.summary }} 告警主机:{{ $alert.Labels.instance }} 告警详情:{{ $alert.Annotations.description }} 触发阀值:{{ $alert.Annotations.value }} 告警时间:{{ $alert.StartsAt.Format "2019-01-02 15:04:05" }} # 启动 docker run -d -p 9093:9093 -v /data/alertmanager/:/etc/alertmanager/ --name alertmanager prom/alertmanager |
安装 Grafana
|
1 2 3 4 5 6 7 8 9 10 |
# 普通安装 docker run -d --name grafana -p 3000:3000 -v /data/grafana:/var/lib/grafana grafana/grafana # 拷贝配置文件 sudo mkdir -p /data/grafana-data/etc sudo docker cp grafana:/etc/grafana/grafana.ini /data/grafana-data/etc/ # 修改配置文件、删除并重新载入配置文件启动 Grafana # 例如配置 smtp 相关参数即可在后台中配置 Alerting 通过邮件发送警告 sudo docker kill grafana sudo docker rm grafana sudo docker <span class="hljs-keyword">run</span><span class="bash"> --user root -d --name grafana -p 3000:3000 -v /data/grafana-data/etc:/etc/grafana/ -v /data/grafana-data/grafana:/var/lib/grafana grafana/grafana</span> |
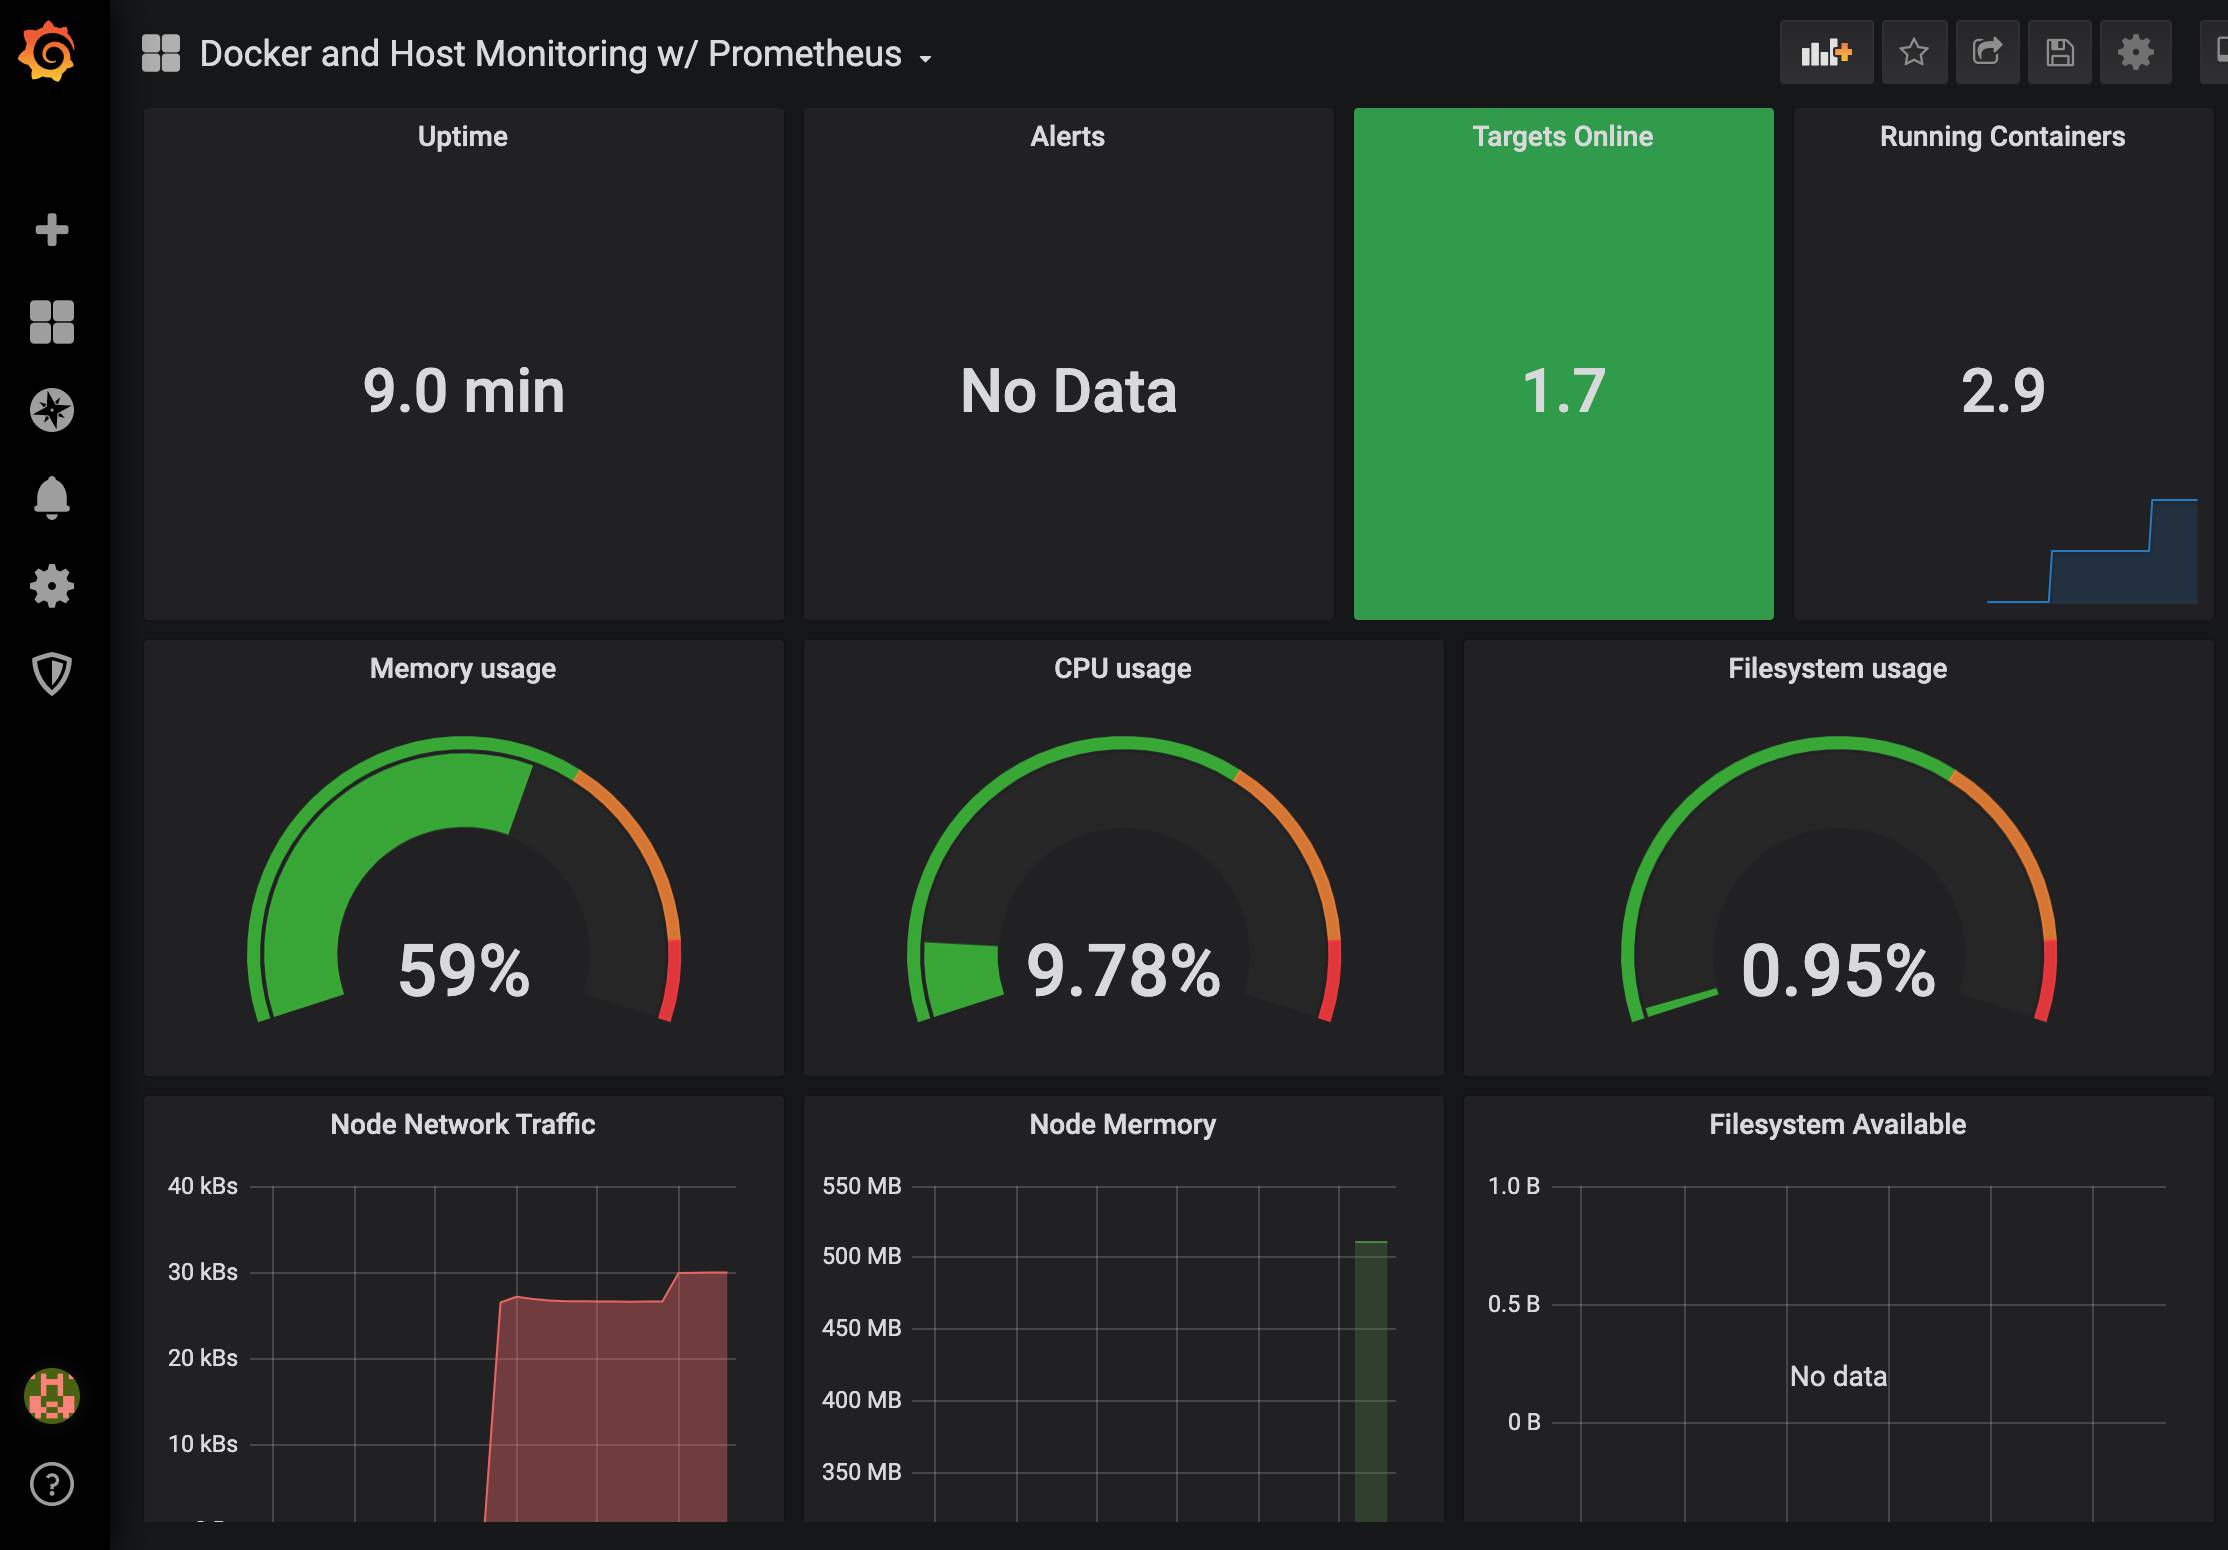
登录并选择 Prometheus 为数据源(http://172.17.0.1:9090)
然后进入点击左侧加号搜索模板:
https://grafana.com/dashboards?search=docker
通过 id (如179)导入创建 Dashboard
MySQL DashBoard 示例模板:7362
Node Exporter 模板:8919
以上为单机操作,但完全可以放到不同机器上,在进行对应配置时修改为外网IP 地址或域名即可,当然在对外网暴露数据时应进行安全校验,Prometheus 可通过 Nginx 添加基础认证。
|
1 2 3 4 5 6 7 8 9 10 11 12 13 14 15 16 17 |
cd /etc/nginx # 选择用户名,如 username,这里使用apache2-utils 提供的 htpasswd工具 htpasswd -c .htpasswd username # 也可自行配置文件,内容格式为ttlsauser1:password1:comment # 配置示例 http { server { listen 0.0.0.0:19090; location / { proxy_pass http://localhost:9090/; auth_basic "Prometheus"; auth_basic_user_file ".htpasswd"; } } |
另如在本地也大可不必通过-p 或–publish 来指定外网访问端口
Docker 重启后容器自动重启
|
1 |
docker container update --restart=always 容器名 |
但我们知道容器默认 IP 是自动分配的,如何为容器固定 IP 呢?可通过如下命令来创建自定义内网网段,并为容器分配固定 IP
|
1 2 3 4 5 6 |
docker network create --subnet=172.18.0.0/16 customnetwork docker run --net customnetwork --ip 172.18.0.22 .... # 将容器加入网络(在创建容器阶段可通过--network customnetwork的形式进行配置) docker network connect NETWORK CONTAINER # 此外可在指定端口时限定本地 IP 而不对外网暴露 docker run -d -p 127.0.0.1:8000:8000... |


