刚刚接触Magento开发的人经常会搞不清布局(Layout)和视图(View)之间的分别。那么本节就来剖析Magento的布局/块,以及它们在Magento的MVC架构中所起到的作用。
和很多主流的MVC系统不同,Magento的Action控制器不向视图传递数据对象,并且通常也不会去设定视图对象中的属性值。而是由视图组件直接引用系统模型来获取所需显示的信息。
采用这种设计方法直接导致视图被分割成两个部分:块文件(Blocks)和模板文件(Templates),其中块是PHP对象,模板是混合了HTML和PHP的原生PHP文件,后缀名采用.phtml。每个块文件对应着一个模板文件,在模块文件中通过$this关键词来引用块文件中的对象。
先看看代码,打开app/design/frontend/base/default/template/catalog/product/list.phtml文件,会看到如下代码
<?php     $_productCollection=$this->getLoadedProductCollection();
    $_helper = $this->helper('catalog/output');
?>
<?php if(!$_productCollection->count()): ?>

<?php echo $this->__('There are no products matching the selection.') ?>

<?php else: ?>
其中getLoadedProductCollection方法来自块文件的Mage_Catalog_Block_Product_List类,具体位置在app/code/core/Mage/Catalog/Block/Product/List.php
public function getLoadedProductCollection()
    {
        return $this->_getProductCollection();
    }
块文件中的_getProductCollection会实例化模型并读取其中的数据,并将结果返回给模板文件。
块文件内置
块和模板文件真正的强大之处在于getChildHtml方法的使用,使用这个方法可以包含一级块、模板文件内的二级块、模板文件。页面上的HTML布局正是通过块文件不断地调用内嵌的块文件来创建的。下面我们就来看一看app/design/frontend/base/default/template/page/1column.phtml这个文件:
<!DOCTYPE html PUBLIC "-//W3C//DTD XHTML 1.0 Strict//EN" "http://www.w3.org/TR/xhtml1/DTD/xhtml1-strict.dtd">
<html xmlns="http://www.w3.org/1999/xhtml" xml:lang="<?php echo $this->getLang() ?>" lang="<?php echo $this->getLang() ?>">
<head>
<?php echo $this->getChildHtml('head') ?>
</head>
<body<?php echo $this->getBodyClass()?' class="'.$this->getBodyClass().'"':'' ?>>
<?php echo $this->getChildHtml('after_body_start') ?>

<div class="wrapper">
    <?php echo $this->getChildHtml('global_notices') ?>

<div class="page">
        <?php echo $this->getChildHtml('header') ?>

<div class="main-container col1-layout">

<div class="main">
                <?php echo $this->getChildHtml('breadcrumbs') ?>

<div class="col-main">
                    <?php echo $this->getChildHtml('global_messages') ?>
                    <?php echo $this->getChildHtml('content') ?>
                </div>

            </div>

        </div>

        <?php echo $this->getChildHtml('footer') ?>
        <?php echo $this->getChildHtml('global_cookie_notice') ?>
        <?php echo $this->getChildHtml('before_body_end') ?>
    </div>

</div>

<?php echo $this->getAbsoluteFooter() ?>
</body>
</html>
模板文件本身并不长,但通过多次调用$this->getChildHtml()方法包含并显示了多个块文件,这些块文件又会使用getChildHtml方法去调用其它块文件。
布局文件
这么看起来块文件和模板文件确实不错,那么如何让Magento知道在页面中使用哪一个块文件?先从哪一个块文件开始处理?又如何在getChildHtml中指定一个块文件呢?毕竟里面的参数看起来不太像是个块文件的名称。
这就需要讲到布局对象了,布局对象是一个指定了页面上将包含块文件的XML对象,它同时也指定了先处理哪一个块文件。在上节中我们在Action方法中使用了echo指令输出了一些内容,本节我们将会为Helloworld模块创建一个简单的HTML模板文件。首先创建一个app/design/frontend/base/default/layout/local.xml文件,加入如下代码
<layout version='0.1.0'>
	<default>
		<block type="page/html" name="root" output="toHtml" template="alanhou/helloworld/simple_page.phtml" />
	</default>
</layout>
然后再创建一个app/design/frontend/base/default/template/alanhou/helloworld/simple_page.phtml文件并添加如下代码:
<!DOCTYPE html PUBLIC "-//W3C//DTD XHTML 1.0 Strict//EN" "http://www.w3.org/TR/xhtml1/DTD/xhtml1-strict.dtd">
<html xmlns="http://www.w3.org/1999/xhtml" xml:lang="en">
<head>
	<title>Hello World</title>

<style type="text/css">
		body{
			background-color:#f00;
		}
	</style>

</head>
<body>

</body>
</html>
完成了上面的操作后,最后需要通过Action控制器来调用整个布局,那么我们需要对之前创建的indexAction方法进行如下调整:
public function indexAction(){
		//echo 'Hello World!';
		$this->loadLayout();
		$this->renderLayout();
}
清除缓存重新加载http://localhost/mgt/helloworld/index/index,就会显示刚刚在simple_page.phtml里所添加的内容,也就是整个屏幕都显示红色的背景。
你一定很好奇这背后到底发生了什么呢?下面就让我们一起来揭开这神秘的面纱。为方便观察首先安装一下Layoutviewer模块:
链接: http://pan.baidu.com/s/1qHTd8 密码: 2dya
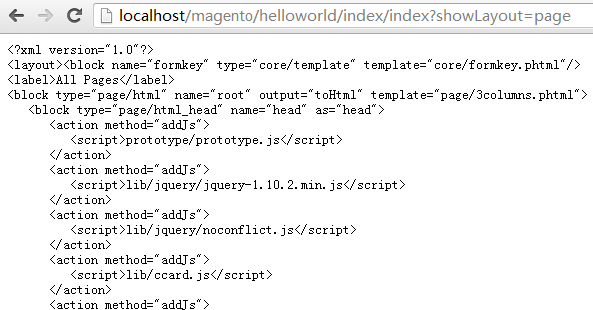
只需解压缩然后拷贝到app目录中即可完成安装,这个模块类似于我们这前面小节里提到的Configviewer。安装完成后请访问http://localhost/magento/helloworld/index/index?showLayout=page
输出内容即为page请求的layout.xml,它由<block />, <reference /> 和<remove />等标签组成,当我们在调用loadLayout方法时,Magento实际完成的操作有:
- 生成Layout布局XML文件
- 实例化各<block />标签中的Block类,通过标签属性查找类并作为全局配置路径保存到布局对象的_blocks数组中,在该数组中以标签名作为数据的键
- 如若标签中包含输出属性,其值就会被添加到布局对象的_output数组中
然后在Action控制器中调用renderLayout方法时,Magento会遍历_output数组中的所有Block,将输出属性的值作为一个回调方法,这通常都是toHtml,也就是从块模板文件开始处理。接下我们会谈谈Block是怎么被实例化的,layout文件又是如何生成并完成输出的?
Block的实例化
在生成的布局XML文件中,包含type属性的实际上是一个类群URI,比如
<block type="page/html" name="root" output="toHtml" template="alanhou/helloworld/simple_page.phtml"/>
<block type="page/template_links" name="top.links" as="topLinks"/>
这些URI都引用全局配置文件中的一个地方,URI的前半部分(上例中都是page)会用于在全局配置文件中查询page的类名,而第二部分(分别是html和template_links)会被加到前面查询到的类名最后并形成Magento将要实例化的类。
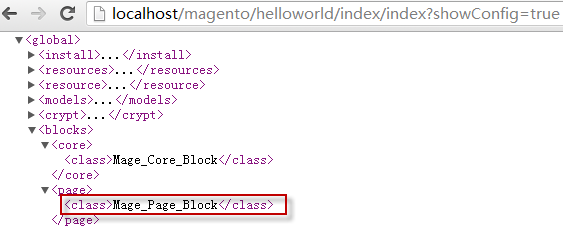
以page/html为例,Magento会首先去依次查找全局配置文件中的global > blocks > page节点(参见Magento开发系列之二 配置文件)
查找到的结果即是上图中的
<page>
<class>Mage_Page_Block</class>
</page>
这里我们就得到了类名的前一部分Mage_Page_Block,然后将第二部分添加到后面就构成了将要实例化的类名Mage_Page_Block_Html。假如我们创建了一个和现有block同名的块文件,新的block会替换原来的实例,我们在前面创建的local.xml就做了这样的替换
<layout version='0.1.0'>
	<default>
		<block type="page/html" name="root" output="toHtml" template="alanhou/helloworld/simple_page.phtml" />
	</default>
</layout>
名为root的block就被我们的创建的block所替换,指向了一个新phtml模板文件。
Reference标签
标签会将会将内部包含的所有XML声明以指定的名称放到现在的block中,它内部包含的节点会被作为所引用的父级block的子block
<layout version=“0.1.0″>
    <default>
        <block type=“page/html” name=“root” output=“toHtml” template=“page/2columns-left.phtml”>
            <!– … sub blocks … –>
        </block>
    </default>
</layout>
放在不同的layout文件中:
<layout version=“0.1.0″>
    <default>
        <reference name=“root”>
            <!– … another sub block … –>
            <block type=“page/someothertype” name=“some.other.block.name” template=“path/to/some/other/template” />
        </reference>
    </default>
</layout>
即便root block是在一个单独的布局XML文件中声明,新添加的block还是作为一个子block。Magento先创建一个名为root的page/html块,之后如果再遇到有对root的引用(reference),就会将新的块some.other.block.name作为root的子block。
Layout文件的生成过程
现在我们对于Layout XML文件已经有了更进一步的了解,但这个XML文件是从哪里来的呢?要解释这个问题就需要引入两个新的概念:指针(Handle)和安装包布局(Package Layout)。
Magento中的每个页面请求都会生成一些指针,我们前面创建的Layoutview模块将有助于形象化的展示这些指针,只需要访问http://localhost/magento/helloworld/index/index?showLayout=handles就会看到类似下面的结果(根据个人配置会略有差别)
Handles For This Request

1. default
2. STORE_default
3. THEME_frontend_rwd_default
4. helloworld_index_index
5. customer_logged_out
以上输出的每一个都是指针,指针可以在Magento系统中的很多地方进行设置,这里我们着重讨论的是default和helloworld_index_index这两个。default指针在每个Magento的请求中都会出现,而helloworld_index_index是拼接了Router名称(helloworld)、Action控制器名称(index)和Action控制器方法名(index)所形成的一个字符串。这也就是说Action控制器中的每个方法都会对应一个指针。
前面我们也讲过在Magento中Action控制器及方法的默认值都是index,所以访问http://localhost/magento/helloworld/?showLayout=handles会输出同样的内容。
那么Package Layout又是什么东东呢?它有点类似于全局配置文件,具体体现为一个包含所有可能出现的布局配置的一个大型XML文件,依然用到Layoutviewer这个模块,这次我们访问http://localhost/magento/helloworld/index/index?showLayout=package,浏览器中会输出一长段XML,这就是安装包布局文件,这个XML文件是通过将当前主题(或称为安装包)中所有的XML布局文件进行组合而得。对于default主题,这些布局文件在app/design/frontend/base/default/layout/中
全局文件中的<frontend><layout><updates /> 和<adminhtml><layout><updates /> 代码段会包含不同区域需要加载的所有文件的节点,配置文件将所有的文件拼接完之后,Magento会添加最后一个xml文件,即local.xml。因而我们可以在这个文件中添加一些自定义代码。
安装包布局文件中会包含一些我们已然熟知的标签,如<block />和<reference />,但都会出现在<default />和<catalogsearch_advanced_index />等标签内。这些标签是指针标签,某一请求的布局文件是通过抓取匹配请求中各指针安装包布局中的各个代码段来生成的。所以上例中,我们的布局文件是由抓取以下代码段中的标签生成的:
1. default
2. STORE_default
3. THEME_frontend_rwd_default
4. helloworld_index_index
5. customer_logged_out
在安装包布局文件中还有另一个需要关注的标签,标签可以包含其它指针标签,比如
<customer_account_index>
    <!– … –>
    <update handle=“customer_account”/>
    <!– … –>
</customer_account_index>
上面代码的意思是在请求中包含customer_account_index指针时,应包含<customer_account />指针中的<block />
具体实践
讲了这么多理论,还是回到前面的例子:
<layout version='0.1.0'>
	<default>
		<block type="page/html" name="root" output="toHtml" template="alanhou/helloworld/simple_page.phtml" />
	</default>
</layout>
这段代码就是我们所添加的local.xml文件,它的主要作用是用一个新的Block来重载root标签。通过将这个block放到指针中将使得系统中的任何一次页面请求都会进行这一重载,这显然不是我们想要的。
访问Magento站点中的任意一页,要么返回一个空白页,要么会显示红色的背景页,那下面我们就对local.xml文件进行修改,让我们的代码只对hello world页面生效。你可能已经猜到,只需要修改指针名称为helloworld_index_index即可
<layout version='0.1.0'>
	<helloworld_index_index>
		<block type="page/html" name="root" output="toHtml" template="alanhou/helloworld/simple_page.phtml" />
	</helloworld_index_index>
</layout>
清除缓存,再重新加载一下其它页面会发现都已恢复正常。现在这段代码只对index这个Action方法有效,如果我们想要对goodye方法也生效的话,就需修改修改该方法
public function goodbyeAction(){
	// echo 'Goodbye World!';
	$this->loadLayout();
	$this->renderLayout();
}
可是这时如何你访问http://localhost/magento/helloworld/index/goodbye会发现并没有什么变化,这是因为我们还没添加一个包含完整action名称(helloworld_index_goodbye)的指针,让我们使用update标签来将local.xml修改为
<layout version='0.1.0'>
	<helloworld_index_index>
		<block type="page/html" name="root" output="toHtml" template="alanhou/helloworld/simple_page.phtml" />
	</helloworld_index_index>
	<helloworld_index_goodbye>
		<update handle="helloworld_index_index" />
	</helloworld_index_goodbye>
</layout>
这时清除缓存再加载一下页面会出现同样的红色背景页面。
输出和getChildHtml
标准配置中,输出从名为root的Block开始(因为它包含一个输出属性),在本例中我们使用如下代码对root进行了重载
template="alanhou/helloworld/simple_page.phtml"
模板引用自当前主题的根文件夹,这里为app/design/frontend/base/default,所以我们需要深入分析一下我们的自定义页面,大多数Magento的模板文件都存储在app/design/frontend/base/default/template中,结合这一段得到如下路径
app/design/frontend/base/default/templates/alanhou/helloworld/simple_page.phtml
仅有红色背景页面不免显得过于单调,下面我们就为页面添加更多的内容,修改local.xml中对应的指针如下
<helloworld_index_index>
	<block type="page/html" name="root" output="toHtml" template="alanhou/helloworld/simple_page.phtml">
		<block type="customer/form_register" name="customer_form_register" template="customer/form/register.phtml" />
	</block>
</helloworld_index_index>
我们在root中又内嵌了一个Block,这是Magento所自带的用户注册表单,通过这一修改,内嵌Block就可以在simple_page.phtml中通过getChildHtml方法来获取到了。在simple_page.phtml的body标签内加入相关内容:
<body>
	<?php echo $this->getChildHtml('customer_form_register'); ?>
</body>
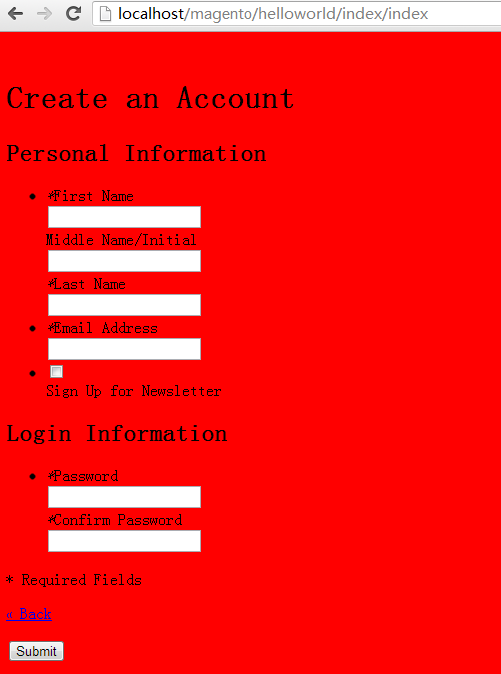
清除缓存再重新访问http://localhost/magento/helloworld/index/index页面就会在红色背景上输出注册表单了
Magento还有一个名为top.links的Block,我们在simple_page.phtml进行添加
<body>

<h1>Links</h1>

	<?php echo $this->getChildHtml('top.links'); ?>
</body>
重新加载页面,会发现只有<h1>Links</h1>进行了输出,但是top.links却没有输出。这是因为我们并没有在local.xml进行添加,getChildHtml方法只能包含在布局文件指定为子Block的块。通过这样做可以在只实例化所需用到的Block,开发者就可以根据不同应用场景为Block设置不同的模板文件。
那么我们在local.xml中添加top.links
<helloworld_index_index>
		<block type="page/html" name="root" output="toHtml" template="alanhou/helloworld/simple_page.phtml">
			<block type="page/template_links" name="top.links" />
			<block type="customer/form_register" name="customer_form_register" template="customer/form/register.phtml" />
		 </block>
	</helloworld_index_index>
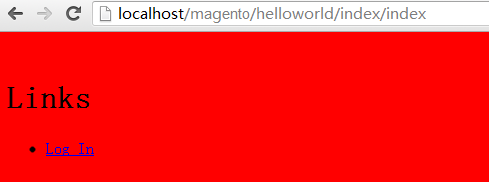
再重新载入页面就会出现top.links模块了
在本节的最后还需要再介绍一个重要的概念,<action />标签。使用<action />标签允许我们调用block类中公有方法,因此我们可以不用替换root block的模板,而只通过调用setTemplate方法就可以了,下面我们将local.xml的内容修改如下:
<layout version="0.1.0">
	<helloworld_index_index>
		<reference name="root">
			<action method="setTemplate">
				<template>alanhou/helloworld/simple_page.phtml</template>
			</action>
			<block type="page/template_links" name="top.links" />
			<block type="customer/form_register" name="customer_form_register" template="customer/form/register.phtml" />
		</reference>
	</helloworld_index_index>
</layout>
以上XML布局文件会先设置模板属性为root block,然后添加两个子block。清除缓存重新访问http://localhost/magento/helloworld/index/index会得到一模一样的结果。使用<action />的好处在于使用之前创建的同一个block实际不会影响到其它的父子block关联,
action方法的变量需要内置在单独的标签子节点中,节点的名称影响不大,但顺序非常重要。上例中我们完全可以将action段代码写成下面这样而丝毫不影响输出
<action method=“setTemplate”>
    <some_new_template>alanhou/helloworld/simple_page.phtml</some_new_template>
</action>
这也说明action的变量节点名完全可以自由定义。


