完整目录请见:Django 3网页开发指南 – 第4版
本章中我们将学习如下内容:
- 编排 base.html模板
- 使用 Django Sekizai
- 在JavaScript中暴露配置
- 使用HTML5 data属性
- 提供响应式图片
- 实现持续滚动
- 在模态对话框中打开对象详情
- 实现Like微件
- 通过Ajax上传图片
引言
静态网站适用于静态内容,如传统文档、在线图书或课程;但如今大部分交互式web应用和平台必须拥有动态组件,才能鹤立鸡群、为访客提供最好的用户体验。本章中,我们将学习在Django中如何使用JavaScript和CSS。我们会使用到Bootstrap 4前端框架来进行响应式布局,以及使用jQuery JavaScript框架来实现更具生产力的脚本。
技术要求
和前面一样,学习本章代码,应当安装最新稳定版本的Python、MySQL或PostgreSQL数据库,以及在虚拟环境中安装Django项目。有些小节会需要用到特定的Python依赖。有些会用到额外的JavaScript库。在对应的小节中会进行说明。
本章中的代码请参见 GitHub 仓库的 Chapter04目录。
译者注:本章中使用到了 PostgreSQL,习惯使用 MySQL的小伙伴们请自行安装配置,同时请记得安装psycopg2
pip install psycopg2-binary
编排 base.html模板
在开始使用模板前,首先要做的是创建一个base.html基础模板,项目中的大部分页面模板对其进行扩展。本小节中,我们将演示如何为多语种HTML5网站创建这种模板,同时顾及响应式。
💡响应式(responsive)网站对所有设备提供相同的基础内容,按视窗进行相应的样式展示,不管使用的是桌面浏览器、平板电脑还是手机。这与自适应(adaptive)网站不同,后者根据user agent来自决定设备类型,然后提供不同的内容、标记,甚至会根据user agent的分类不同而使用不同的功能。
准备工作
在项目中创建templates目录,并在配置文件中添加模板目录,如下所示:
|
1 2 3 4 5 6 7 8 9 10 11 12 13 14 15 16 17 18 |
# myproject/settings/_base.py TEMPLATES = [ { "BACKEND": "django.template.backends.django.DjangoTemplates", "DIRS": [os.path.join(BASE_DIR, "myproject", "templates")], "APP_DIRS": True, "OPTIONS": { "context_processors": [ "django.template.context_processors.debug", "django.template.context_processors.request", "django.contrib.auth.context_processors.auth", "django.contrib.messages.context_processors.messages", "django.template.context_processors.media", "django.template.context_processors.static", ] }, } ] |
如何实现…
按照如下步骤进行操作:
- 在模板根目录下,使用如下内容创建一个base.html文件:
12345678910111213141516171819202122232425262728293031323334{# base.html #}<!doctype html>{% load i18n static %} <html lang="en"><head><meta charset="utf-8" /><meta name="viewport" content="width=device-width, initial-scale=1, shrink-to-fit=no" /><title>{% block head_title %}{% endblock %}</title>{% include "misc/includes/favicons.html" %}{% block meta_tags %}{% endblock %}<link rel="stylesheet" href="https://stackpath.bootstrapcdn.com/bootstrap/4.3.1/css/bootstrap.min.css" integrity="sha384-ggOyR0iXCbMQv3Xipma34MD+dH/1fQ784/j6cY/iJTQUOhcWr7x9JvoRxT2MZw1T" crossorigin="anonymous" /><link rel="stylesheet" href="{% static 'site/css/style.css' %}" crossorigin="anonymous" />{% block css %}{% endblock %}{% block extra_head %}{% endblock %}</head><body>{% include "misc/includes/header.html" %}<div class="container my-5">{% block content %}<div class="row"><div class="col-lg-4">{% block sidebar %}{% endblock %}</div><div class="col-lg-8">{% block main %}{% endblock %}</div></div>{% endblock %}</div>{% include "misc/includes/footer.html" %}<script src="https://code.jquery.com/jquery-3.4.1.min.js" crossorigin="anonymous"></script><script src="https://cdnjs.cloudflare.com/ajax/libs/popper.js/1.14.7/umd/popper.min.js" integrity="sha384-UO2eT0CpHqdSJQ6hJty5KVphtPhzWj9WO1clHTMGa3JDZwrnQq4sF86dIHNDz0W1" crossorigin="anonymous"></script><script src="https://stackpath.bootstrapcdn.com/bootstrap /4.3.1/js/bootstrap.min.js" integrity="sha384-JjSmVgyd0p3pXB1rRibZUAYoIIy6OrQ6VrjIEaFf/nJGzIxFDsf4x0xIM+B07jRM" crossorigin="anonymous"></script>{% block js %}{% endblock %}{% block extra_body %}{% endblock %}</body></html> - 在misc/includes中,创建包含所有版本favicon的模板:
1234{# misc/includes/favicon.html #}{% load static %}<link rel="icon" type="image/png" href="{% static 'site/img/favicon-32x32.png' %}" sizes="32x32"/><link rel="icon" type="image/png" href="{% static 'site/img/favicon-16x16.png' %}" sizes="16x16"/>ℹ️favicon是一个通常会在浏览器标签、最近访问网站的集合或桌面上快捷方式中看到的小图片。可以使用一个在线生成器来使用 logo 生成适用不同用例、浏览器及平台多个版本的favicon。我们常用的favicon生成器有https://favicomatic.com/和https://realfavicongenerator.net/。
- 使用网站的头部和底部创建模板misc/includes/header.html和misc/includes/footer.html。现在可以保持文件的内容为空。
实现原理…
基础模板包含HTML文档的<head> 和 <body>两大版块,其中包含网站中其它页面都将重用的内容。根据网页设计的要求,可以对不同布局建立不同的基础模板。例如,我们可以添加一个base_simple.html文件,在其中包含相同的<head>版块以及最简化的<body>版块,将其用于登录页、密码重置或其它简单页面。也可以对其它布局添加单独的基础模板,如单栏、两栏和三栏布局,每个都继承base.html并按需要重写各版块。
我们来看此前所定义的base.html的详情。以下是<head>版块中的详细说明:
- 我们定义了UTF-8来作为默认编码以支持多语言内容。
- 然后是viewport的定义,它会使用全宽来在浏览器中按比例显示网站。这对于由Bootstrap前端框架所创建具体屏幕布局的小屏设备是非常有益的。
- 当然,在浏览器标签和搜索引擎搜索结果中会有自定义的网站标题。
- 然后是meta标签版块,可用于搜索引擎优化(SEO)、Open Graph和Twitter Cards。
- 之后我们添加了不同格式和大小的favicon。
- 我们还包含默认的Bootstrap和自定义网站样式。加载了Bootstrap CSS,因为我们希望有响应式布局,这样也会对所有元素的基本样式进行统一,来保持跨浏览器中的一致性。
- 最后,有一个可扩展元标签、样式等需要用于<head>版块中的区块。
以下是<body>版块中的详细说明:
- 首先我们添加了网站的头部内容。这里可以放置logo、网站标题和主导航。
- 然后有一个包含内容版块占位的主容器区,这里可通过继承该模板进行填充。
- 在这一容器内有content版块,其中又包含sidebar和main版块。在子模板中,我们需要一个侧边栏布局。我们将会重写sidebar和main版块,但在需要全宽内容时,我们将重写content版块。
- 接着添加了网站的底部。这里可以放置版权信息以及链接到重要信息页面的链接,比如隐私政策、用户条款、联系表单等等。
- 再后我们加载了jQuery和Bootstrap脚本。按照页面加载性能最佳实践在<body>的最后面添加了可扩展的JavaScript版块,这类似于<head>中的样式处理。
- 最后,有针对额外JavaScript和附加HTML的版块,如针对JavaScript的HTML模板或隐藏模态对话框,在本章的稍后将会讨论。
我们所创建的基础模板并非是一个一成不变的模板。可以修改其结构或添加所需的元素,例如针对 body属性的模板区块、Google Analytics代码段、常用JavaScript文件、针对iPhone书签的Apple touch图标、Open Graph元标签、Twitter Card标签、schema.org属性等等。还可以根据项目需求定义其它的版块,甚至是封装整个body内容,以便在子模板中进行重写。
相关内容
- 使用 Django Sekizai一节
- 在JavaScript中暴露配置一节
使用 Django Sekizai
在Django模板中,通常会使用模板继承来重写父模板中的版块来在HTML文档中添加样式或脚本。这表示每个视图的主模板应知晓其内的所有内容;但有时让所包含模板来决定样式和脚本的加载会更为便捷。通过Django Sekizai可进行实现,本节我们就来学习如何使用。
准备工作
在开始本小节的学习前,按照如下步骤来进行准备:
- 在虚拟环境中安装django-classy-tags和django-sekizai(并将它们添加到requirements/_base.txt中):
12(env)$ pip install -e git+https://github.com/divio/django-classy-tags.git@4c94d0354eca1600ad2ead9c3c151ad57af398a4#egg=django-classy-tags(env)$ pip install django-sekizai==1.0.0 - 然后在配置文件的已安装应用中添加sekizai:
123456# myproject/settings/_base.pyINSTALLED_APPS = [#..."sekizai",#...] - 接着在配置文件的模板配置中添加sekizai上下文处理器:
12345678910111213141516171819# myproject/settings/_base.pyTEMPLATES = [{"BACKEND": "django.template.backends.django.DjangoTemplates","DIRS": [os.path.join(BASE_DIR, "myproject", "templates")],"APP_DIRS": True,"OPTIONS": {"context_processors": ["django.template.context_processors.debug","django.template.context_processors.request","django.contrib.auth.context_processors.auth","django.contrib.messages.context_processors.messages","django.template.context_processors.media","django.template.context_processors.static","sekizai.context_processors.sekizai",]},}]
如何实现…
按照如下步骤来完成本小节的学习:
- 在base.html模板的开头加载sekizai_tags库:
123{# base.html #}<!doctype html>{% load i18n static sekizai_tags %} - 还是在该文件中,在<head>版块的最后,添加模板标签{% render_block “css” %}如下:
1234{% block css %}{% endblock %}{% render_block "css" %}{% block extra_head %}{% endblock %}</head> - 然后在<body> 版块的结束处添加模板标签{% render_block “js” %}如下:
1234{% block js %}{% endblock %}{% render_block "js" %}{% block extra_body %}{% endblock %}</body> - 现在,想在任意模板中添加样式或JavaScript时,像下面这样使用{% addtoblock %}模板标签:
123456789{% load static sekizai_tags %}<div>Sample widget</div>{% addtoblock "css" %}<link rel="stylesheet" href="{% static 'site/css/sample-widget.css' %}"/>{% endaddtoblock %}{% addtoblock "js" %}<script src="{% static 'site/js/sample-widget.js' %}"></script>{% endaddtoblock %}
实现原理…
Django Sekizai适用于{% include %} 模板标签所包含的模板、通过模板渲染的自定义模板标签或针对表单组件的模板。模板标签{% addtoblock %}定义了我们想要添加HTML内容的Sekizai版块。
在Sekizai版块中添加内容时,django-sekizai进行仅包含该内容一次的处理。这表示可以有多个同一类型的组件,但它们的CSS和JavaScript都只会加载并执行一次。
相关内容
- 实现Like微件一节
- 通过Ajax上传图片一节
在JavaScript中暴露配置
Django项目的配置放在settings文件中,如用于开发环境的myproject/settings/dev.py;我们在第1章 Django 3.0入门为开发、测试、预发布和生产环境配置设置一节中进行过讲解。其中有些配置值可用于浏览器的功能,因此也需要在JavaScript中进行设置。我们希望在同一处定义项目设置,因此在本小节中,我们将学习如何将一些Django端的配置值传递到浏览器。
准备工作
确保在TEMPLATES[‘OPTIONS’][‘context_processors’] 配置中有请求上下文处理器,如下:
|
1 2 3 4 5 6 7 8 9 10 11 12 13 14 15 16 17 18 |
# myproject/settings/_base.py TEMPLATES = [ { "BACKEND": "django.template.backends.django.DjangoTemplates", "DIRS": [os.path.join(BASE_DIR, "myproject", "templates")], "APP_DIRS": True, "OPTIONS": { context_processors": [ "django.template.context_processors.debug", "django.template.context_processors.request", "django.contrib.auth.context_processors.auth", "django.contrib.messages.context_processors.messages", "django.template.context_processors.media", "django.template.context_processors.static", "sekizai.context_processors.sekizai", ] }, } ] |
如未创建的话,还应创建core应用,并将其添加至配置文件的INSTALLED_APPS中:
|
1 2 3 4 5 |
INSTALLED_APPS = [ #... "myproject.apps.core", #... ] |
如何实现…
按照如下步骤来创建并包含JavaScript配置:
- 在core应用的views.py文件中,创建一个返回JavaScript内容类型的js_settings()视图,如以下代码所示:
1234567891011121314151617181920212223242526272829# myproject/apps/core/views.pyimport jsonfrom django.http import HttpResponsefrom django.template import Template, Contextfrom django.views.decorators.cache import cache_pagefrom django.conf import settingsJS_SETTINGS_TEMPLATE = """window.settings = JSON.parse('{{ json_data|escapejs }}');"""@cache_page(60 * 15)def js_settings(request):data = {"MEDIA_URL": settings.MEDIA_URL,"STATIC_URL": settings.STATIC_URL,"DEBUG": settings.DEBUG,"LANGUAGES": settings.LANGUAGES,"DEFAULT_LANGUAGE_CODE": settings.LANGUAGE_CODE,"CURRENT_LANGUAGE_CODE": request.LANGUAGE_CODE,}json_data = json.dumps(data)template = Template(JS_SETTINGS_TEMPLATE)context = Context({"json_data": json_data})response = HttpResponse(content=template.render(context),content_type="application/javascript; charset=UTF-8",)return response - 在URL配置中插入该视图:
1234567891011121314# myproject/urls.pyfrom django.conf.urls.i18n import i18n_patternsfrom django.urls import include, pathfrom django.conf import settingsfrom django.conf.urls.static import staticfrom myproject.apps.core import views as core_viewsurlpatterns = i18n_patterns(# other URL configuration rules...path("js-settings/", core_views.js_settings, name="js_settings"),)urlpatterns += static(settings.STATIC_URL, document_root=settings.STATIC_ROOT)urlpatterns += static("/media/", document_root=settings.MEDIA_ROOT) - 通过在base.html模板的最后添加该内容来在前台中加载JavaScript视图:
123456789{# base.html #}{# ... #}<script src="{% url 'js_settings' %}"></script>{% block js %}{% endblock %}{% render_block "js" %}{% block extra_body %}{% endblock %}</body></html> - 此时可以像下面这样在任意JavaScript文件中访问具体的配置:
123if (window.settings.DEBUG) {console.warn('The website is running in DEBUG mode!');}
实现原理…
在 js_settings视图中,我们构建了一个希望传递给浏览器的设置字典,转化字典为JSON,渲染解析该JSON的JavaScript的模板并将结果赋值给window.settings 变量。通过将字典转化为JSON字符串并在JavaScript文件中解析,我们不必担心最后一个元素后逗号所带来的问题 – 这在Python中允许使用,但在JavaScript中视作无效。
渲染后的JavaScript文件类似下面这样:
|
1 2 |
# http://127.0.0.1:8000/en/js-settings/ window.settings = JSON.parse('{\u0022MEDIA_URL\u0022: \u0022http://127.0.0.1:8000/media/\u0022, \u0022STATIC_URL\u0022: \u0022/static/20191001004640/\u0022, \u0022DEBUG\u0022: true, \u0022LANGUAGES\u0022: [[\u0022bg\u0022, \u0022Bulgarian\u0022], [\u0022hr\u0022, \u0022Croatian\u0022], [\u0022cs\u0022, \u0022Czech\u0022], [\u0022da\u0022, \u0022Danish\u0022], [\u0022nl\u0022, \u0022Dutch\u0022], [\u0022en\u0022, \u0022English\u0022], [\u0022et\u0022, \u0022Estonian\u0022], [\u0022fi\u0022, \u0022Finnish\u0022], [\u0022fr\u0022, \u0022French\u0022], [\u0022de\u0022, \u0022German\u0022], [\u0022el\u0022, \u0022Greek\u0022], [\u0022hu\u0022, \u0022Hungarian\u0022], [\u0022ga\u0022, \u0022Irish\u0022], [\u0022it\u0022, \u0022Italian\u0022], [\u0022lv\u0022, \u0022Latvian\u0022], [\u0022lt\u0022, \u0022Lithuanian\u0022], [\u0022mt\u0022, \u0022Maltese\u0022], [\u0022pl\u0022, \u0022Polish\u0022], [\u0022pt\u0022, \u0022Portuguese\u0022], [\u0022ro\u0022, \u0022Romanian\u0022], [\u0022sk\u0022, \u0022Slovak\u0022], [\u0022sl\u0022, \u0022Slovene\u0022], [\u0022es\u0022, \u0022Spanish\u0022], [\u0022sv\u0022, \u0022Swedish\u0022]], \u0022DEFAULT_LANGUAGE_CODE\u0022: \u0022en\u0022, \u0022CURRENT_LANGUAGE_CODE\u0022: \u0022en\u0022}'); |
相关内容
- 第1章 Django 3.0入门为开发、测试、预发布和生产环境配置设置一节
- 编排 base.html模板一节
- 使用HTML5 data属性一节
使用HTML5 data属性
HTML5中引入了data-*属性用解析来自网页服务器中的具体HTML元素为JavaScript和CSS。在本小节中,我们将学习一种有效把Django中数据添加到HTML5数据属性中的方式,然后用实例讲解如何在JavaScript中读取这些数据:我们将渲染带有具体地理位置标记的Google Map;在点击标记时,将会在信息窗口中显示该地址。
准备工作
按照如下步骤来进行准备:
- 在本章及接下来的章节中使用带有PostGIS插件的PostgreSQL数据库。要了解如何安装PostGIS插件,请参阅官方文档。
- 确保在Django项目中使用了postgis数据库后台:
1234567891011# myproject/settings/_base.pyDATABASES = {"default": {"ENGINE": "django.contrib.gis.db.backends.postgis","NAME": get_secret("DATABASE_NAME"),"USER": get_secret("DATABASE_USER"),"PASSWORD": get_secret("DATABASE_PASSWORD"),"HOST": "localhost","PORT": "5432",}} - 创建带有Location模型的locations应用。它将包含一个UUID主键、Char 字段名称、街道地址、城市、国家和邮编,PostGIS相关的Geoposition字段以及Description文本字段:
12345678910111213141516171819202122232425262728293031323334353637# myproject/apps/locations/models.pyimport uuidfrom collections import namedtuplefrom django.contrib.gis.db import modelsfrom django.urls import reversefrom django.conf import settingsfrom django.utils.translation import gettext_lazy as _from myproject.apps.core.models import (CreationModificationDateBase, UrlBase)COUNTRY_CHOICES = getattr(settings, "COUNTRY_CHOICES", [])Geoposition = namedtuple("Geoposition", ["latitude", "longitude"])class Location(CreationModificationDateBase, UrlBase):uuid = models.UUIDField(primary_key=True, default=None, editable=False)name = models.CharField(_("Name"), max_length=200)description = models.TextField(_("Description"))street_address = models.CharField(_("Street address"), max_length=255, blank=True)street_address2 = models.CharField(_("Street address (2nd line)"), max_length=255, blank=True)postal_code = models.CharField(_("Postal code"), max_length=255, blank=True)city = models.CharField(_("City"), max_length=255, blank=True)country = models.CharField(_("Country"), choices=COUNTRY_CHOICES, max_length=255,blank=True)geoposition = models.PointField(blank=True, null=True)class Meta:verbose_name = _("Location") verbose_name_plural = _("Locations")def __str__(self): return self.namedef get_url_path(self):return reverse("locations:location_detail", kwargs={"pk": self.pk}) - 重写save()方法来在创建地点时生成唯一UUID字段:
1234def save(self, *args, **kwargs):if self.pk is None:self.pk = uuid.uuid4()super().save(*args, **kwargs) - 创建方法来以一个字符串获取地点的完整地址:
123456789101112131415161718192021222324252627282930def get_field_value(self, field_name):if isinstance(field_name, str):value = getattr(self, field_name)if callable(value):value = value()return valueelif isinstance(field_name, (list, tuple)):field_names = field_namevalues = []for field_name in field_names:value = self.get_field_value(field_name)if value:values.append(value)return " ".join(values)return ""def get_full_address(self):field_names = ["name","street_address","street_address2",("postal_code", "city"),"get_country_display",]full_address = []for field_name in field_names:value = self.get_field_value(field_name)if value:full_address.append(value)return ", ".join(full_address) - 创建函数来通过纬度和经度来设置地理位置,在数据中,地理位置保存为一个Point字段。我们可以使用在Django shell、表单、管理命令、数据迁移和其它地方使用这些函数:
1234567891011def get_geoposition(self):print(self.geoposition)if not self.geoposition:return Nonereturn Geoposition(self.geoposition.coords[0], self.geoposition.coords[1])def set_geoposition(self, latitude, longitude):from django.contrib.gis.geos import Pointself.geoposition = Point(latitude, longitude, srid=4326) - 在更新模型后别忘记生成并运行迁移。
- 创建模型管理后台来添加及修改地点。这里不使用标准的ModelAdmin,而是使用gis应用中的OSMGeoAdmin。它会使用OpenStreetMap来渲染一个地图来设置地理位置,参见https://www.openstreetmap.org:
1234567# myproject/apps/locations/admin.pyfrom django.contrib.gis import adminfrom .models import Location@admin.register(Location)class LocationAdmin(admin.OSMGeoAdmin):pass - 在后台中添加一些位置以供今后使用。
我们还将在后续小节中使用并改进这一locations应用。
译者注:1、django.core.exceptions.ImproperlyConfigured: Could not find the GDAL library…
其它平台参见官方文档
Postgis也可通过 Stack Builder(Spatial Extensions) 来进行安装
2、TemplateDoesNotExist gis/admin/osm.html
在INSTALLED_APPS中添加 ‘django.contrib.gis’
如何实现…
执行如下步骤:
- 注册Google Maps API密钥。可以参照Google开发者文档了解如何操作。
- 在secrets中添加Google Maps API密钥,然后在设置中进行读取:
123# myproject/settings/_base.py#...GOOGLE_MAPS_API_KEY = get_secret("GOOGLE_MAPS_API_KEY") - 在core应用中,创建上下文处理器来将GOOGLE_MAPS_API_KEY暴露到模板中:
1234567# myproject/apps/core/context_processors.pyfrom django.conf import settingsdef google_maps(request):return {"GOOGLE_MAPS_API_KEY": settings.GOOGLE_MAPS_API_KEY,} - 在模板配置中引用这一上下文处理器:
123456789101112131415161718192021# myproject/settings/_base.pyTEMPLATES = [{"BACKEND": "django.template.backends.django.DjangoTemplates","DIRS": [os.path.join(BASE_DIR, "myproject", "templates")],"APP_DIRS": True,"OPTIONS": {"context_processors":["django.template.context_processors.debug","django.template.context_processors.request","django.contrib.auth.context_processors.auth","django.contrib.messages.context_processors.messages","django.template.context_processors.media","django.template.context_processors.static","sekizai.context_processors.sekizai","myproject.apps.core.context_processors.google_maps",]},}] - 对地点创建列表及详情视图:
1234567891011# myproject/apps/locations/views.pyfrom django.views.generic import ListView, DetailViewfrom .models import Locationclass LocationList(ListView):model = Locationpaginate_by = 10class LocationDetail(DetailView):model = Locationcontext_object_name = "location" - 对locations应用创建URL配置:
12345678# myproject/apps/locations/urls.pyfrom django.urls import pathfrom .views import LocationList, LocationDetailurlpatterns = [path("", LocationList.as_view(), name="location_list"),path("<uuid:pk>/", LocationDetail.as_view(), name="location_detail"),] - 在项目的URL配置中包含地点的URL:
12345678910111213141516171819# myproject/urls.pyfrom django.contrib import adminfrom django.conf.urls.i18n import i18n_patternsfrom django.urls import include, pathfrom django.conf import settingsfrom django.conf.urls.static import staticfrom django.shortcuts import redirectfrom myproject.apps.core import views as core_viewsurlpatterns = i18n_patterns(path("", lambda request: redirect("locations:location_list")),path("admin/", admin.site.urls),path("accounts/", include("django.contrib.auth.urls")),path("locations/", include(("myproject.apps.locations.urls", "locations"), namespace="locations")),path("js-settings/", core_views.js_settings, name="js_settings"),)urlpatterns += static(settings.STATIC_URL, document_root=settings.STATIC_ROOT)urlpatterns += static("/media/", document_root=settings.MEDIA_ROOT) - 是时候创建用于地点列表和详情视图的模板了。地点列表现在尽量保持简化,我们只需要能够浏览地点并获取地点详情视图即可。
123456789101112131415{# locations/location_list.html #}{% extends "base.html" %}{% load i18n %}{% block content %}<h1>{% trans "Interesting Locations" %}</h1>{% if object_list %}<ul>{% for location in object_list %}<li><a href="{{ location.get_url_path }}"> {{ location.name }}</a></li>{% endfor %}</ul>{% else %}<p>{% trans "There are no locations yet." %}</p>{% endif %}{% endblock %} - 接下来,我们通过继承 base.html并重写content版块来创建一个地点详情的模板:
123456789101112131415{# locations/location_detail.html #}{% extends "base.html" %}{% load i18n static %}{% block content %}<a href="{% url 'locations:location_list' %}">{% trans "Interesting Locations" %}</a><h1 class="map-title">{{ location.name }}</h1><div class="my-3">{{ location.description|linebreaks|urlize }}</div>{% with geoposition=location.get_geoposition %}<div id="map" class="mb-3" data-latitude="{{ geoposition.latitude|stringformat:'f' }}" data-longitude="{{ geoposition.longitude|stringformat:"f" }}" data-address="{{ location.get_full_address }}"></div>{% endwith %}{% endblock %} - 同时在同一模板中,重写js版块:
1234{% block js %}<script src="{% static 'site/js/location_detail.js' %}"></script><script async defer src="https://maps-api-ssl.google.com/maps/api/js?key={{ GOOGLE_MAPS_API_KEY }}&callback=Location.init"></script>{% endblock %} - 像模板一样,我们需要能够读取HTML5 data属性的JavaScript文件并使用它们来渲染带有标记的地图:
12345678910111213141516171819202122232425262728293031323334353637383940414243444546474849505152535455565758596061626364/* site_static/site/js/location_detail.js */(function(window) {"use strict";function Location() {this.case = document.getElementById("map");if (this.case) {this.getCoordinates();this.getAddress();this.getMap();this.getMarker();this.getInfoWindow();}}Location.prototype.getCoordinates = function() {this.coords = {lat: parseFloat(this.case.getAttribute("data-latitude")),lng: parseFloat(this.case.getAttribute("data-longitude"))};};Location.prototype.getAddress = function() {this.address = this.case.getAttribute("data-address");};Location.prototype.getMap = function() {this.map = new google.maps.Map(this.case, {zoom: 15,center: this.coords});};Location.prototype.getMarker = function() {this.marker = new google.maps.Marker({position: this.coords,map: this.map});};Location.prototype.getInfoWindow = function() {var self = this;var wrap = this.case.parentNode;var title = wrap.querySelector(".map-title").textContent;this.infoWindow = new google.maps.InfoWindow({content: "<h3>"+title+"</h3><p>"+this.address+"</p>"});this.marker.addListener("click", function() {self.infoWindow.open(self.map, self.marker);});};var instance;Location.init = function() {// called by Google Maps service automatically once loaded// but is designed so that Location is a singletonif (!instance) {instance = new Location();}};// expose in the global namespacewindow.Location = Location;}(window)); - 要让地图美观的显示,我需要使用一些CSS,如以下代码所示:
123456789101112/* site_static/site/css/style.css */#map {box-sizing: padding-box;height: 0;padding-bottom: calc(9 / 16 * 100%); /* 16:9 aspect ratio */width: 100%;}@media screen and (max-width: 480px) {#map {display: none; /* hide on mobile devices (esp. portrait) */}}
实现原理…
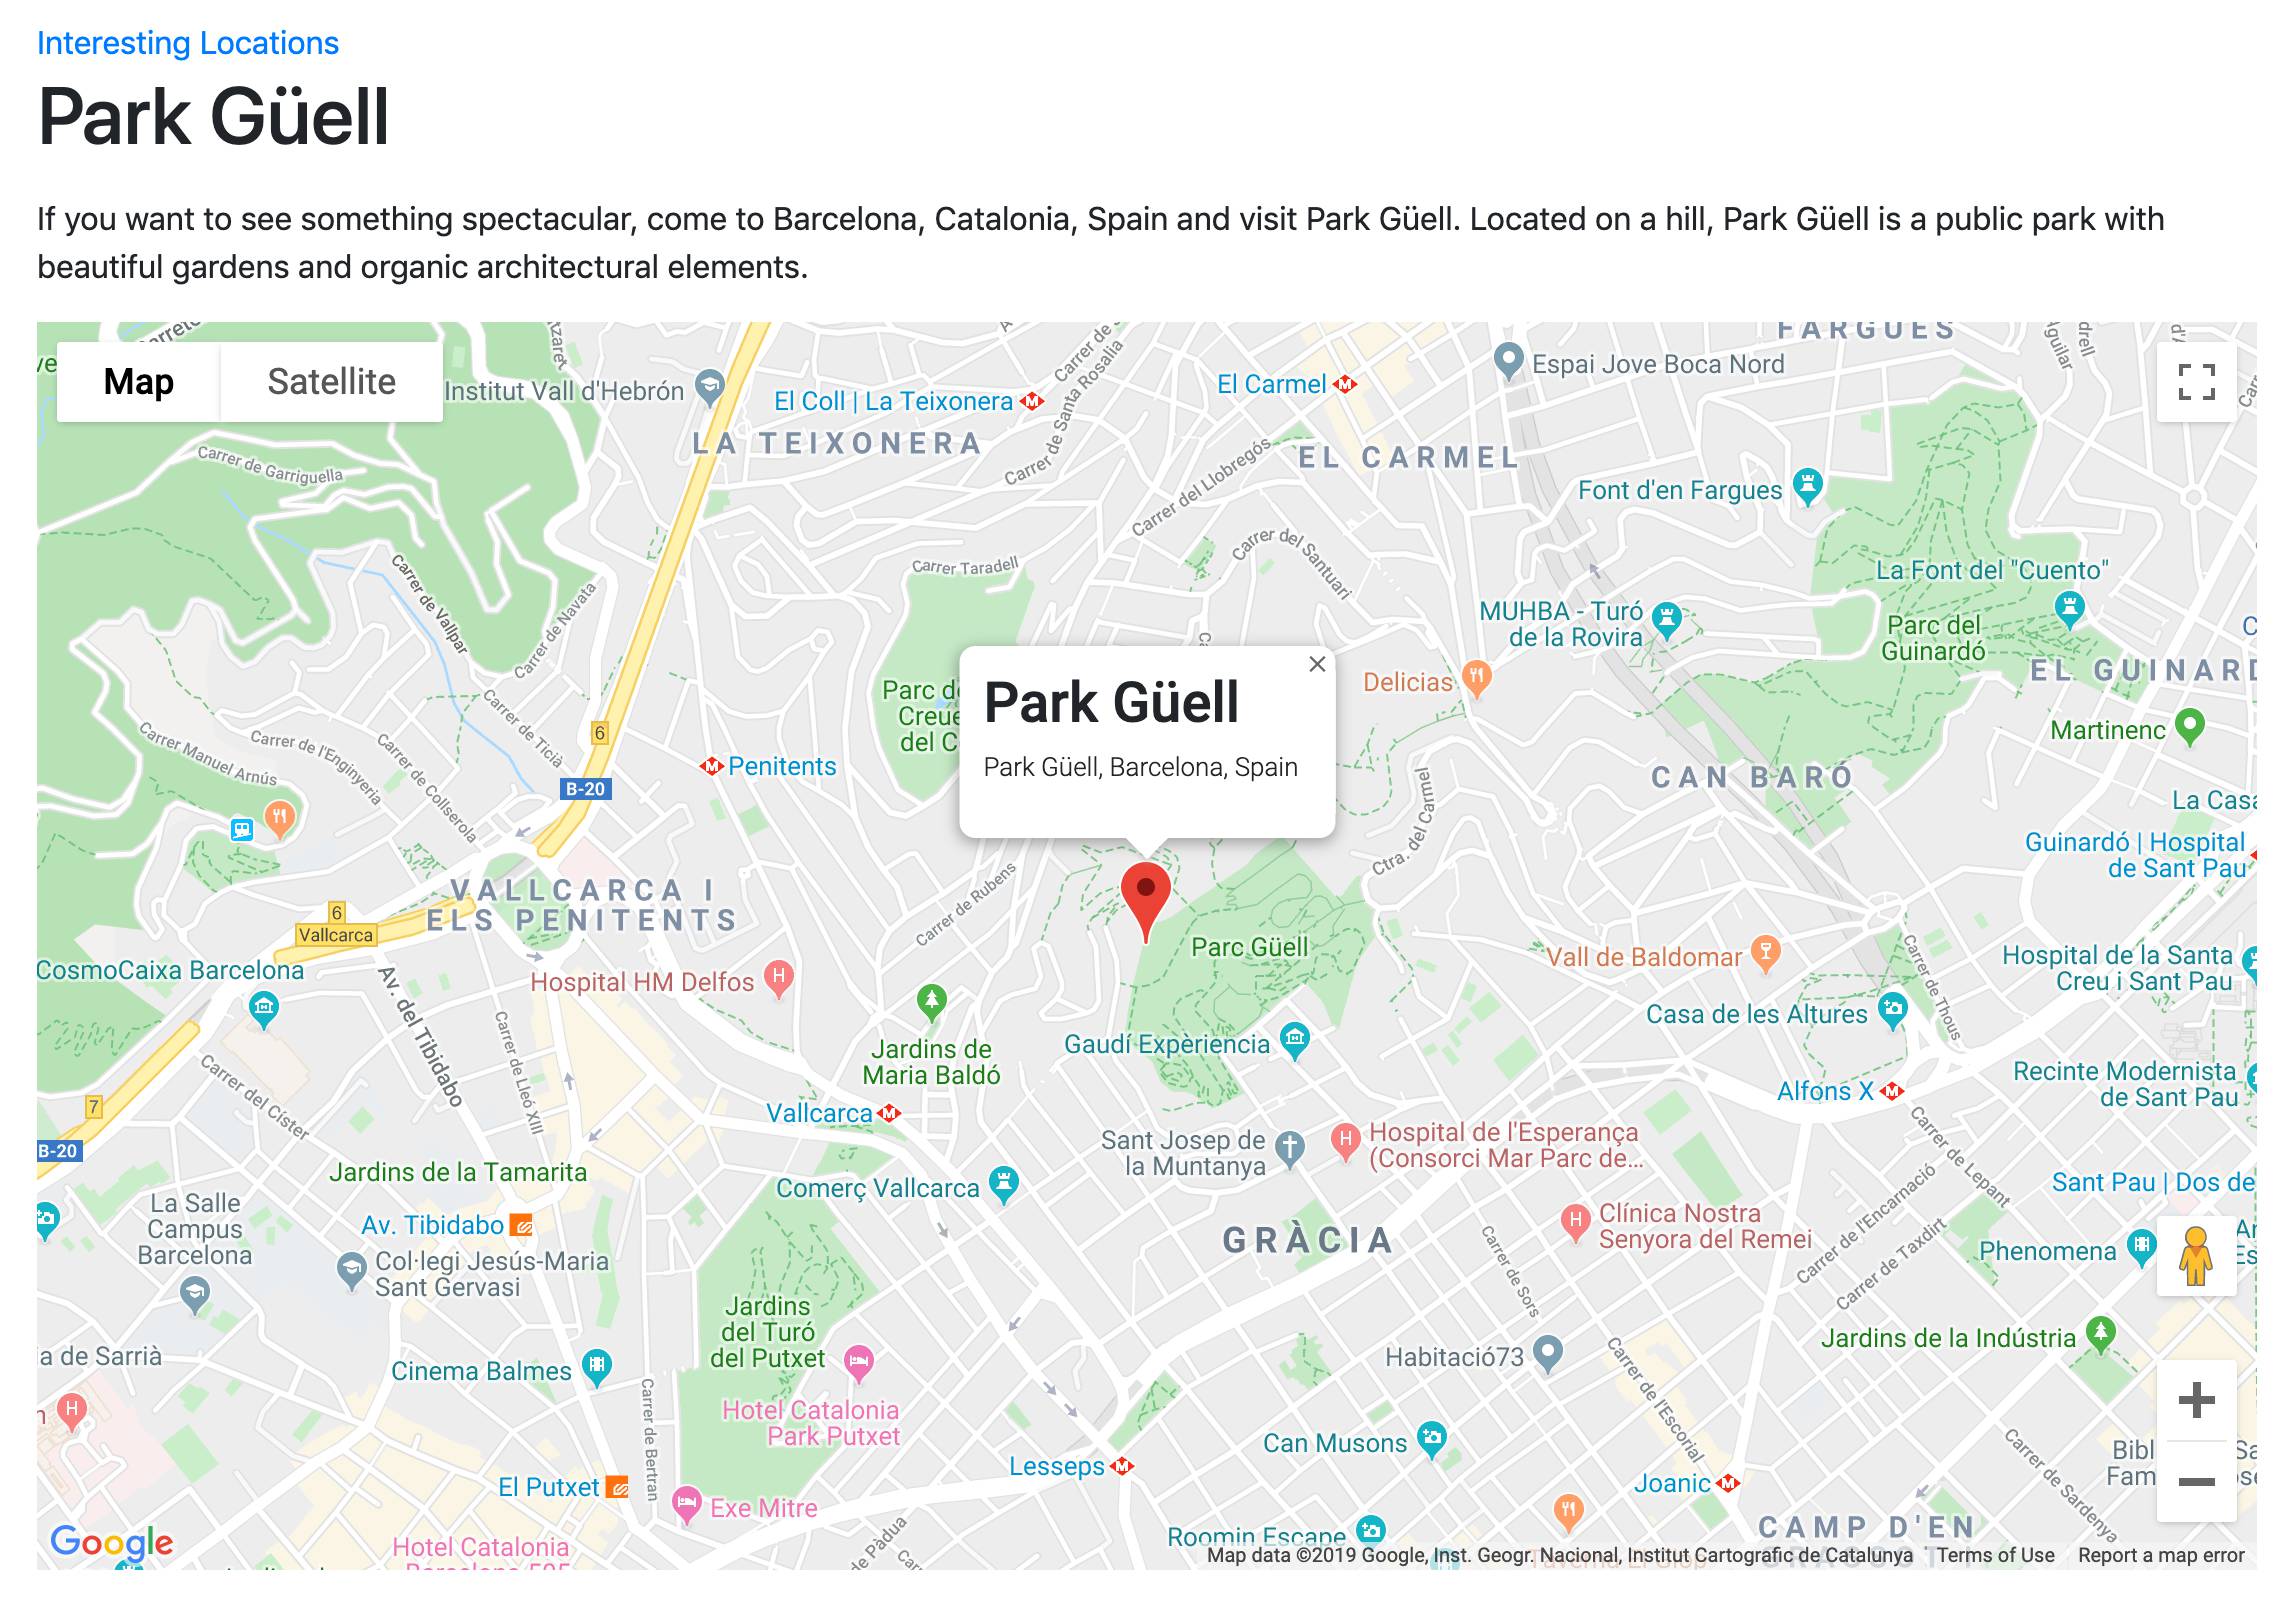
如果运行本地开发服务器并浏览地点的详情视图,会浏览到带有地图及标记的页面。而在点击标记时,会弹出地址信息。像下面这样:
移动设备因滚动叠加的原因而无法地图中滚动,我们选择在小屏(宽度小于480 px)上隐藏地图,因而在缩小屏幕时,地图最终会不可见,如下所示:
我们再看一下代码。在前几步中,我们添加了Google Maps API 密钥并对所有模板进行了暴露。然后我们创建了视图来浏览地点并将它们插入到了URL配置中。接着创建了一个列表及详情模板。
ℹ️DetailView的默认template_name为小写版本的模型名,加上detail;因此我们的模板文件名为location_detail.html。如果希望使用其它的模板,可以在视图中指定template_name属性。同理,ListView的默认template_name为小写版本的模型名,加上list,因而名称为location_list.html。
在详情模板中,id=”map”的<div>元素后面接地点标题和描述,以及data-latitude、data-longitude和data-address属性。这些共同组成了content版块的元素。<body>最后面的js版块中添加了两个<script>标签,一个是后面会讲到的location_detail.js,另一个是Google Maps API脚本,对其传递Maps API密钥以及API加载时的回调函数名称。
在JavaScript文件中,我们使用prototype函数创建了一个Location类。该函数有一个静态init()方法,给定为Google Maps API的回调函数。在调用init()时,会调用该构造函数来创建单个Location实例。在构造函数中,采取了一系列步骤来设置地图及其功能:
- 首先通过ID找到map的壳(容器)。仅在找到元素时才会继续。
- 然后,我们使用data-latitude和data-longitude属性来查找地理坐标,将它们存储为字典来作为地点的坐标。这一对象是Google Maps API所能识别的形式,在稍后使用。
- 下面读取data-address,并将其直接存储为地点的地址属性。
- 现在我们进行构建,从地图开始。要确保地点可见,我们使用之前从数据属性中拉取的坐标作为中点。
- 标记会让地点在地图上更明显,位置使用同样的坐标。
- 最后,我们构建信息容器,这是一种使用API直接在地图上显示的气泡弹窗。除此前获取的地址外,我们还根据模板中指定的.map-title类来查找地点标题。它会在窗口中以<h1>标题进行添加,后接为<p>段落的地址。为能显示该窗口,我们对标记添加了一个点击事件监听器来打开该窗口。
相关内容
- 在JavaScript中暴露配置
- 编排 base.html模板
- 提供响应式图片
- 在模态对话框中打开对象详情
- 第6章 模型管理中的在修改表单中插入地图一节
提供响应式图片
响应式网站已成为常规操作,在对移动设备和台式机提供同样内容时浮现出了很多性能问题。一种在小屏设备上降低负载时间的简易方式是提供更小的图片。这正是响应式图片的核心组件srcset和sizes属性发光发热的地方。
准备工作
我们使用前一小节中的locations应用。
如何实现…
按照如下步骤来添加响应式图片:
- 首先在虚拟环境中安装django-imagekit并添加到requirements/_base.txt.中。我们使用它来将原始图片修改为指定尺寸:
1(env)$ pip install django-imagekit==4.0.2 - 在设置文件的INSTALLED_APPS中添加 imagekit:
123456# myproject/settings/_base.pyINSTALLED_APPS = [#..."imagekit",#...] - 在models.py文件的开头处,导入一些用于图片版本的库、并定义一个用于图片文件目录和文件名的函数:
12345678910111213# myproject/apps/locations/models.pyimport contextlibimport os#...from imagekit.models import ImageSpecFieldfrom pilkit.processors import ResizeToFill#...def upload_to(instance, filename):now = timezone_now()base, extension = os.path.splitext(filename)extension = extension.lower()return f"locations/{now:%Y/%m}/{instance.pk}{extension}" - 此时对定义图片版本相同文件中的Location模型添加picture字段:
1234567891011121314151617class Location(CreationModificationDateBase, UrlBase):#...picture = models.ImageField(_("Picture"), upload_to=upload_to)picture_desktop = ImageSpecField(source="picture",processors=[ResizeToFill(1200, 600)],format="JPEG",options={"quality": 100},)picture_tablet = ImageSpecField(source="picture", processors=[ResizeToFill(768, 384)],format="PNG")picture_mobile = ImageSpecField(source="picture", processors=[ResizeToFill(640, 320)],format="PNG") - 然后对Location模型重写delete()方法来在删除模型实例时删除所生成的版本文件:
1234567891011def delete(self, *args, **kwargs):from django.core.files.storage import default_storageif self.picture:with contextlib.suppress(FileNotFoundError):default_storage.delete(self.picture_desktop.path)default_storage.delete(self.picture_tablet.path)default_storage.delete(self.picture_mobile.path)self.picture.delete()super().delete(*args, **kwargs) - 添加并运行迁移来在数据库模式中添加新的图片字段。
- 更新地点详情模板来包含图片:
12345678910111213141516171819202122232425262728{# locations/location_detail.html #}{% extends "base.html" %}{% load i18n static %}{% block content %}<a href="{% url "locations:location_list" %}">{% trans "Interesting Locations" %}</a><h1 class="map-title">{{ location.name }}</h1>{% if location.picture %}<picture class="img-fluid"><sourcemedia="(max-width: 480px)"srcset="{{ location.picture_mobile.url }}" /><sourcemedia="(max-width: 768px)"srcset="{{ location.picture_tablet.url }}" /><imgsrc="{{ location.picture_desktop.url }}"alt="{{ location.name }}"class="img-fluid"/></picture>{% endif %}{# ... #}{% endblock %}{% block js %}{# ... #}{% endblock %} - 最后,在后台中对地点添加这些图片。
实现原理…
响应式图片很强大,并且底层在于根据展示图片显示设备特性的media规则来提供不同的图片。我们首先做的是添加django-imageki应用,这让其可以实时按需生成不同的图片。
很明显我们还需要原始图片,因此在Location模型中,我们添加了一个名为picture的图片字段。在 upload_to()函数中, 我们通过年月和地点的UUID以及上传文件的扩展名构建了upload路径和文件名。我们还像下面这样定义了图片版本规格:
- picture_desktop尺寸为1,200 x 600,用于桌面电脑布局
- picture_tablet的尺寸为768 x 384,用于平板电脑
- picture_mobile的尺寸为640 x 320,用于智能手机
在地点的delete() 方法中,我们查看picture字段是否有值,然后在删除地点本身前会去删除该字段以及各图片版本。在磁盘上找不到文件时我们使用contextlib.suppress(FileNotFoundError)来静默地忽略错误。
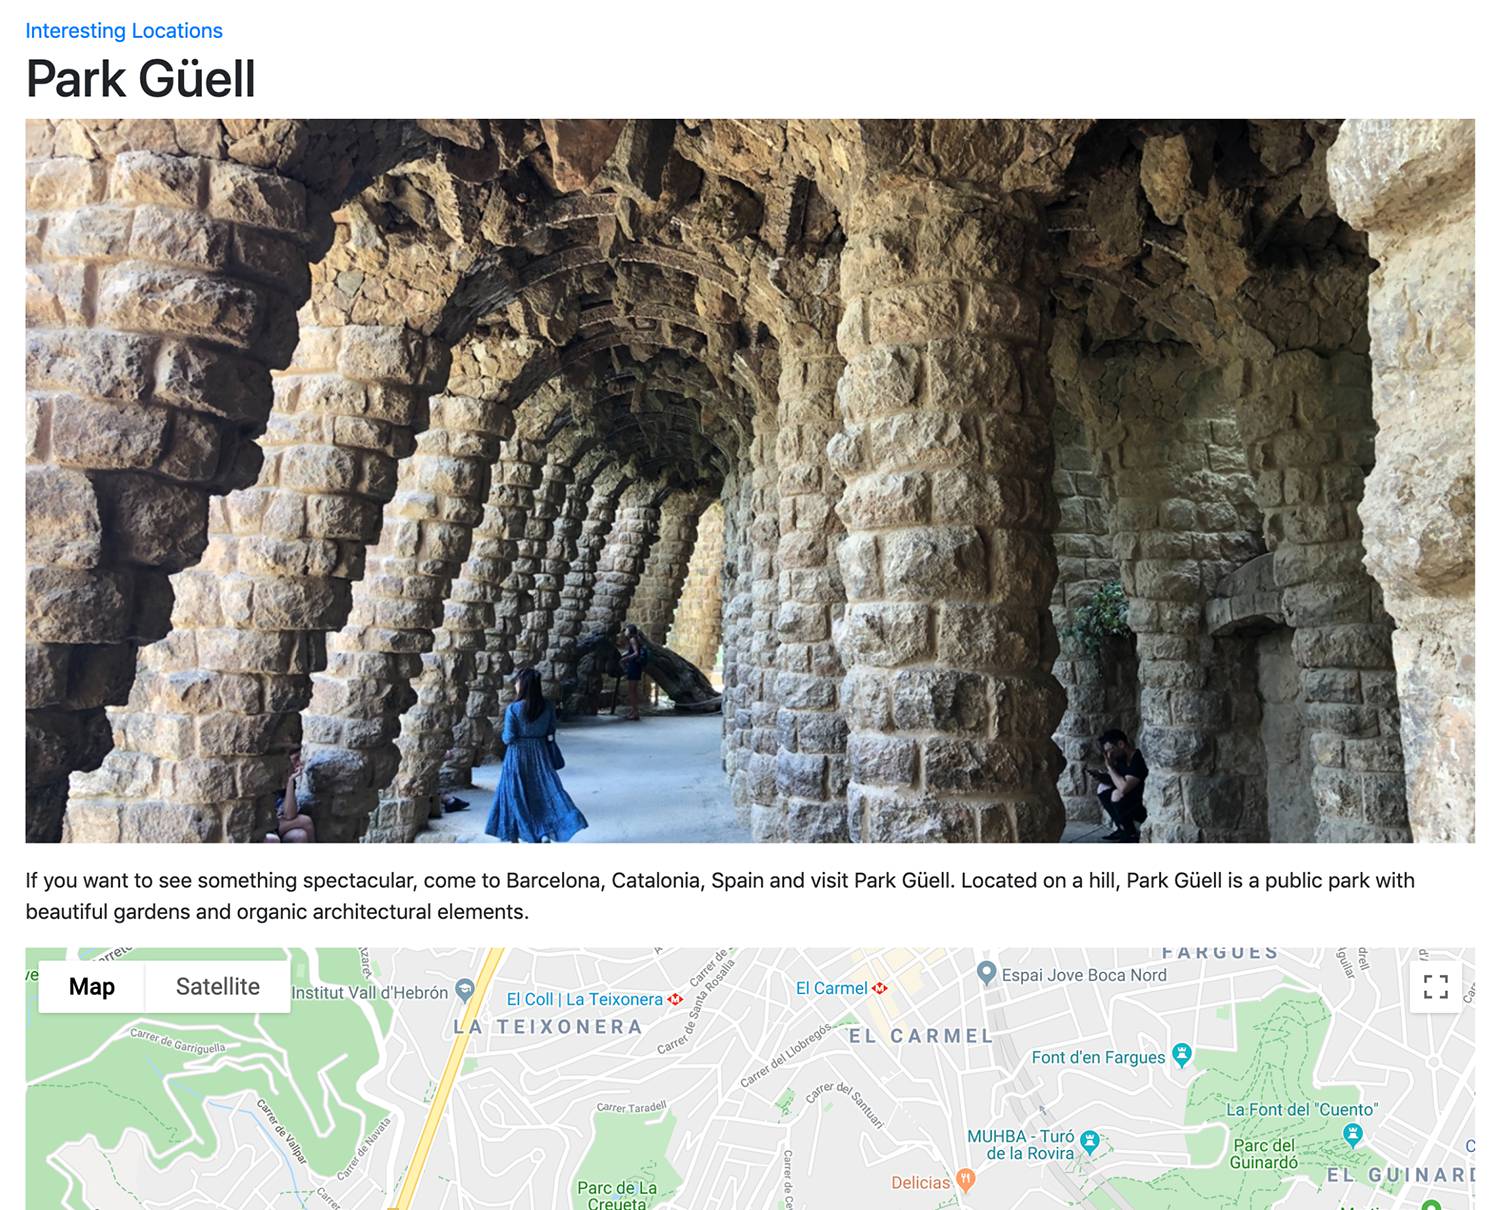
最有趣的部分在模板中。在地点的图片存在时,我们构建<picture>元素。表面上这基本是一个容器。而事实上其中除去现在模板尾部的<img>外里面没有其它内容,但其用处很大。除默认图片外,我们还生成了其它大小的缩略图 – 480 px 和 768 px,它们用于构建额外的<source>元素。每个<source>元素具有media规则条件,根据条件在srcset属性值中选择图片。本例中,我们仅为每个<source>提供了一张图片。地点详情页面此时会在地图上包含图片,如下图所示:
在浏览器加载标记时,会按照一系列步骤来决定加载哪张图片:
- 轮流检查每个<source>的media规则,查看其中是否有匹配当前视窗的
- 在规则匹配时读取srcset并加载和显示相应的图片URL
- 如无规则匹配,那最终使用src,加载默认图片
结果是在较小的视窗中会加载较小的图片。例如,这里我们可以看到仅375 px宽的视窗会加载最小的图片:
对于完全无法识别<picture> 和 <source>的浏览器,还是能加载默认图片,那样与普通的<img>并没有什么区别。
扩展知识…
不仅可以使用响应式图片来提供目标图片尺寸,也可以区分像素密度来提供对给定视窗尺寸设计所显式剪切的图片。这被称之为art direction。如果想要了解,请阅读Mozilla开发者网络(MDN)上有关该主题的文章,点击访问。
相关内容
- 编排 base.html模板一节
- 使用HTML5 data属性一节
- 在模态对话框中打开对象详情一节
- 第6章 模型管理在修改表单中插入地图一节
实现持续滚动
社交网站常常会有持续滚动的功能,可以通过无限下拉滚动来实现翻页功能。这种方式不是通过链接来单独获取更多的内容集合,而是一个子项长列表,在页面下拉滚动时,加载新项并自动加入到页面底部。本小节中,我们将学习如何通过Django和 jScroll jQuery 插件来实现这一功能。
ℹ️可以通过https://jscroll.com/下载jScroll脚本并阅读有关该插件的文档。
准备工作
我们将复用前面小节中所创建的locations应用。
为了让列表视图中显示的内容更为丰富,我们在Location模型中添加一个rating字段,如下:
|
1 2 3 4 5 6 7 8 9 10 11 12 13 |
# myproject/apps/locations/models.py #... RATING_CHOICES = ((1, "★☆☆☆☆"), (2, "★★☆☆☆"), (3, "★★★☆☆"), (4, "★★★★☆"), (5, "★★★★★")) class Location(CreationModificationDateBase, UrlBase): #... rating = models.PositiveIntegerField( _("Rating"), choices=RATING_CHOICES, blank=True, null=True ) #... def get_rating_percentage(self): return self.rating * 20 if self.rating is not None else None |
get_rating_percentage()方法用于以百分比形式返回评分。
别忘了迁移操作,然后在后台中对地点添加评级。
如何实现…
按照如下步骤来创建持续滚动页面:
- 首先在后台中添加足够多的地点。参照使用HTML5 data属性一节,我们会添加一个每页10项的LocationList视图,因此至少需要11个地点来验证持续滚动的效果。
- 修改地点列表视图的模板如下:
123456789101112131415161718192021222324252627282930313233343536373839404142434445{# locations/location_list.html #}{% extends "base.html" %}{% load i18n static utility_tags %}{% block content %}<div class="row"><div class="col-lg-8"><h1>{% trans "Interesting Locations" %}</h1>{% if object_list %}<div class="item-list">{% for location in object_list %}<a href="{{ location.get_url_path }}" class="item d-block my-3"><div class="card"><div class="card-body"><div class="float-right"><div class="rating" aria-label="{% blocktrans with stars=location.rating %} {{ stars }} of 5 stars {% endblocktrans %}"><span style="width:{{ location.get_rating_percentage }}%"></span></div></div><p class="card-text">{{ location.name }}<br/><small>{{ location.city }},{{location.get_country _display }}</small></p></div></div></a>{% endfor %}{% if page_obj.has_next %}<div class="text-center"><div class="loading-indicator"></div></div><p class="pagination"><a class="next-page" href="{% modify_query page=page_obj.next_page_number %}">{% trans "More..." %}</a></p>{% endif %}</div>{% else %}<p>{% trans "There are no locations yet." %}</p>{% endif %}</div><div class="col-lg-4">{% include "locations/includes/navigation.html" %} </div></div>{% endblock %} - 在同一个模板文件中,使用如下代码重写css和js代码块:
1234567{% block css %}<link rel="stylesheet" type="text/css" href="{% static 'site/css/rating.css' %}">{% endblock %}{% block js %}<script src="https://cdnjs.cloudflare.com/ajax/libs/jscroll/2.3.9/jquery.jscroll.min.js"></script><script src="{% static 'site/js/list.js' %}"></script>{% endblock %} - 模板中的最后一步是用JavaScript重写extra_body版块来添加加载中的图标:
1234567{% block extra_body %}<script type="text/template" class="loader"><div class="text-center"><div class="loading-indicator"></div></div></script>{% endblock %} - 创建页面导航地址为locations/includes/navigation.html。目前保持为空即可。
- 下一步添加JavaScript初始化持续滚动组件:
123456789101112/* site_static/site/js/list.js */jQuery(function ($) {var $list = $('.item-list');var $loader = $('script[type="text/template"].loader');$list.jscroll({loadingHtml: $loader.html(),padding: 100,pagingSelector: '.pagination',nextSelector: 'a.next-page:last',contentSelector: '.item,.pagination'});}); - 最后,我添加一些CSS来让评分显示为对用户更友好的星标,而不是干巴巴的数字:
12345678910111213141516171819202122232425262728293031323334353637/* site_static/site/css/rating.css */.rating {color: #c90;display: block;position: relative;margin: 0;padding: 0;white-space: nowrap;}.rating span {color: #fc0;display: block;position: absolute;overflow: hidden;top: 0;left: 0;bottom: 0;white-space: nowrap;}.rating span:before, .rating span:after {display: block;position: absolute;overflow: hidden;left: 0;top: 0;bottom: 0;}.rating:before {content: "☆☆☆☆☆";}.rating span:after {content: "★★★★★";} - 在网站主样式文件中,添加加载中的样式:
123456789101112131415161718192021222324/* site_static/site/css/style.css *//* ... */.loading-indicator {display: inline-block; width: 45px;height: 45px;}.loading-indicator:after {content: "";display: block;width: 40px;height: 40px;border-radius: 50%;border: 5px solid rgba(0,0,0,.25);border-color: rgba(0,0,0,.25) transparent rgba(0,0,0,.25) transparent;animation: dual-ring 1.2s linear infinite;}@keyframes dual-ring {0% {transform: rotate(0deg);}100% {transform: rotate(360deg);}}
实现原理…
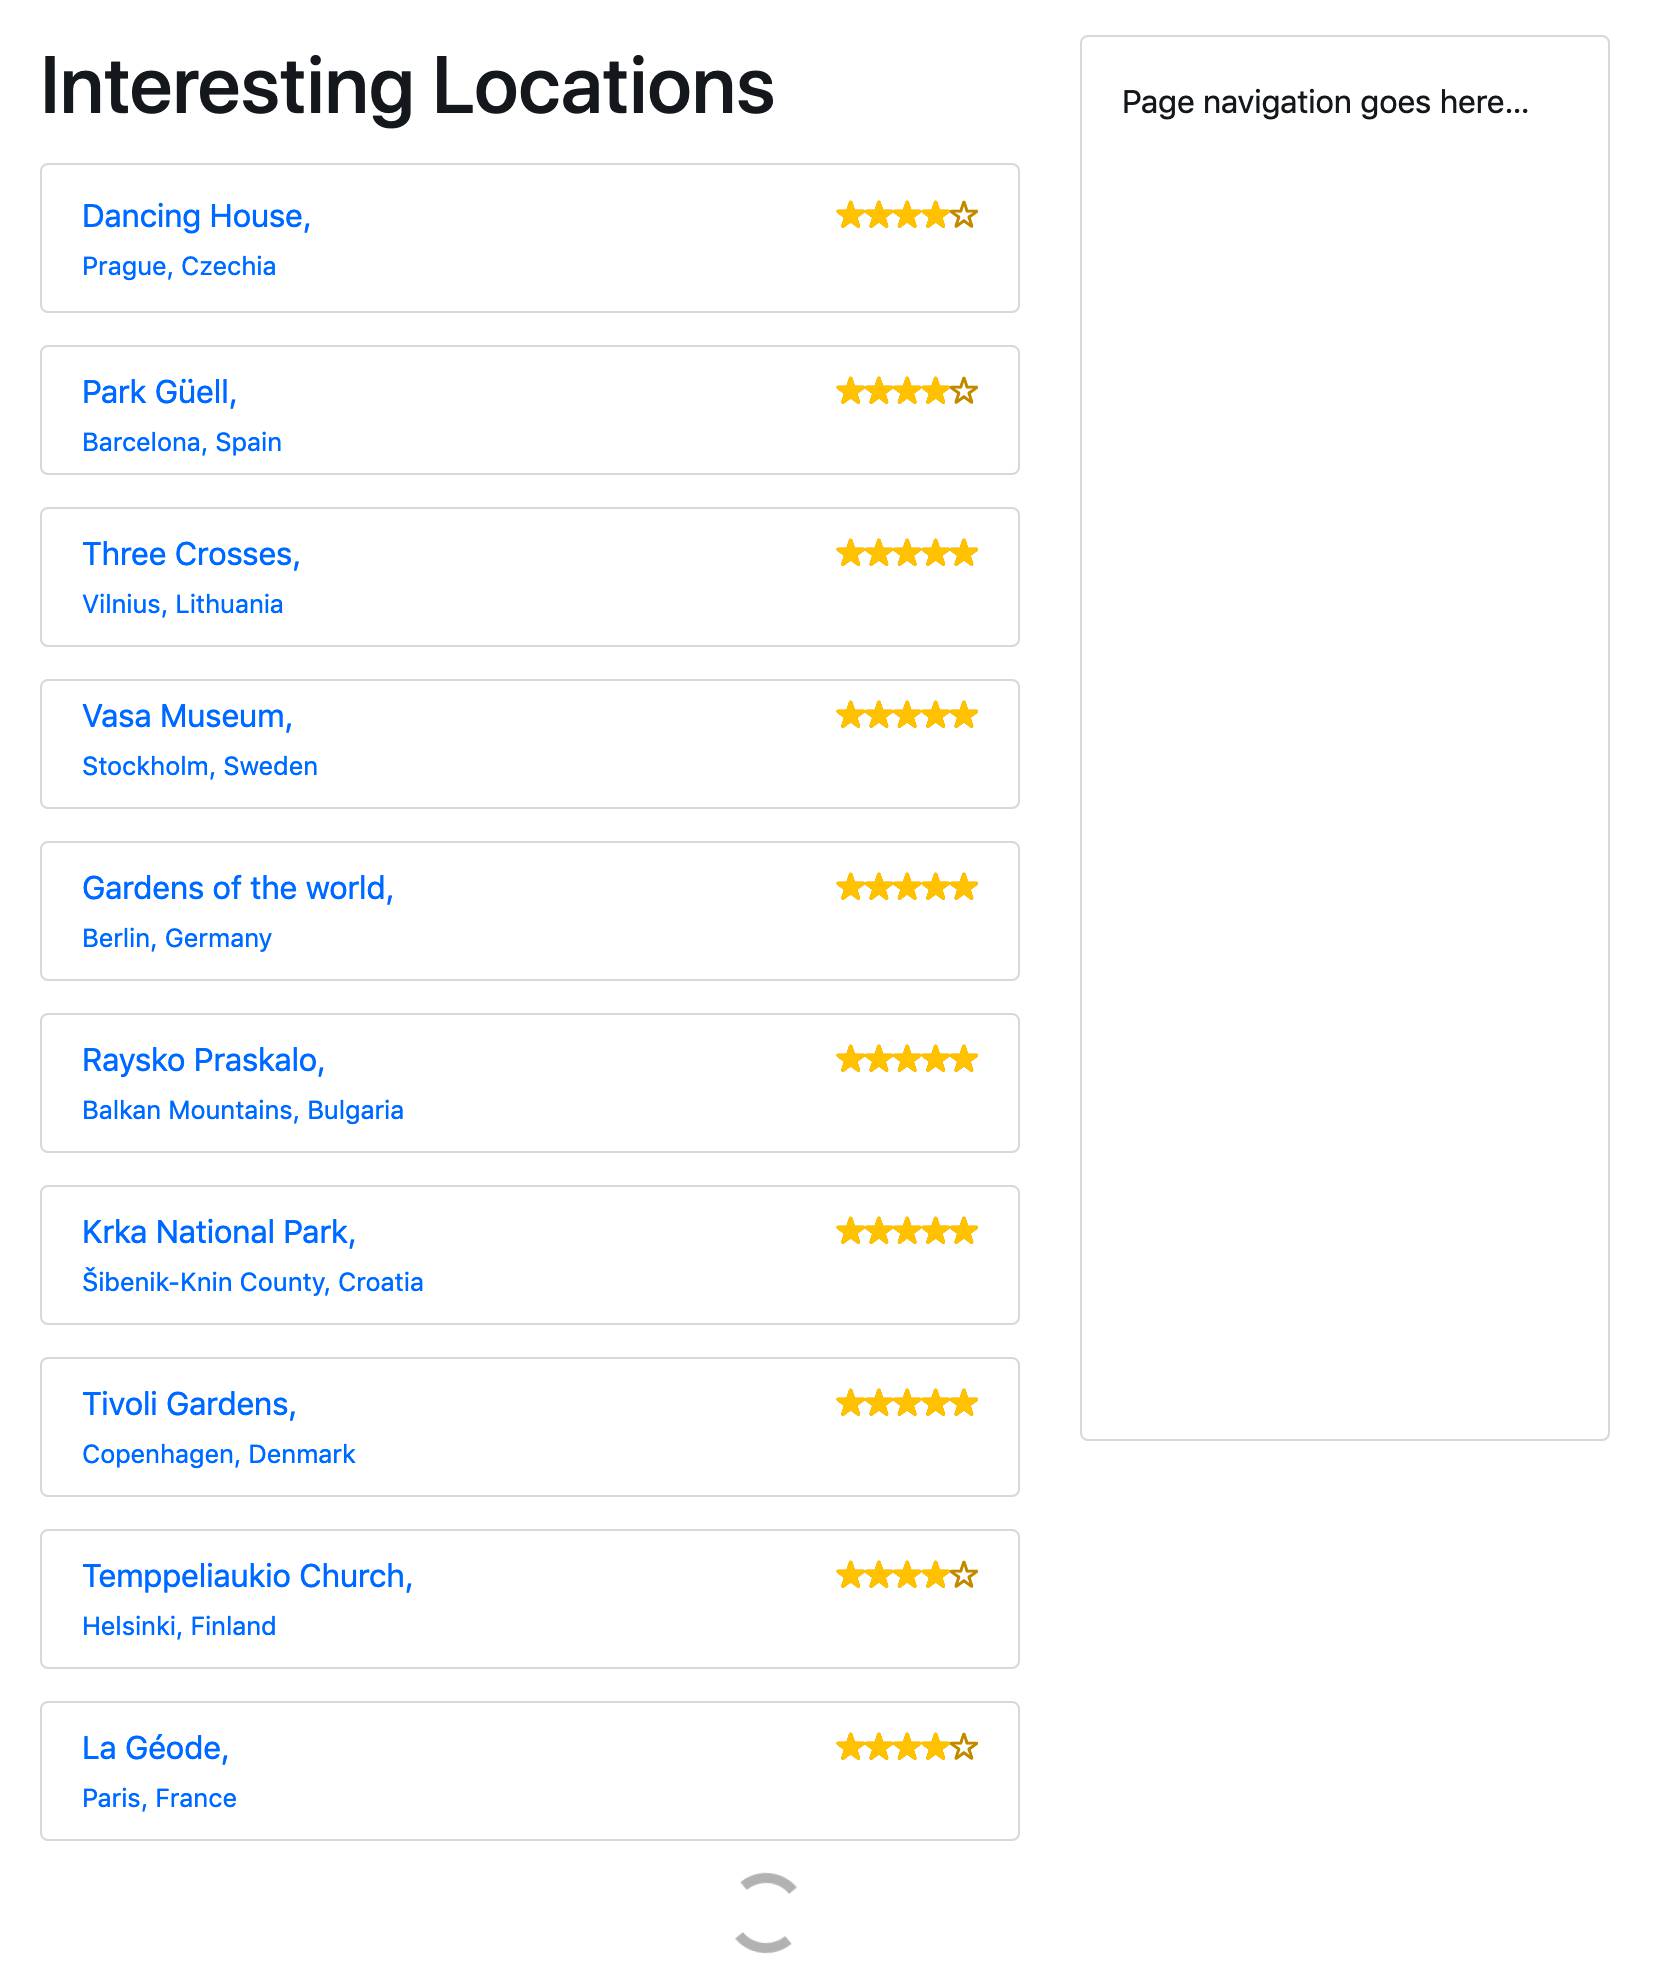
在浏览器中打开地点列表视图时,会在页面中显示通过在视图中由paginate_by预设的条数(即10条)。在下拉时,会自动加载下一页并将获取到的内容添加至容器中。页面链接使用第5章 自定义模板过滤器和标签中创建模板标签来修改请求查询参数一节中所介绍的{% modify_query %}自定义模板标签来即根据当前链接生成相应的URL,指向对应的下一页。如果网速较慢,那么在滚动到页面底部时,会在下一页加载完成并添加至当前列表前看到如下面这样的页面:
进一步进行滚动,第二、第三页及后续页面的内容会添加至底部。直接没有更多页面可供加载,体现为最后一组中没有进行一步可供加载的分页链接。
这里我们使用Cloudflare CDN URL来加载jScroll,但如果你选择下载文件至本地,那么使用{% static %}查询在添加脚本至本地模板。
在初始加载页面时,元素具有item-list CSS类,包含页面内容及分页链接,可通过list.js中的代码转变为jScroll对象。其实这种实现非常通用,它可以按照相似的标记结构来启动用对任意列表显示进行持续滚动。
提供了如下选项为定义其功能:
- loadingHtml:在加载新页面内容时会设定标记并由jScroll注入到列表的最后。本例中为一个动态加载标记,直接由标记中的<script type=”text/template” /> 标签内所包含的HTML绘制。通过给定这一type属性,浏览器会像普通JavaScript那样对执行它,其中的内容则对用户隐藏。
- padding:在页面滚动位置处于底部滚动区范围内时,应当加载新页面。本例中我们设置为100像素。
- pagingSelector:表明object_list中哪个HTML元素是分页链接的CSS选择器。它们隐藏于浏览器中,由jScroll插件调用来由持续滚动加载更多页面,但其它浏览器中的用户仍然可以正常点击分页。
- nextSelector:这一个CSS选择器查找读取下一页URL的HTML元素。
- contentSelector:也是一个CSS选择器。它指定从Ajax所加载的内容中提取哪些HTML元素并加入到容器中。
rating.css插入Unicode星形字符并对中空的星形覆盖上已填充星形来实现评分效果。使用等于评分值最大百分比的值作为宽度(本例为5),填充后的星形在中空星形之上覆盖相应的空间,允许进行小数评分。在标记中,对于使用屏幕阅读器的人们有一个带有评分信息的aria-label属性。
最后, style.css文件中的CSS使用CSS动画来创建一个旋转的加载图标。
扩展知识…
在边栏中有一个用于导航的占位符。注意对于持续滚动,所有内容列表之后的二级导航应位于边栏而不是footer中,因为访客可能永远不会触达页面的底部。
相关内容
- 第3章 表单和视图中的过滤对象列表一节
- 第3章 表单和视图中的管理分页列表一节
- 第3章 表单和视图中的编写基于类的视图一节
- 在JavaScript中暴露配置一节
- 第5章 自定义模板过滤器和标签中的创建模板标签来修改请求查询参数一节
在模态对话框中打开对象详情
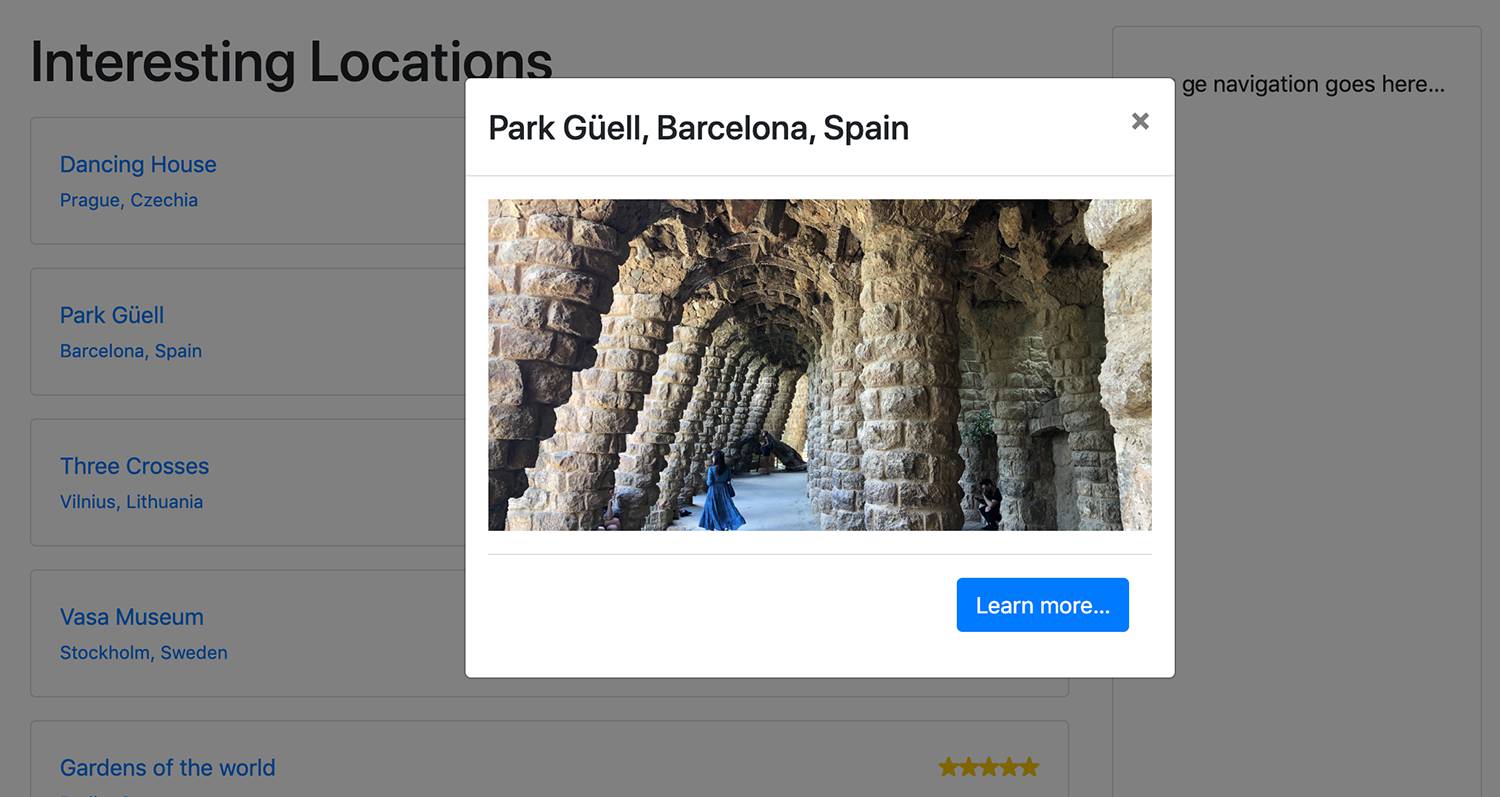
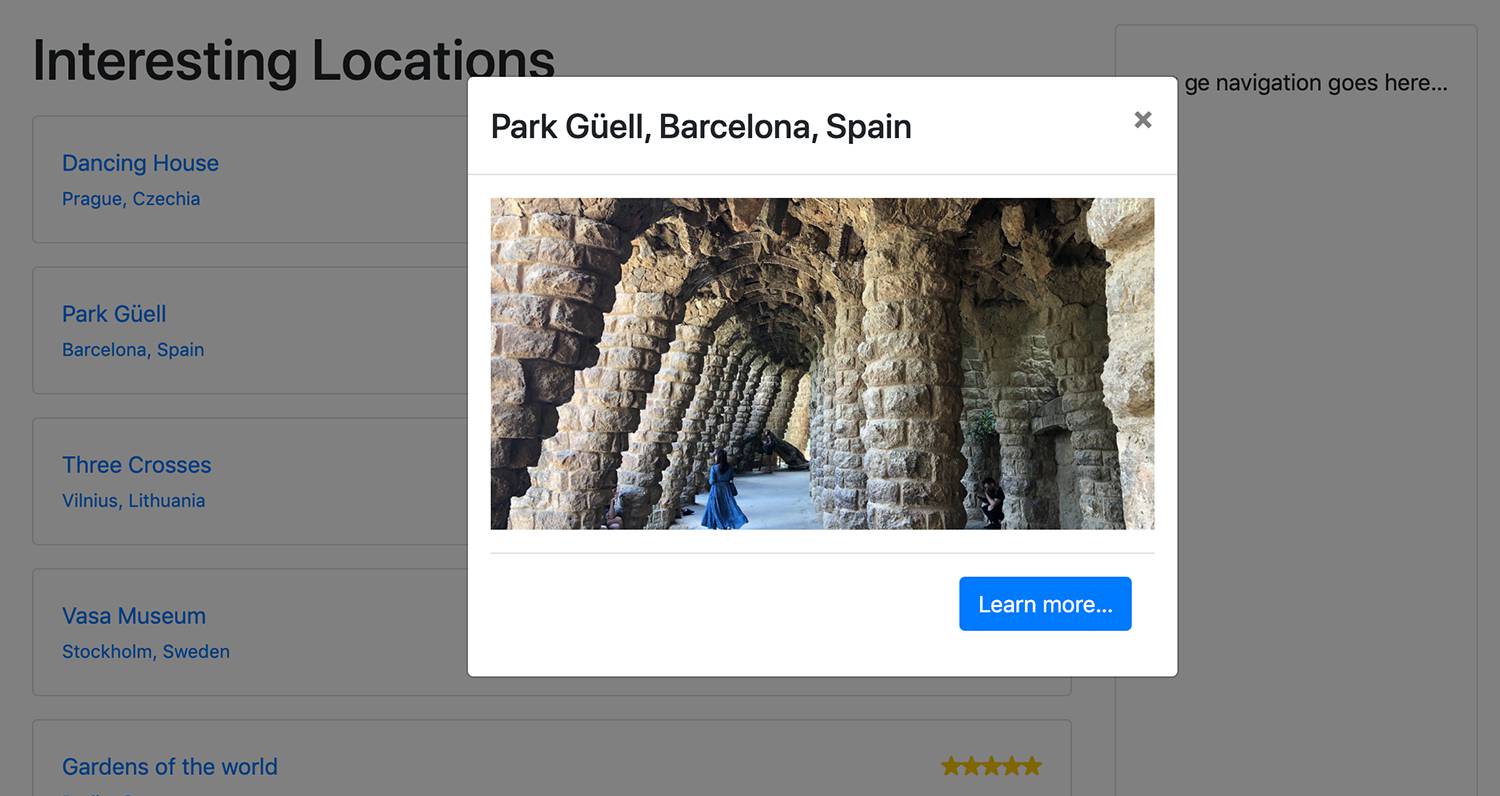
本小节中,我们将创建一个地点链接列表,在点击时,会打开带有一些地点信息和Learn more…链接的Bootstrap模态框,链接指向地点详情页:
对话框中的内容使用Ajax加载。对于不支持JavaScript的访客,会跳过中间步骤立即打开详情页。
准备工作
我们使用前一小节所创建的locations应用。
确保其中包含了我们前面所定义的视图、URL配置以及地点列表和详情模板。
如何实现…
执行以下步骤来在列表视图和详情视图之间创建一个模态对话框中间页:
- 首先,在地点应用的URL配置中,添加一条响应模态对话框的规则:
1234567891011121314# myproject/apps/locations/urls.pyfrom django.urls import pathfrom .views import LocationList, LocationDetailurlpatterns = [path("", LocationList.as_view(), name="location_list"),path("add/", add_or_change_location, name="add_location"),path("<uuid:pk>/", LocationDetail.as_view(), name="location_detail"),path("<uuid:pk>/modal/",LocationDetail.as_view(template_name="locations/location_detail_modal.html"),name="location_detail_modal",),] - 为模态对话框创建一个模板:
12345678910111213141516{# locations/location_detail_modal.html #}{% load i18n %}<p class="text-center">{% if location.picture %}<picture class="img-fluid"><source media="(max-width: 480px)" srcset="{{ location.picture_mobile.url }}"/><source media="(max-width: 768px)" srcset="{{ location.picture_tablet.url }}"/><img src="{{ location.picture_desktop.url }}" alt="{{ location.name }}" class="img-fluid" /></picture>{% endif %}</p><div class="modal-footer text-right"><a href="{% url "locations:location_detail" pk=location.pk %}"class="btn btn-primary pull-right"> {% trans "Learn more..." %}</a></div> - 在地点列表的模板中,通过添加自定义data属性来更新链接为地点详情:
12345678910{# locations/location_list.html #}{# ... #}<a href="{{ location.get_url_path }}"data-modal-title="{{ location.get_full_address }}"data-modal-url="{% url 'locations:location_detail_modal'pk=location.pk %}"class="item d-block my-3">{# ... #}</a>{# ... #} - 同样在该文件中,通过模态对话框的代码重写extra_body内容:
123456789101112131415{% block extra_body %}{# ... #}<div id="modal" class="modal fade" tabindex="-1" role="dialog" aria-hidden="true" aria-labelledby="modal_title"><div class="modal-dialog modal-dialog-centered" role="document"><div class="modal-content"> <div class="modal-header"><h4 id="modal_title" class="modal-title"></h4><button type="button" class="close" data-dismiss="modal"aria-label="{% trans 'Close' %}"><span aria-hidden="true">×</span></button></div><div class="modal-body"></div> </div></div></div>{% endblock %} - 最后,修改list.js文件,添加脚本来处理打开和关闭模态对话框:
123456789101112131415161718192021222324/* site_static/js/list.js *//* ... */jQuery(function ($) {var $list = $('.item-list');var $modal = $('#modal');$modal.on('click', '.close', function (event) {$modal.modal('hide');// do something when dialog is closed...});$list.on('click', 'a.item', function (event) {var $link = $(this);var url = $link.data('modal-url');var title = $link.data('modal-title');if (url && title) {event.preventDefault();$('.modal-title', $modal).text(title);$('.modal-body', $modal).load(url, function () {$modal.on('shown.bs.modal', function () {// do something when dialog is shown...}).modal('show');});}});});
实现原理…
如果我们在浏览器中访问地点列表视图并点击其中一个地点时,会看到类似下面这样的模态对话框:
我们来看这些是如何共同作用的。名为location_detail_modal的URL路径指向同一地点的详情视图,但使用了不同的模板。该模板仅有一张响应式图片和具有Learn more…链接的模态对话框底部,链接指向该地点的常规详情页。在列表视图中,我们修改了列表项的链接来包含 data-modal-title 和 data- modal-url属性,稍后在JavaScript中进行引用。前一个属性表明应将完整地址用作标题。后一个属性表明模态对话框的主体 HTML应该接收的位置。在列表视图的最后是Bootstrap 4模态对话框的标记。该对话框包含具有Close按钮和标题的状况,以及主要详情的内容区。JavaScript应通过js版块进行添加。
在JavaScript文件中,我们使用jQuery框架来利用其更精简的语法和跨浏览器功能。在加载页面时,对.item-list元素添加了一个事件处理器on(‘click’)。在点击任意a.item时,事件被委托给处理器,它读取并存储自定义数据属性为url和title。在成功提取这些内容后,阻止原始点击动作(导航至完整的详情页)执行,然后设置模态框以供显示。设置新标题和隐藏对话框并通过Ajax加载模态对话框的内容到.modal-body元素中。最后使用Bootstrap 4 modal() jQuery插件将模态框显示给用户。
如果JavaScript无法通过自定义属性处理模态对话框的URL,甚至是list.js中的JavaScript完全无法加载或执行,用户可以通过点击地点链接正常进行详情页。我们以渐进式的增强实现了模态框,这样会提升用户的体验,即使出现错误也没问题。
相关内容
- 使用HTML5 data属性一节
- 提供响应式图片一节
- 实现持续滚动一节
- 实现Like微件一节
实现Like微件
通常在具有社交组件的网站中,会具有Facebook、Twitter和Google+插件来用于喜欢和分享内容。本节中,我们将讲解在Django中实现类似的功能,用于在用户对内容点赞时将信息保存至数据库中。可以根据用户在网站上具体点赞的内容来创建相应的视图。我们会创建一个Like插件,包含两个状态按钮以及显示总点赞数的数标。
以下截图显示的是未点赞状态,用户通过点击按钮来进行点赞:
以下截图显示的是已点赞状态,用户通过点击按钮来取消点赞:
插件状态中的改变交由Ajax调用处理。
准备工作
首先,创建likes应用交添加至INSTALLED_APPS中。然后设置一个Like模型,它有一个对点赞内容用户的外键关联,以及对数据库中任意对象的通用关联。我们将使用第2章 模型和数据库结构中创建模型mixin来处理通用关联一节中所写义的object_relation_base_factory。如果不希望使用mixin,可以在如下模型中自己定义一个通用关联:
|
1 2 3 4 5 6 7 8 9 10 11 12 13 14 15 16 17 18 19 20 21 22 |
# myproject/apps/likes/models.py from django.db import models from django.utils.translation import ugettext_lazy as _ from django.conf import settings from myproject.apps.core.models import ( CreationModificationDateBase, object_relation_base_factory, ) LikeableObject = object_relation_base_factory(is_required=True) class Like(CreationModificationDateBase, LikeableObject): class Meta: verbose_name = _("Like") verbose_name_plural = _("Likes") ordering = ("-created",) user = models.ForeignKey(settings.AUTH_USER_MODEL, on_delete=models.CASCADE) def __str__(self): return _("{user} likes {obj}").format(user=self.user, obj=self.content_object) |
同时确保在配置文件中设置了request上下文处理器。并且为了让当前已登录用户与request关联需要在request中添加authentication middleware:
|
1 2 3 4 5 6 7 8 9 10 11 12 13 14 15 16 17 18 19 |
# myproject/settings/_base.py #... MIDDLEWARE = [ #... "django.contrib.auth.middleware.AuthenticationMiddleware", #... ] TEMPLATES = [ { #... "OPTIONS": { "context_processors": [ "django.template.context_processors.request", #... ] }, } ] |
别忘了对新的Like模型创建和运行迁移来进行相应的数据库设置。
如何实现…
逐步执行如下步骤:
- 在likes应用中,创建一个templatetags目录,共中包含一个空的__init__.py文件让其成为Python模块。然后添加likes_tags.py文件,在其中我们定义{% like_widget %}模板标签如下:
123456789101112131415161718192021222324252627282930313233343536373839# myproject/apps/likes/templatetags/likes_tags.pyfrom django import templatefrom django.contrib.contenttypes.models import ContentTypefrom django.template.loader import render_to_stringfrom ..models import Likeregister = template.Library()# TAGSclass ObjectLikeWidget(template.Node):def __init__(self, var):self.var = vardef render(self, context):liked_object = self.var.resolve(context)ct = ContentType.objects.get_for_model(liked_object)user = context["request"].userif not user.is_authenticated:return ""context.push(object=liked_object, content_type_id=ct.pk)output = render_to_string("likes/includes/widget.html", context.flatten())context.pop()return output@register.tagdef like_widget(parser, token):try:tag_name, for_str, var_name = token.split_contents()except ValueError:tag_name = "%r" % token.contents.split()[0]raise template.TemplateSyntaxError(f"{tag_name} tag requires a following syntax: "f"{{% {tag_name} for <object> %}}")var = template.Variable(var_name)return ObjectLikeWidget(var) - 在同一个文件中添加过滤器来获取某个用户的Like状态以及具体对象的Like总数:
123456789101112131415# myproject/apps/likes/templatetags/likes_tags.py#...# FILTERS@register.filterdef liked_by(obj, user):ct = ContentType.objects.get_for_model(obj)liked = Like.objects.filter(user=user, content_type=ct, object_id=obj.pk)return liked.count() > 0@register.filterdef liked_count(obj):ct = ContentType.objects.get_for_model(obj)likes = Like.objects.filter(content_type=ct, object_id=obj.pk)return likes.count() - 在URL规则中,我们需要一个针对视图的规则,使用Ajax来处理点赞和取消点赞:
1234567# myproject/apps/likes/urls.pyfrom django.urls import pathfrom .views import json_set_likeurlpatterns = [path("<int:content_type_id>/<str:object_id>/", json_set_like, name="json_set_like")] - 还应保证URL与项目之间的映射:
12345678# myproject/urls.pyfrom django.conf.urls.i18n import i18n_patternsfrom django.urls import include, pathurlpatterns = i18n_patterns(#...path("likes/", include(("myproject.apps.likes.urls", "likes"), namespace="likes")),) - 接着需要定义视图,如以下代码所示:
123456789101112131415161718192021222324252627282930313233343536# myproject/apps/likes/views.pyfrom django.contrib.contenttypes.models import ContentTypefrom django.http import JsonResponsefrom django.views.decorators.cache import never_cachefrom django.views.decorators.csrf import csrf_exemptfrom .models import Likefrom .templatetags.likes_tags import liked_count@never_cache@csrf_exemptdef json_set_like(request, content_type_id, object_id):"""Sets the object as a favorite for the current user"""result = {"success": False,}if request.user.is_authenticated and request.method == "POST":content_type = ContentType.objects.get(id=content_type_id)obj = content_type.get_object_for_this_type(pk=object_id)like, is_created = Like.objects.get_or_create(content_type=ContentType.objects.get_for_model(obj),object_id=obj.pk,user=request.user)if not is_created:like.delete()result = {"success": True,"action": "add" if is_created else "remove","count": liked_count(obj),}return JsonResponse(result) - 在任意对象的列表或详情视图中,我们可以添加该微件的模板标签。下面将这一微件添加到前面小节中所创建的地点详情页中:
1234567891011121314{# locations/location_detail.html #}{% extends "base.html" %}{% load i18n static likes_tags %}{% block content %}<a href="{% url "locations:location_list" %}">{% trans "Interesting Locations" %}</a><div class="float-right">{% if request.user.is_authenticated %}{% like_widget for location %}{% endif %}</div><h1 class="map-title">{{ location.name }}</h1>{# ... #}{% endblock %} - 然后需要为该微件添加一个模板,如以下代码所示:
123456789101112131415161718192021{# likes/includes/widget.html #}{% load i18n static likes_tags sekizai_tags %}<p class="like-widget"><button type="button"class="like-button btn btn-primary {% if object|liked_by:request.user %} active{% endif %}"data-href="{% url "likes:json_set_like" content_type_id=content_type_id object_id=object.pk %}"data-remove-label="{% trans "Like" %}"data-add-label="{% trans "Unlike" %}">{% if object|liked_by:request.user %}{% trans "Unlike" %}{% else %}{% trans "Like" %}{% endif %}</button><span class="like-badge badge badge-secondary">{{ object|liked_count }}</span></p>{% addtoblock "js" %}<script src="{% static 'likes/js/widget.js' %}"></script>{% endaddtoblock %} - 最后,我们创建JavaScript来处理在浏览中点赞和取消点赞的动作,如下:
1234567891011121314151617181920/* myproject/apps/likes/static/likes/js/widget.js */(function($) {$(document).on("click", ".like-button", function() {var $button = $(this);var $widget = $button.closest(".like-widget");var $badge = $widget.find(".like-badge");$.post($button.data("href"), function(data) {if (data.success) {var action = data.action; // "add" or "remove"var label = $button.data(action + "-label");$button[action + "Class"]("active");$button.html(label);$badge.html(data.count);}}, "json");});}(jQuery));
实现原理…
此时可对网站任何对象使用{% like_widget for object %}模板标签。它生成一个显示Like状态的微件,状态根据当前登录用户是否及如何与对象响应生成。
Like按钮有3个自定义HTML5 data属性:
- data-href提供用于修改该微件当前状态的唯一、指定对象的URL
- data-add-text为在添加了Like关联后显示的翻译文本(Unlike)
- 相应地data-remove-text为删除了Like关联后显示的翻译文本(Like)
我们使用django-sekizai在页面中添加了<script src=”{% static ‘likes/js/widget.js’ %}”></script> 。注意如果页面中有一个以上的Like微件时,只需要包含该JavaScript一次即可。而如果在页面上没有Like微件,则无需包含该JavaScript代码。
在这个JavaScript文件中,Like按钮由like-button CSS类进行识别。有一个关联到文档的事件监听器来监听页面上的这类按钮的点击事件,然后对data-href所指定的URL进行Ajax post调用。
指定的视图json_set_like接收两个参数:内容类型ID及所点赞对象的主键。视图检查指定对象是否存在点赞,如果存在则进行删除;反之添加一个Like对象。视图会返回一个JSON响应,包含success状态、Like对象所接收的动作(add或remove)、所有用户对该对象的Like总数。根据所返回的动作,JavaScript将对按钮显示相应的状态。
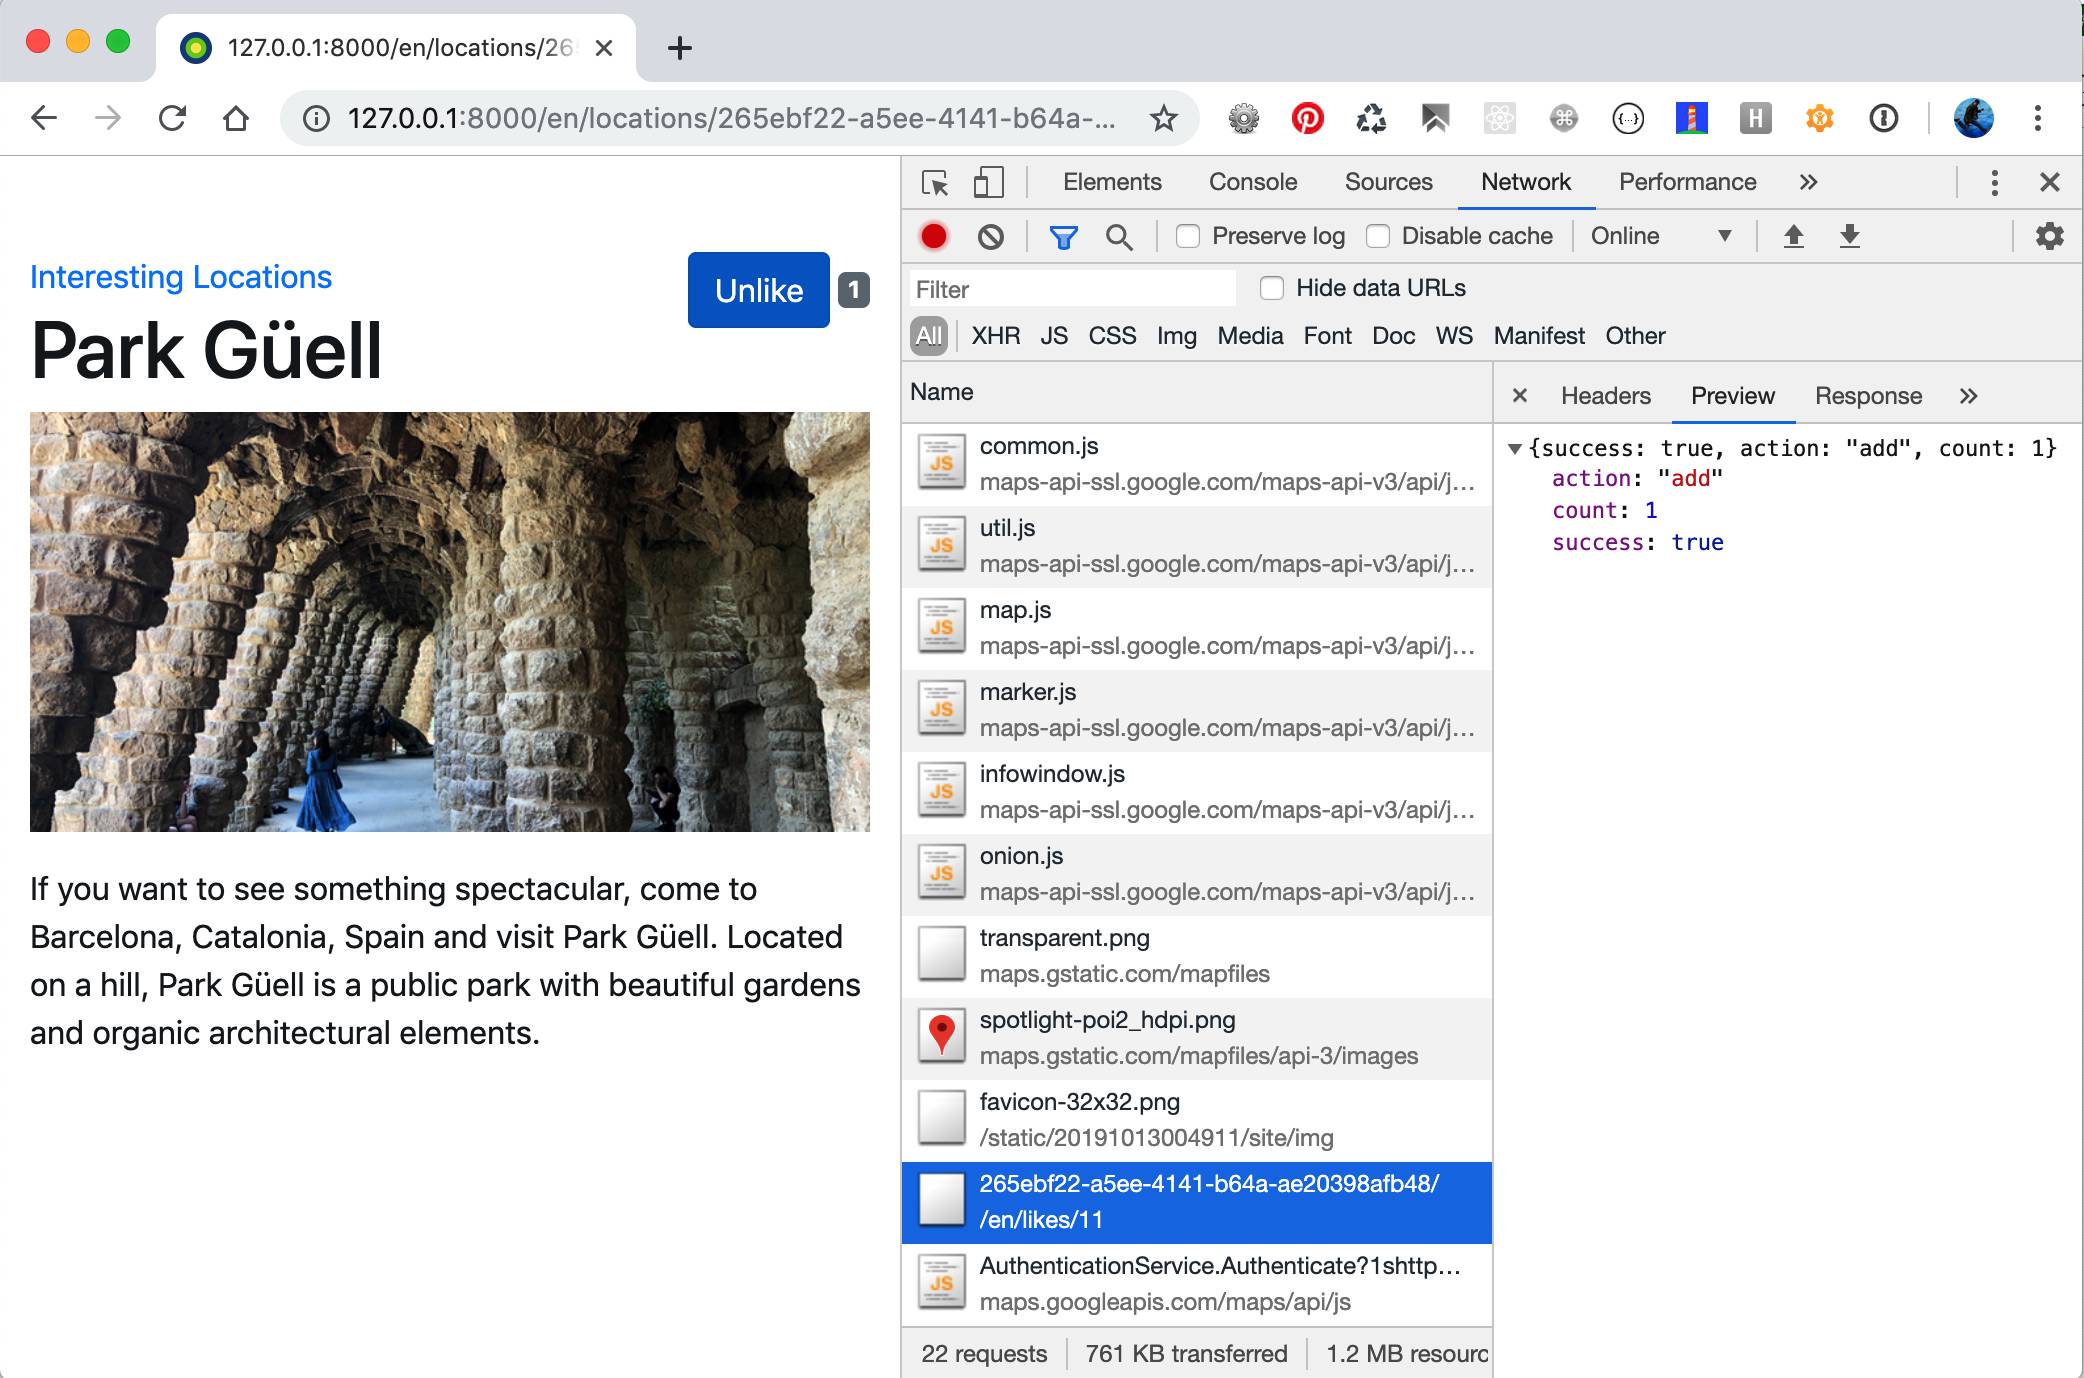
可以在浏览器的开发者工具中调试Ajax响应,通常位于Network标签下。如果在开发过程中出现服务端错误,在配置中开启DEBUG后可以在响应预览中看到错误追踪信息,否则会看到下图中所示返回的JSON:
相关内容
- 使用 Django Sekizai一节
- 在模态对话框中打开对象详情一节
- 实现持续滚动一节
- 通过Ajax上传图片一节
- 第2章 模型和数据库结构中创建模型mixin来处理通用关联一节
- 第5章 自定义模板过滤器和标签
通过Ajax上传图片
使用默认的文件input框,很快就会发现需要进行改进来提升用户体验:
- 首先,在输入框中仅显示所选文件路径,而用户希望在选取文件后马上看到所选的内容。
- 其次,文件输入框本身通常不足以显示所选的路径,仅显示左侧部分。结果是在输入框中几乎看不到文件名。
- 最后,如果表单存在验证错误,人们不希望重新再选择文件;验证错误的表单中应保持文件的选中状态。
本节中,我们学习如何改进文件上传功能。
准备工作
我们使用前面小节中所创建的locations应用。
我们的JavaScript文件会依赖于外部库-jQuery File Upload。可以下载https://github.com/blueimp/jQuery-File-Upload/tree/v10.2.0中的文件并放入 site_static/site/vendor/jQuery-File-Upload-10.2.0。这个工具还要求使用jquery.ui.widget.js,放在vendor/子目录中。准备好这些后就可以开始我们的学习了。
如何实现…
通过以下步骤为locations定义一个表单,让其支持Ajax上传:
- 我们为locations创建一个模型表单,有非必填的picture字段、隐藏的picture_path字段、地理位置使用的latitude和longitude字段:
12345678910111213141516171819202122232425262728293031# myproject/apps/locations/forms.pyimport osfrom django import formsfrom django.urls import reversefrom django.utils.translation import ugettext_lazy as _from django.core.files.storage import default_storagefrom crispy_forms import bootstrap, helper, layoutfrom .models import Locationclass LocationForm(forms.ModelForm):picture = forms.ImageField(label=_("Picture"), max_length=255,widget=forms.FileInput(), required=False)picture_path = forms.CharField(max_length=255, widget=forms.HiddenInput(), required=False)latitude = forms.FloatField(label=_("Latitude"),help_text=_("Latitude (Lat.) is the angle between any point and the equator (north pole is at 90; south pole is at -90)."),required=False,)longitude = forms.FloatField(label=_("Longitude"),help_text=_("Longitude (Long.) is the angle east or west of an arbitrary point on Earth from Greenwich (UK), which is the international zero-longitude point (longitude=0 degrees). The anti-meridian of Greenwich is both 180 (direction to east) and -180 (direction to west)."),required=False,)class Meta:model = Locationexclude = ["geoposition", "rating"] - 在该表单的__init__()方法中,我们从模型实例中读取位置,然后对表单定义django-crispy-forms布局:
12345678910111213141516171819202122232425262728293031323334353637383940414243444546474849505152535455565758def __init__(self, request, *args, **kwargs):self.request = requestsuper().__init__(*args, **kwargs)geoposition = self.instance.get_geoposition()if geoposition:self.fields["latitude"].initial = geoposition.latitudeself.fields["longitude"].initial = geoposition.longitudename_field = layout.Field("name", css_class="input-block- level")description_field = layout.Field("description", css_class="input-block-level", rows="3")main_fieldset = layout.Fieldset(_("Main data"), name_field, description_field)picture_field = layout.Field("picture",data_url=reverse("upload_file"),template="core/includes/file_upload_field.html",)picture_path_field = layout.Field("picture_path")picture_fieldset = layout.Fieldset(_("Picture"),picture_field,picture_path_field,title=_("Picture upload"),css_id="picture_fieldset",)street_address_field = layout.Field("street_address", css_class="input-block-level")street_address2_field = layout.Field("street_address2", css_class="input-block-level")postal_code_field = layout.Field("postal_code", css_class="input-block-level")city_field = layout.Field("city", css_class="input-block- level")country_field = layout.Field("country", css_class="input- block-level")latitude_field = layout.Field("latitude", css_class="input- block-level")longitude_field = layout.Field("longitude", css_class="input- block-level")address_fieldset = layout.Fieldset(_("Address"),street_address_field,street_address2_field,postal_code_field,city_field,country_field,latitude_field,longitude_field,)submit_button = layout.Submit("save", _("Save"))actions = bootstrap.FormActions(layout.Div(submit_button, css_class="col"))self.helper = helper.FormHelper()self.helper.form_action = self.request.pathself.helper.form_method = "POST"self.helper.attrs = {"noValidate": "noValidate"}self.helper.layout = layout.Layout(main_fieldset, picture_fieldset, address_fieldset, actions) - 然后我们要对该表单的picture和picture_path字段添加验证:
12345def clean(self):cleaned_data = super().clean()picture_path = cleaned_data["picture_path"]if not self.instance.pk and not self.files.get("picture") and not picture_path:raise forms.ValidationError(_("Please choose an image.")) - 最后,我们对该表单添加保存方法,处理图片和地理位置的保存:
12345678910111213141516def save(self, commit=True):instance = super().save(commit=False)picture_path = self.cleaned_data["picture_path"]if picture_path:temporary_image_path = os.path.join("temporary-uploads", picture_path)file_obj = default_storage.open(temporary_image_path)instance.picture.save(picture_path, file_obj, save=False)default_storage.delete(temporary_image_path)latitude = self.cleaned_data["latitude"]longitude = self.cleaned_data["longitude"]if latitude is not None and longitude is not None:instance.set_geoposition(longitude=longitude, latitude=latitude)if commit:instance.save()self.save_m2m()return instance - 除前面在locations应用中定义的视图外,还要添加一个add_or_change_location视图,如以下代码所示:
1234567891011121314151617181920212223# myproject/apps/locations/views.pyfrom django.contrib.auth.decorators import login_requiredfrom django.shortcuts import render, redirect, get_object_or_404from .forms import LocationFormfrom .models import Location#...@login_requireddef add_or_change_location(request, pk=None):location = Noneif pk:location = get_object_or_404(Location, pk=pk)if request.method == "POST":form = LocationForm(request, data=request.POST, files=request.FILES, instance=location)if form.is_valid():location = form.save()return redirect("locations:location_detail", pk=location.pk)else:form = LocationForm(request, instance=location)context = {"location": location, "form": form}return render(request, "locations/location_form.html", context) - 在URL配置中添加该视图:
12345678# myproject/apps/locations/urls.pyfrom django.urls import pathfrom .views import add_or_change_locationurlpatterns = [#...path("<uuid:pk>/change/", add_or_change_location, name="add_or_change_location"),] - 在core应用的视图中,添加通用upload_file函数上传图片,供其它具有picture字段的应用复用:
1234567891011121314151617181920212223242526272829303132333435363738394041424344# myproject/apps/core/views.pyimport osfrom django.core.files.base import ContentFilefrom django.core.files.storage import default_storagefrom django.http import JsonResponsefrom django.core.exceptions import SuspiciousOperationfrom django.urls import reversefrom django.views.decorators.csrf import csrf_protectfrom django.utils.translation import gettext_lazy as _from django.conf import settings#...@csrf_protectdef upload_file(request):status_code = 400data = {"files": [], "error": _("Bad request")}if request.method == "POST" and request.is_ajax() and "picture" in request.FILES:file_types = [f"image/{x}" for x in ["gif", "jpg", "jpeg", "png"]]file = request.FILES.get("picture")if file.content_type not in file_types:status_code = 405data["error"] = _("Invalid file format")else:upload_to = os.path.join("temporary-uploads", file.name)name = default_storage.save(upload_to, ContentFile(file.read()))file = default_storage.open(name) status_code = 200del data["error"]absolute_uploads_dir = os.path.join(settings.MEDIA_ROOT, "temporary-uploads")file.filename = os.path.basename(file.name)data["files"].append({"name": file.filename,"size": file.size,"deleteType": "DELETE","deleteUrl": (reverse("delete_file") + f"?filename={file.filename}"),"path": file.name[len(absolute_uploads_dir) + 1 :],})return JsonResponse(data, status=status_code) - 为新上传视图设置URL规则如下:
12345678910111213# myproject/urls.pyfrom django.urls import pathfrom myproject.apps.core import views as core_views#...urlpatterns += [path("upload-file/",core_views.upload_file,name="upload_file",),] - 下面为地点表单创建模板如下:
123456789101112131415161718192021{# locations/location_form.html #}{% extends "base.html" %}{% load i18n crispy_forms_tags %}{% block content %}<div class="row"><div class="col-lg-8"><a href="{% url 'locations:location_list' %}">{% trans "Interesting Locations" %}</a><h1>{% if location %}{% blocktrans trimmed with name=location.name %}Change Location "{{ name }}"{% endblocktrans %}{% else %}{% trans "Add Location" %}{% endif %}</h1>{% crispy form %}</div></div>{% endblock %} - 我们还需要一些模板。创建一个文件上传自定义模板,其中包含所需的CSS和JavaScript:
12345678910111213141516171819202122232425262728293031323334353637383940{# core/includes/file_upload_field.html #}{% load i18n crispy_forms_field static sekizai_tags %}{% include "core/includes/picture_preview.html" %}<{% if tag %}{{ tag }}{% else %}div{% endif %} id="div_{{ field.auto_id }}"class="form-group{% if 'form-horizontal' in form_class %} row{% endif %}{% if wrapper_class %} {{ wrapper_class }}{% endif %}{% if field.css_classes %} {{ field.css_classes }}{% endif %}">{% if field.label and form_show_labels %}<label for="{{ field.id_for_label }}"class="col-form-label {{ label_class }}{% if field.field.required %} requiredField{% endif %}">{{ field.label|safe }}{% if field.field.required %}<span class="asteriskField">*</span>{% endif %}</label>{% endif %}<div class="{{ field_class }}"><span class="btn btn-success fileinput-button"><span>{% trans "Upload File..." %}</span>{% crispy_field field %}</span>{% include 'bootstrap4/layout/help_text_and_errors.html' %}<p class="form-text text-muted">{% trans "Available formats are JPG, GIF, and PNG." %}{% trans "Minimal size is 800 × 800 px." %}</p></div></{% if tag %}{{ tag }}{% else %}div{% endif %}>{% addtoblock "css" %}<link rel="stylesheet" href="{% static 'site/vendor/jQuery-File-Upload-10.2.0/css/jquery.fileupload-ui.css' %}"/><link rel="stylesheet" href="{% static 'site/vendor/jQuery-File-Upload-10.2.0/css/jquery.fileupload.css' %}"/>{% endaddtoblock %}{% addtoblock "js" %}<script src="{% static 'site/vendor/jQuery-File-Upload-10.2.0/js/vendor/jquery.ui.widget.js' %}"></script><script src="{% static 'site/vendor/jQuery-File-Upload-10.2.0/js/jquery.iframe-transport.js' %}"></script><script src="{% static 'site/vendor/jQuery-File-Upload-10.2.0/js/jquery.fileupload.js' %}"></script><script src="{% static 'site/js/picture_upload.js' %}"></script>{% endaddtoblock %} - 然后,创建一个用于图片预览的模板:
123456789101112131415{# core/includes/picture_preview.html #}<div id="picture_preview">{% if form.instance.picture %}<img src="{{ form.instance.picture.url }}" alt="" class="img-fluid"/>{% endif %}</div><div id="progress" class="progress" style="visibility: hidden"><div class="progress-bar progress-bar-stripedprogress-bar-animated"role="progressbar"aria-valuenow="0"aria-valuemin="0"aria-valuemax="100"style="width: 0%"></div></div> - 最后,添加处理图片上传和预览的JavaScript:
1234567891011121314151617181920212223242526272829303132333435363738394041/* site_static/site/js/picture_upload.js */$(function() {$("#id_picture_path").each(function() {$picture_path = $(this);if ($picture_path.val()) {$("#picture_preview").html('<img src="' +window.settings.MEDIA_URL +"temporary-uploads/" +$picture_path.val() +'" alt="" class="img-fluid" />');}});$("#id_picture").fileupload({dataType: "json",add: function(e, data) {$("#progress").css("visibility", "visible");data.submit();},progressall: function(e, data) {var progress = parseInt((data.loaded / data.total) * 100,10);$("#progress .progress-bar").attr("aria-valuenow", progress).css("width", progress + "%");},done: function(e, data) {$.each(data.result.files, function(index, file) {$("#picture_preview").html('<img src="' +window.settings.MEDIA_URL +"temporary-uploads/" +file.name +'" alt="" class="img-fluid" />');$("#id_picture_path").val(file.name);});$("#progress").css("visibility", "hidden");}});});
实现原理…
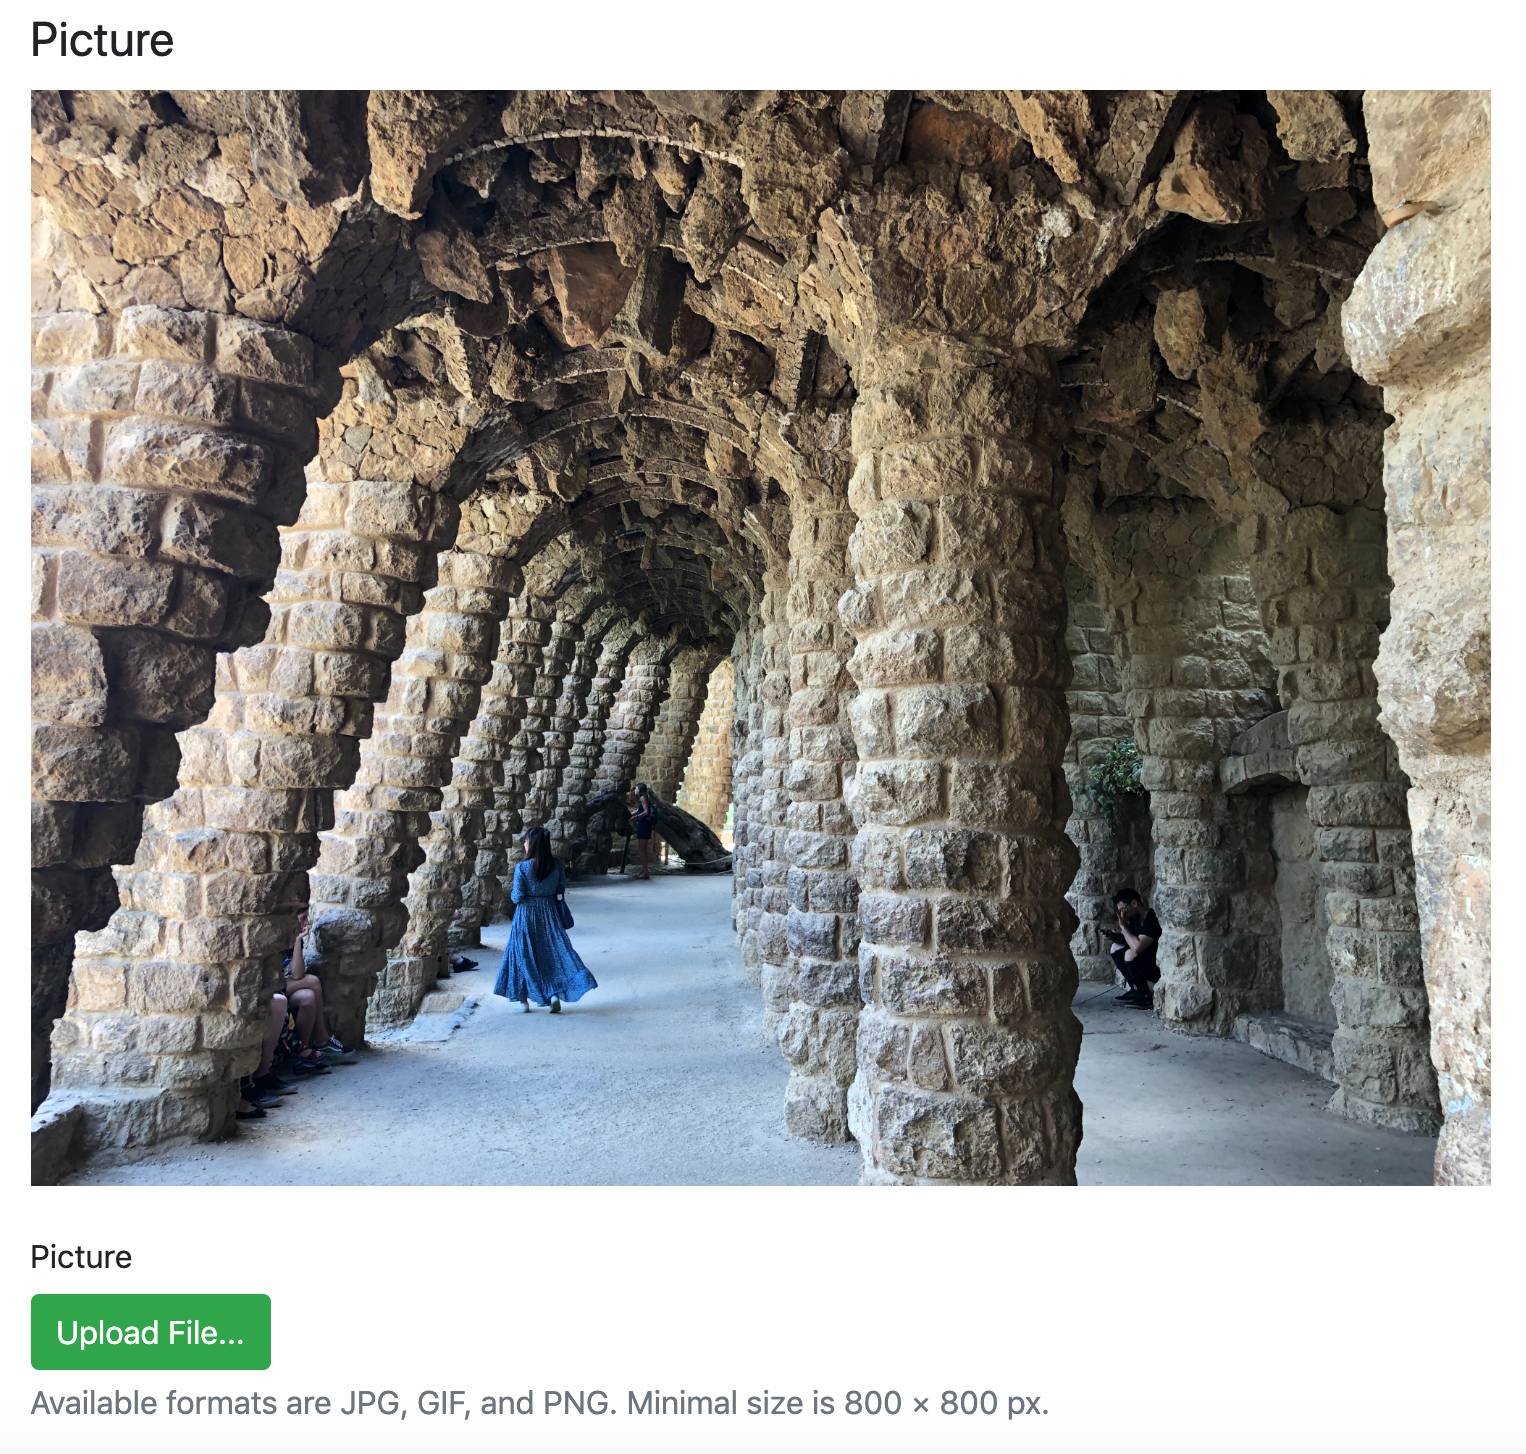
如果JavaScript执行失败,表单仍然可用,但在JavaScript正常运行时,会得到一个改进了的表单,文件字段由按钮替换,如下所示:
在通过点击Upload File…按钮选中图片后,浏览器中的结果类似下面的截图:
点击Upload File…按钮会触发文件对话框,要求选择文件,选中后会立即开始Ajax上传处理。然后我们看到添加了图片的预览。预览的图片上传到了一个临时目录,文件名保存在picture_path隐藏字段中。在提交表单时,表单通过临时目录或图片字段保存该图片。图片字段的值在提交表单时没有JavaScript或无法加载JavaScript的情况下会进行提交。如果在页面重新加载后其它字段存在验证错误,那么预览图片根据picture_path进行加载。
我们进一步深挖运行步骤,查看其运行原理。
在针对Location模型的模型表单中,我们令picture字段非必填,但它在模型层面是必填的。此外,还添加了picture_path字段,这两个字段至少有一个要提交至表单。在crispy-forms布局中,我们对picture字段定义了一个自定义模板file_upload_field.html。在里面设置了预览图片、上传进度条、允许上传文件格式以及最小尺寸的自定义帮助文本。还在该模板中添加了 jQuery File Upload库中的CSS和JavaScript文件以及自定义脚本picture_upload.js。CSS文件将上传字段渲染为美观的按钮。JavaScript负责基于Ajax的文件上传。
picture_upload.js将所选中的文件发送给upload_file视图。该视图检查上传文件是否为图片类型并尝试将其保存至项目MEDIA_ROOT中的temporary-uploads/目录下。此视图返回文件成功或不成功上传详情的JSON。
在选中并上传图片及提交表单之后,会调用LocationForm的save()方法。如果存在picture_path字段,会从临时目录中提取文件、复制到Location模型的picture字段中。然后会删除临时目录中的图片并保存Location实例。
扩展知识…
我们在模型表单中排除了geoposition字段,而是将地理位置的数据以纬度和经度字段进行渲染。默认地理位置的PointField以Leaflet.js地图进行渲染,无法自定义。通过这两个纬度和经度字段,我们可以灵活地使用Google Maps API, Bing Maps API或Leaflet.js来在地图中显示,可手动输入或通过输入的地址代码生成。
为方便起见,我们使用了前面在使用HTML5 data属性一节中定义的两个帮助方法get_geoposition() 和 set_geoposition()。

